We may not have the course you’re looking for. If you enquire or give us a call on +32 35001305 and speak to our training experts, we may still be able to help with your training requirements.
We ensure quality, budget-alignment, and timely delivery by our expert instructors.

Looking for a way out of the headache of messy spreadsheets, endless copy-pasting and manual updates? Embrace the power of Power Query in Excel! This data transformation and data preparation engine helps you clean, transform and combine vast datasets effortlessly. By automating data preparation through a range of functions, including summarising data and creating relationships between datasets, this tool ensures that users can keep their focus on analysis and decision-making.
This blog brings you an in-depth insight into How to Use Power Query in Excel, encompassing its phases, benefits, and the transformations it can perform. So, dive in and transform your Excel workflow with Power Query's amazing data-handling features!
Table of Contents
1) What is Power Query in Excel?
2) Steps to Download the Power Query in Excel
3) The Four Phases of Power Query
4) Who Should use Power Query?
5) Benefits of Power Query
6) Functions of Power Query
7) Four Different Methods to Import Data to the Excel sheet
8) What Basic Transformations Can be Performed Using Power Query?
9) Conclusion
What is Power Query in Excel?
Power Query is a powerful data transformation and preparation engine. It has a graphical interface for gathering data from sources and a Power Query Editor for applying transformations. Since the engine is available in numerous products and services, the data's destination depends on where Power Query was used. Using this engine, you can perform data extraction, transformation, and load (ETL) processing.
This is one of Excel's most transformative tools for simplifying data handling. by enabling you to create a query once and reuse it with a quick refresh. Power Query can import and clean millions of rows into the data model for later analysis. The user interface is clear and well-designed, making it simple to learn. Compared to other Excel features like formulae or excel VBA, Power Query Excel has a shallow learning curve.

Steps to Download the Power Query Add-on Excel
Follow the steps below to learn how to download Power Query Excel:
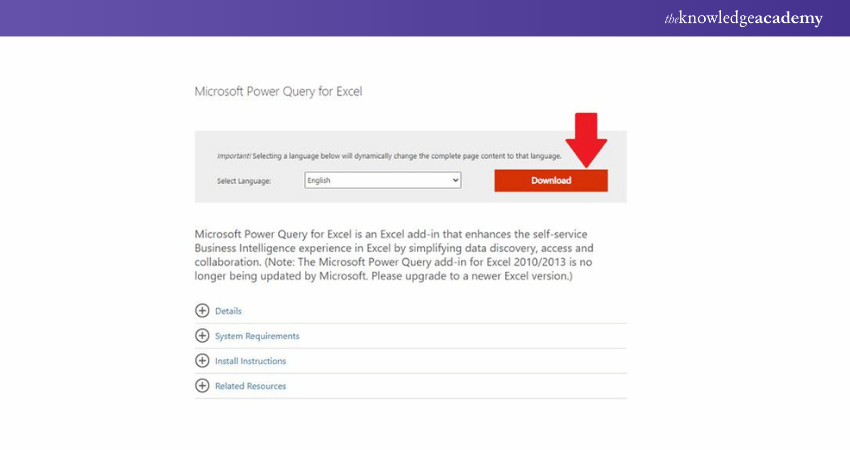
Step 1: On Microsoft’s official website, when you click on the download button, it redirects you to a dialogue box where you can opt for the correct download option.
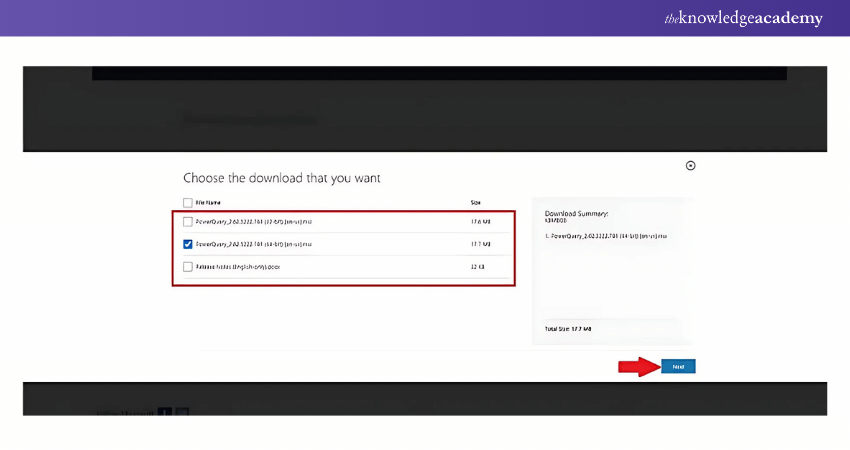
Step 2: Choose the preferred file size and click on the “Next” option.
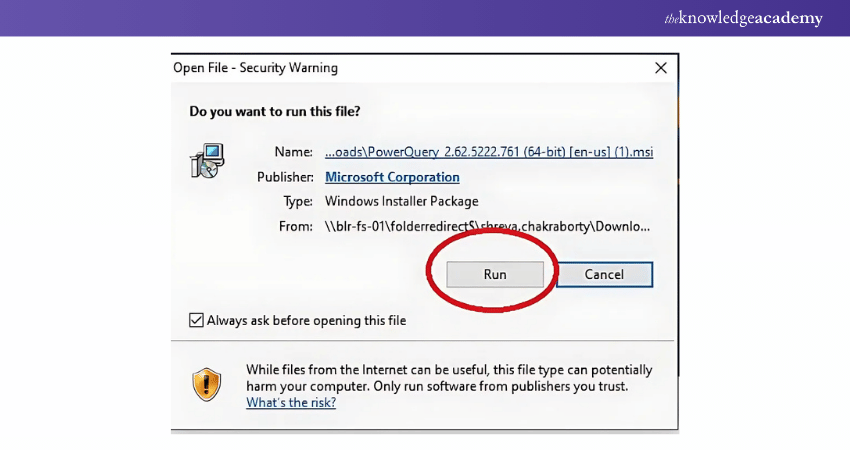
Step 3: Click on the “RUN” option to execute the download.
Step 4: To successfully complete your Power Query Microsoft download, Click on the “Finish” button.
Four Phases of Power Query
Power Query is a tool used in Excel for Extract, Transform, and Load (ETL) process. Here’s a refined explanation of its four key stages:
a) Connect: In this phase, users connect to the data sources from which they seek to extract data. Power Query supports multiple data sources, including files, web pages, databases, etc. At this phase, users can also specify any required authorisation or authentication details.
b) Transform: Once the data is filled into Power Query, users can efficiently use a variety of data transformation tools to clean and convert the data to meet specific needs. This efficiency is evident in data transformation tasks such as filtering data, finding duplicates in Excel, merging data, splitting columns, and pivoting data.
c) Combine: Power Query permits users to combine data from numerous sources using various techniques. Using a common key, they can merge tables, append, or join data. This phase is beneficial for integrating data from diverse sources into a single, unified view.
d) Load: Finally, users specify where to load the transformed data in the Load phase. They can load data into an Excel worksheet or a Power BI report or generate a connection to the data source to refresh it automatically whenever the source data changes.
Amplify your business analysis game with our comprehensive Business Analytics With Excel Course - register now!
Benefits of Power Query
The benefits of Power Query include:
1) Streamlined data preparation
2) Automated data refresh
3) Easy data transformation
4) Support for various data sources
5) Improved data analysis capabilities
6) Ability to replicate and modify data transformations with a single click
Build your career as a Data Analystwith our Data Analysis Training Using MS Excel- Sign up now!
Functions of Power Query
Power Query is a widely used ETL tool. It is an innovative tool which can save hours, reduce manual errors, and allow users to source data from a singular source of truth. Power Query can retain the user's data, transformation steps, and efficiently automating manual processes. Let’s take a closer look at some of its functions:
1) Transferring Data
Transferring data becomes manageable using the "Get and Transform Data" section of the Data tab in Excel.
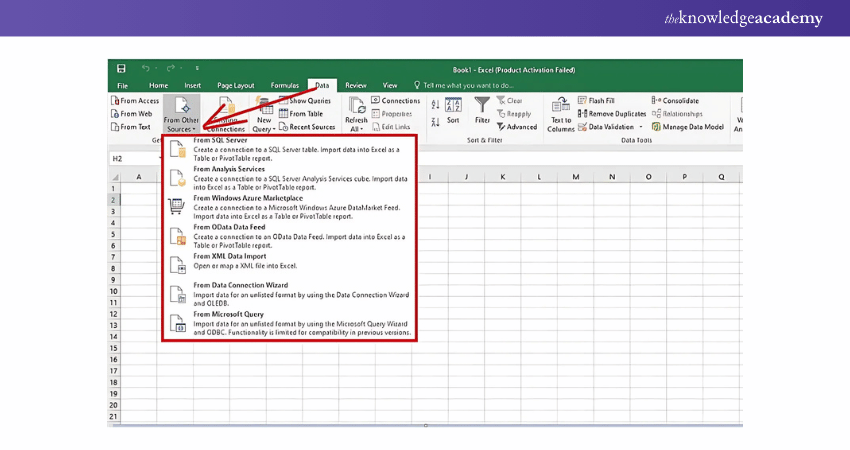
You can transfer data from various sources:
1) Excel files (Workbooks), text or CSV files, XML files, and JSON files can all be read from .
2) SQL Server, Microsoft Access, and SQL Server Analysis Services are databases.
3) Excel Tables/Ranges, the Web, Microsoft Query, and OData feeds are among additional sources.
2) Modifying Data
The objective of Power Query is to modify data. This refers to editing the layout, reducing errors, and making the data more presentable to use.
Common data modifications in Power Query include:
a) Unpivot and pivot
b) Dividing/combining columns
c) Data Filtering
d) Adding customised columns
e) Removing blank, error, and header rows
f) Various data types
g) Insert values
Here's what the Power Query Editor Interface looks like:
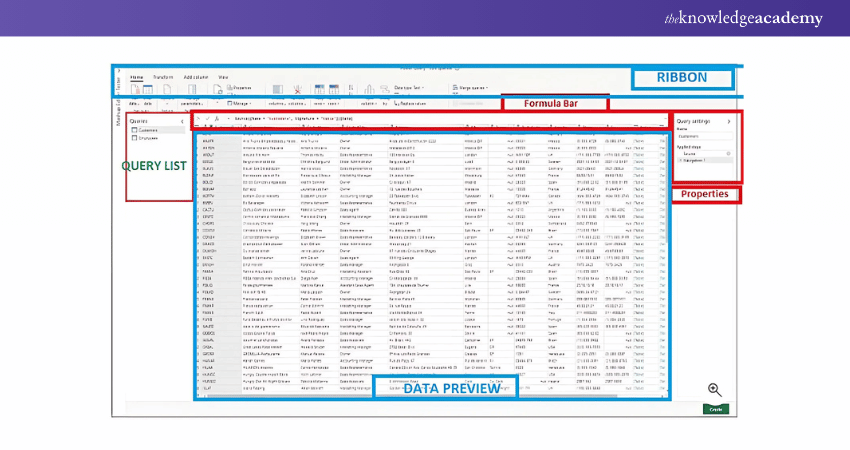
Let’s take an example to understand a simple transformation process:
Go through the steps below to understand how to sort a table based on a single column:
Step 1: Enter the data in the editor
Step 2: Choose the preferred column to sort
Step 3: Tap on the filter icon
There are icons to sort your column in either ascending or descending order in the Sort group under the “Home” tab.
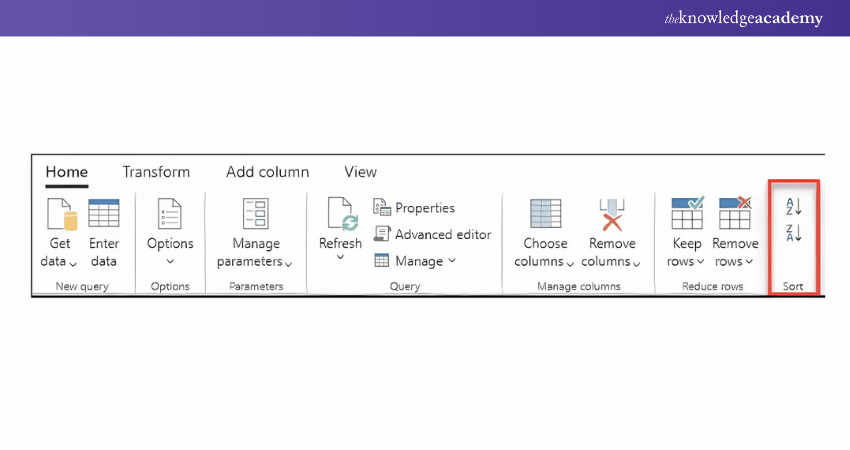
There is a drop-down menu indicator next to the column's name. The column sorting option appears when you pick the icon.
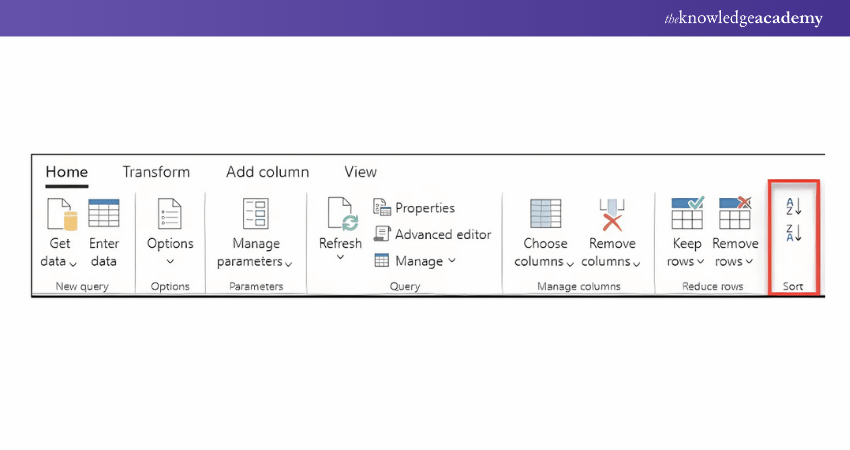
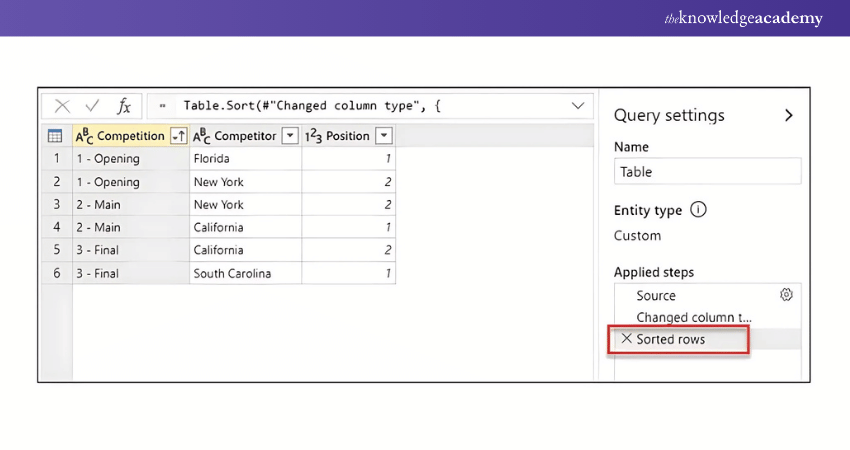
The buttons in the Sort group on the “Home” tab will be used to carry out the excel function. This operation adds a new step called Sorted rows to the Applied steps section.
3) Exporting to Excel
After finishing them all, you must export the editor's operations to our Excel sheet. Choose "Close and Load” from the Power Query Editor's Ribbon menu to perform this task.
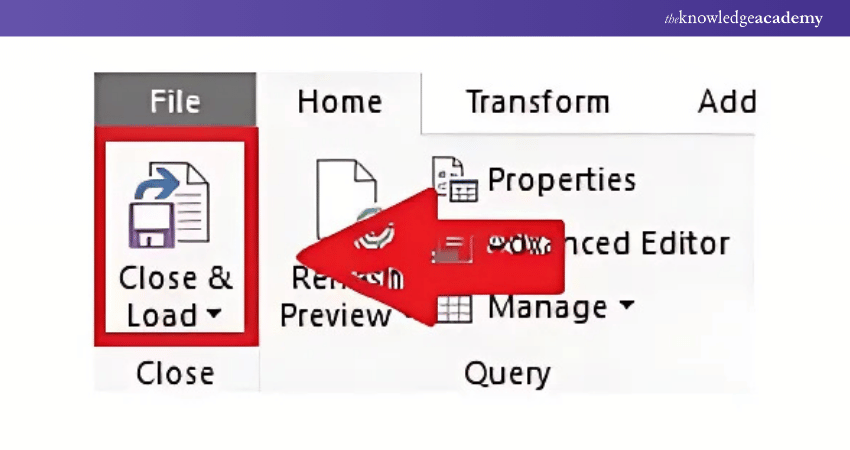
After choosing this option, the Editor will be directed toward closing and this will help you get the result of your worksheet.
Four Different Methods to Import Data to the Excel Sheet
Follow the steps below to import data from various data sources:
1) Import Data From a Text File
a) Click Text/CSV File under the Data tab.
b) After choosing "Text/CSV file," a new "Import data" dialogue box appears.
c) Click Import after choosing the text file you want to import.
d) When a dialogue box is opened, a preview of the data is displayed inside.
e) Finally, to import the data, click Load.
2) Importing Data from a CSV File
The steps listed below can be used to import data from CSV files into Power Query:
a) Click “Text/CSV” File under the Data tab.
b) After choosing "Text/CSV file," a new "Import data" dialogue box appears.
c) Click on import after choosing the CSV file you want.
d) When a dialogue box is opened, a preview of the data inside is displayed.
e) To import the data, click Load at the end.
3) Single Data Source Import From an Excel Workbook
Follow the steps below to import a single data source:
a) To access the Get Data command, select the Data tab, following which a drop-down menu appears. You can import the data using a range of options from the drop-down menu. You can choose "From File" and then "From Workbook" to import data from the Excel workbook.
b) When you navigate and choose the workbook using Excel, a dialogue box appears.
c) Once you've found the worksheet, click on it and choose "Open" from the menu.
d) As a result, the navigation dialogue box appears, where you can access a number of data sources.
e) You can choose the data you want to work with from here.
f) To import the data, click 'Load' at the end.
4) Import Multiple Data Sources From an Excel Workbook
The steps listed below will help you to get an idea of importing multiple data sources from the Excel workbook:
a) After clicking the "Data" tab, select the Get data command. Upon clicking, a drop-down menu will appear. You can import the data using a variety of options from the drop-down menu. You choose "From File" and then "From Workbook" to import data from an Excel workbook. .
b) Excel displays a dialogue box to assist in selecting and browsing the workbook.
c) Once you have found the worksheet, you can click on it and select "Open" from the menu.
d) The navigation dialogue box appears after that. You can access a number of data sources via the navigation dialogue box.
e) There is a "Select Multiple Items" option in the navigation dialogue box. You can pick multiple items when you choose this option.
f) From this point, you may choose more than one data sources you want to use.
g) To import the data, click “Load” at the end.
h) These were some of the steps which will help you in understanding how to import data to Excel.
Master basic Excel skills by signing up for our class Microsoft Excel Course today!
What Basic Transformations Can be Performed Using Power Query?
There are various transformation functions that can be accomplished with a few clicks, as detailed below:
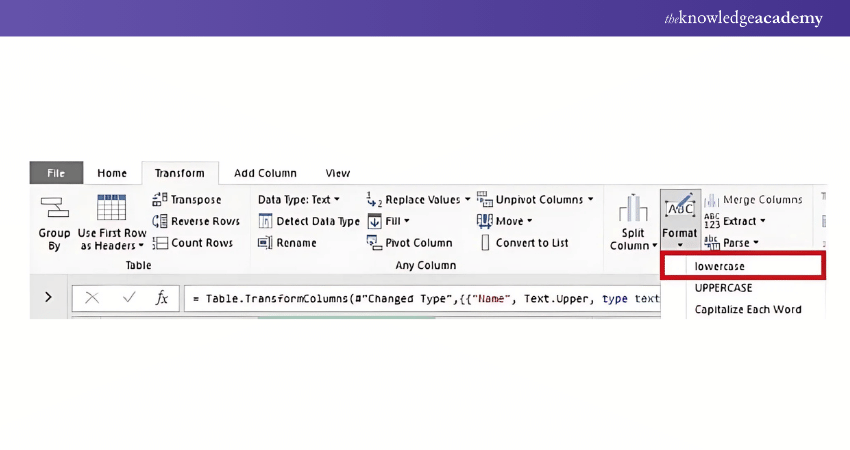
1) Text Formatting: Once you go to the Power Query editor, you can click on the column name, go to the “transform” tab, and then to the “Format” option. Here, you’ll find options such as uppercase, lowercase, trim and clean.
2) Splitting a Column Using Delimiters: You can split a column with the help of a delimiter. Click on the “Transform” tab, then on the “Split column” option. This will give you a drop-down menu with the option to split the data “By Delimiter”.

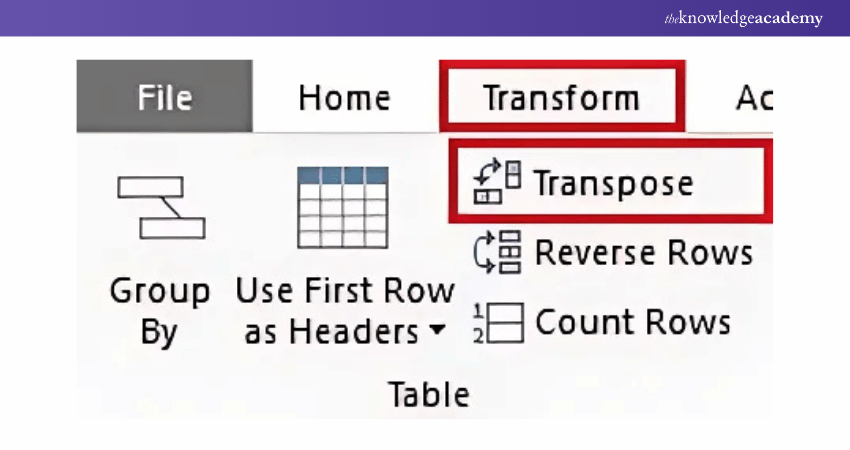
3) Transpose a Data Table: To rotate the rows to columns, navigate to the "Transform" tab. Upon selecting it, you will see an option to Transpose the data.
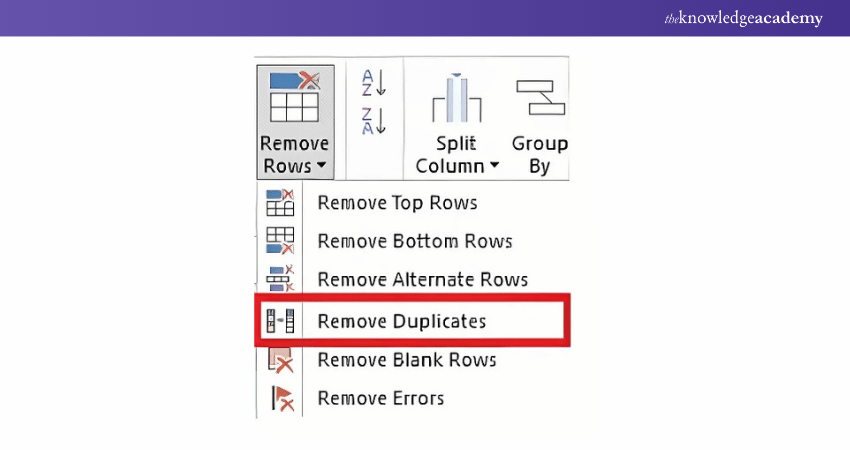
4) Removing Duplicates Using Power Query: For this, you will have to select the target row, navigate to the “Home” tab, click on the “Remove Rows” dropdown menu and then on the “Remove Duplicates” option.
Conclusion
In conclusion, Power Query is nothing short of a game-changer for anyone seeking to streamline and simplify data processes in Microsoft Excel. As detailed in this blog, its powerful features for cleaning, transforming, and merging data, reduces the burden of manual tasks and helps you focus on analysis and decision-making. Learning How to Use Power Query in Excel is essential to unlocking the secret to seamless data management.
Expand your Microsoft Excel expertise with our Microsoft Excel Expert MO201 Training - Sign up now!
Frequently Asked Questions
What Role Does Excel Power Query play in Handling Large Datasets and Improving Performance?

Excel Power Query is a tool that enables you to import, connect, and transform data from various sources in Excel. It can help you handle large datasets and improve performance by automating data transformation tasks, enabling data refresh, cleaning, reshaping, and merging data.
How Does Power Query Facilitate Data modelling and Shaping for Better Visualisation in Excel?

Power Query facilitates data modelling and shaping for better visualisation in Excel by allowing you to connect to various data sources and import the data you need. Providing a user-friendly interface to transform, clean, and reshape your data. Additionally, it enables users to build relationships between tables and load them into the data model.
What are the Other Resources and Offers Provided by The Knowledge Academy?

The Knowledge Academy takes global learning to new heights, offering over 3,000 online courses across 490+ locations in 190+ countries. This expansive reach ensures accessibility and convenience for learners worldwide.
Alongside our diverse Online Course Catalogue, encompassing 19 major categories, we go the extra mile by providing a plethora of free educational Online Resources like News updates, Blogs, videos, webinars, and interview questions. Tailoring learning experiences further, professionals can maximise value with customisable Course Bundles of TKA.
What is The Knowledge Pass, and How Does it Work?

The Knowledge Academy’s Knowledge Pass, a prepaid voucher, adds another layer of flexibility, allowing course bookings over a 12-month period. Join us on a journey where education knows no bounds.
What are the Related Courses and Blogs Provided by The Knowledge Academy?

The Knowledge Academy offers various Microsoft Excel Training & Certification Courses, including Microsoft Excel Course, Business Analytica with Excel and Excel Training with Gantt Charts. These courses cater to different skill levels, providing comprehensive insights into How to Create a Project Plan in Excel.
Our Office Applications Blogs cover a range of topics related to Microsoft Excel, offering valuable resources, best practices, and industry insights. Whether you are a beginner or looking to advance your Excel skills, The Knowledge Academy's diverse courses and informative blogs have you covered.
Upcoming Office Applications Resources Batches & Dates
Date
 Microsoft Excel Course
Mon 10th Mar 2025
Mon 7th Apr 2025
Mon 9th Jun 2025
Mon 8th Sep 2025
Mon 1st Dec 2025


 Top Rated Course


 If you wish to make any changes to your course, please


