


 Top Rated Course

We may not have the course you’re looking for. If you enquire or give us a call on 01344203999 and speak to our training experts, we may still be able to help with your training requirements.
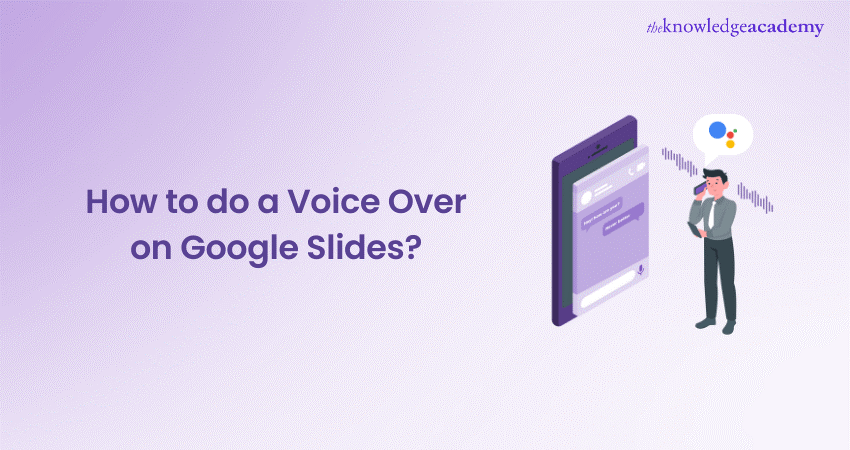
How to Do a Voice-Over on Google Slides: A Step-by-Step Guide
Eliza Taylor 18 March 2025Are you curious about How to do a Voice Over on Google Slides? Adding voice overs can provide additional context and engagement. This blog explains the step-by-step process to record and insert voice overs in your Google Slides. Learn how to use tools, ensure audio quality and create impactful presentations.
Training Outcomes Within Your Budget!
We ensure quality, budget-alignment, and timely delivery by our expert instructors.
Google Slides is without a doubt one of the most popular choices for one’s presentation across industries. It is majorly preferred for usage due to its accessibility and user friendliness. Adding a voice-over to your Google Slides can certainly elevate your presentatins making them more informative and fascinating. Follow this step-by-step guide on How to Do a Voice over on Google Slides to ease your process. Whether you are employing a Windows or Mac computer, this compact blog will help you through. Read on to learn more!
Table of Contents
1) Why Learn to add Audio on Google Slides?
2) How to do a Voiceover on Google Slides?
a) On Windows Computers
b) On Mac Computers
3) How to Record a Voiceover for Your Google Slides Presentations in 4 Simple Steps?
4) Conclusion
Why Learn to Add Audio on Google Slides?
Adding a Voice Over to your Google Slides presentation can elevate your content to a whole new level. Whether you're creating an online lecture, a business presentation, or a personal project, a voice over can provide clarity, add personality, and engage your audience more effectively. In today's remote working and learning environments, the ability to create comprehensive, multimedia presentations is invaluable.

How to Do a Voiceover on Google Slides?
Voice overs can transform your slides from static images into dynamic presentations. The process varies slightly contingent upon whether you’re using a Windows or Mac computer. Here, we'll cover both methods to ensure you're well-equipped, no matter what device you're using.
Understand the importance of branding and marketing for your podcast with our Introduction to Podcasting Course – sign up today!
1) On Windows Computers
Learn the steps of adding voice over in Google Slides using a Windows computer:
Step 1: Navigate to Slideshow in the Top Menu and Select Record Slideshow
First, open your Google Slides presentation. In the top menu, click on "Slideshow" and then select "Record Slideshow."
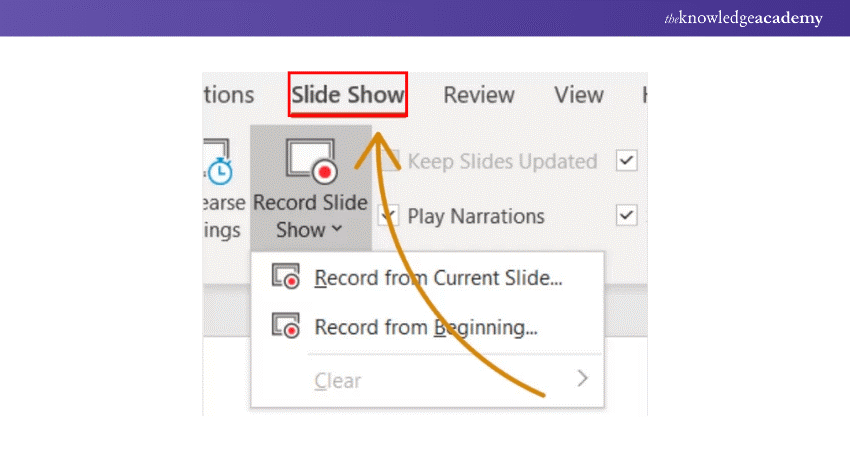
This option is your gateway to adding a professional touch to your presentation. Make sure that your microphone is properly set up to ensure clear audio recording.
Step 2: Begin Recording
A new window will appear with options to start recording your voice over. Ensure your microphone is connected and working correctly.

Press the record button, and you'll get a countdown before the recording begins. Speak clearly and confidently as you narrate your slides.
Step 3: Test Your Narration
Once you've finished recording, it's essential to test your narration. Play back the recorded slideshow to check the audio quality and ensure everything is in sync.
![]()
If needed, you can re-record any sections to improve clarity or correct mistakes. Save your presentation to ensure that all changes are properly updated and ready for your audience.
Want to improve your writing skills too? With our Creative Writing Course that wish can be granted – sign up today!
2) On Mac Computers
Learn the steps of adding voice over in Google Slides using a Mac computer:
Step 1: Open Slide Show
Start by opening your Google Slides presentation. In the top menu, select "Slide Show." This is where you'll find the tools needed to add your voice over.

However, you must ensure that the microphone is connected and functioning properly before starting.
Step 2: Select Record Slide Show
Next, click on "Record Slide Show." This feature allows you to record your narration as you move through your slides.

In this step, you should speak clearly and at a steady pace to ensure that your audience can easily follow along.
Step 3: Choose Your Input Method
Before you begin, make sure you select the correct input method for your microphone. This is typically found in your system preferences under "Sound."

Ensure your preferred microphone is selected and test it to confirm it’s working correctly. Adjust the input volume to an appropriate level to avoid any distortion or background noise.
Step 4: Add Voice Over to Your Slides
With everything set up, press the record button. You'll get a brief countdown, and then it's showtime.

Speak clearly as you navigate through your slides, providing commentary, explanations, or additional insights.
Step 5: Finish Recording
Once you've completed your narration, click the stop button. Your voice over is now embedded in your presentation.

Be sure to save your work to avoid losing your recorded audio. Review the entire presentation to ensure that the audio is correctly synced with each slide.
Step 6: Click Tips for Additional Controls
Explore the additional controls available in the recording interface. These might include options to pause, resume, or re-record sections of your narration.

Familiarising yourself with these controls can help you create a polished and professional presentation.
Step 7: Verify Your Voice Over for Accuracy
Finally, play back your entire presentation to verify the voice over. Ensure the audio is clear, the timing is correct, and the narration aligns with the slide content.

If everything sounds good, you’re ready to share your presentation. Consider exporting your presentation as a video file for easier sharing and wider accessibility.
How to Record a Voiceover for Your Google Slides Presentations in 4 Simple Steps?
Recording a voice over might seem daunting, but it’s straightforward once you know the steps. Here’s a simplified method to get you started:
Step 1: Record Your Voice
Use an external recording tool or app to record your voice. Many computers come with built-in recording software, such as Voice Recorder on Windows or QuickTime on Mac.

Alternatively, you can utilise free online tools like Audacity. Ensure you’re in a quiet environment and speak clearly into the microphone.
Step 2: Take a Pause from Recording
During your recording session, take pauses as needed. This could be to gather your thoughts.

You must ensure that you’re on the right slide, or take a break if you’re recording a lengthy presentation. Pausing helps maintain a steady flow and prevents unnecessary errors.
Enhance your productivity with our Attention Management Training – register now and maintain focus!
Step 3: Resume and Preview the Recording
After pausing, resume recording from where you left off. Once you’ve finished, listen to the entire recording to ensure it’s coherent and clear.

This step is crucial for identifying any sections that may need re-recording or editing. Finally, save your recording in the desired format for easy access and sharing.
Step 4: Download the Recording
Once satisfied with your recording, save and download the audio file. This file can then be directly uploaded to Google Slides, where you can add it to the appropriate slides to create a seamless voice over presentation.

You must ensure the audio is properly synced with your slides for a smooth and professional presentation.
Conclusion
Understanding How to Do a Voice over on Google Slides presentation can significantly enhance its impact and engagement. By incorporating our step-by-step instructions, along with preparing for Voice Process Interview Questions, you can create professional, polished presentations that resonate with your audience. So, why not give it a go and add a personal touch to your next slide deck? Your listeners will thank you!
Attain the knowledge of how to become a Voice over Artist with our Voice Over Artist Course – Register today!
Frequently Asked Questions
Can you Add Sound on Slides?
Yes, you can add sound to slides in PowerPoint, Google Slides, and Keynote. In PowerPoint, go to Insert > Audio and select your file. In Google Slides, upload the audio to Google Drive, then Insert > Audio. In Keynote, click Media > Choose. Adjust playback settings to start automatically or on click, and set volume levels accordingly.
How do you Add Voice to a Slide?
To add voice to a slide: Upload your audio to Google Drive, then Insert > Audio, select your file, and adjust playback settings.
What are the Other Resources and Offers provided by The Knowledge Academy?
The Knowledge Academy takes global learning to new heights, offering over 3,000 online courses across 490+ locations in 190+ countries. This expansive reach ensures accessibility and convenience for learners worldwide.
Alongside our diverse Online Course Catalogue, encompassing 19 major categories, we go the extra mile by providing a plethora of free educational Online Resources like News updates, Blogs, videos, webinars, and interview questions. Tailoring learning experiences further, professionals can maximise value with customisable Course Bundles of TKA.
What is The Knowledge Pass, and How Does it Work?
The Knowledge Academy’s Knowledge Pass, a prepaid voucher, adds another layer of flexibility, allowing course bookings over a 12-month period. Join us on a journey where education knows no bounds.
What are the Related Courses and Blogs Provided by The Knowledge Academy?
The Knowledge Academy offers various Personal Development Courses, including Time Management Training, Attention Management Training, and Active Listening Training. These courses cater to different skill levels, providing comprehensive insights into Benefits of Soft Skills.
Our Business Skills Blogs cover a range of topics related to Business related skills and personal development, offering valuable resources, best practices, and industry insights. Whether you are a beginner or looking to advance your Business skills, The Knowledge Academy's diverse courses and informative blogs have got you covered.
Upcoming Business Skills Resources Batches & Dates
Date
 Voice Over Artist Course
Voice Over Artist Course
Fri 2nd May 2025
Voice Over Artist Course
Fri 4th Jul 2025
Voice Over Artist Course
Fri 5th Sep 2025
Voice Over Artist Course
Fri 7th Nov 2025
 If you wish to make any changes to your course, please


