We may not have the course you’re looking for. If you enquire or give us a call on 01344203999 and speak to our training experts, we may still be able to help with your training requirements.
We ensure quality, budget-alignment, and timely delivery by our expert instructors.
In today's digital age, Typing has become an essential skill for students, professionals and people willing to communicate in the fast-paced world of the internet. And if someone wants to boost their Typing speed and accuracy, learning How to Touch Type is the key. So, embark on the journey of Typing speedily with our blog. Read this blog to learn How to Learn Touch Typing. Also, explore the techniques needed to become an expert Touch Typist.
Table of Contents
1) Understanding Touch Typing
2) Why Learn Touch Typing?
3) How to Learn Touch Typing?
4) Common mistakes to avoid while Touch Typing
5) Conclusion
Understanding Touch Typing
Touch Typing is the art of typing without looking at the keyboard. Instead of hunting and pecking for keys, Touch Typists use muscle memory to quickly and accurately input text. This skill is crucial in today's digital world, as it significantly enhances your typing speed, productivity, and overall computer proficiency. The benefits of Touch Typing include reduced typing errors, improved focus, and reduced strain on your hands and wrists.
Why Learn Touch Typing?
Touch Typing offers a multitude of compelling reasons to invest your time and effort in mastering this skill. Here are some of the benefits it brings:
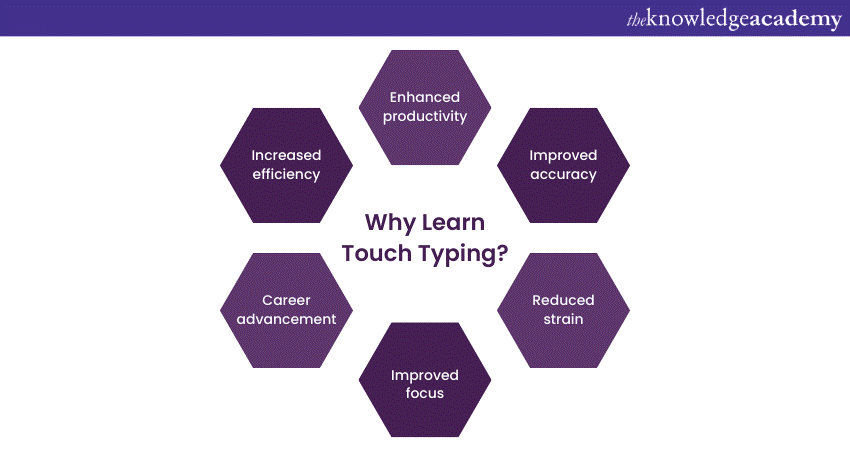
a) Increased efficiency: Touch Typing can significantly boost your typing speed. As you become proficient, you'll notice that you can accomplish tasks that involve typing much faster, whether it's drafting emails, writing reports, or coding.
b) Enhanced productivity: Faster typing means you can complete tasks more quickly, freeing up time for other important activities. This increased efficiency can make a major difference in both your personal and professional life.
c) Improved accuracy: Touch Typists tend to make fewer typing errors, which is crucial when precision matters. Fewer mistakes can save you time and help maintain the quality of your work.
d) Reduced strain: Proper Touch Typing technique minimises strain on your fingers, wrists, and hands. This helps reduce the risk of Repetitive Strain Injuries (RSI) like Carpal Tunnel Syndrome.
e) Improved focus: When you don't have to look at the keyboard, your attention remains fixed on the screen or your work material. This results in better concentration and fewer distractions, which is vital in today's multitasking environments.
f) Career advancement: Many jobs require proficient computer skills, and Touch Typing is a fundamental part of that skill set. Being a proficient Touch Typist can open up job opportunities and lead to career advancement.
How to Learn Touch Typing?
After you have learnt the importance of Touch Typing, it’s time to answer the question: How to Learn Touch Typing? Learning Touch Typing is a simple process. Here’s a step-by-step guide for beginners:
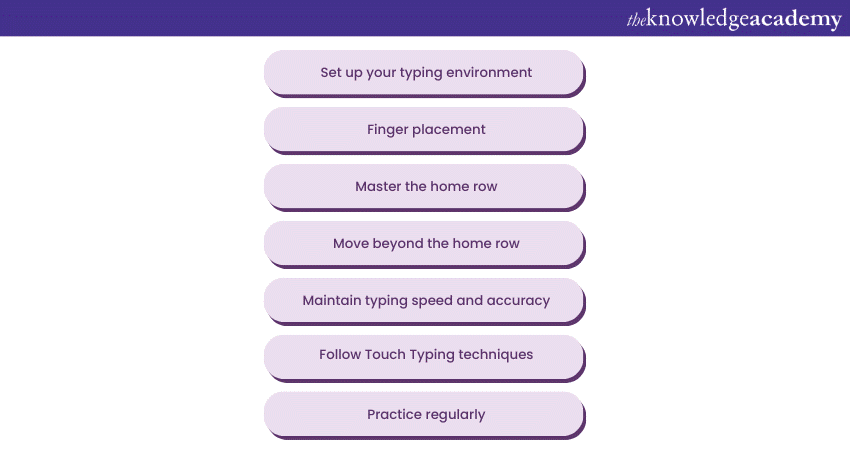
1) Setting up your typing environment
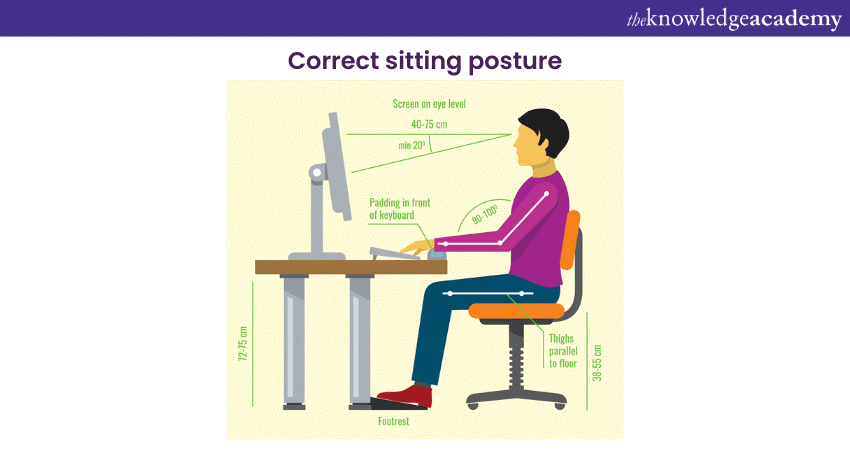
Before diving into Touch Typing, it's essential to set up a comfortable and ergonomic workspace and environment. Ensure that your keyboard and chair are at the right height to prevent strain and discomfort during long typing sessions. A well-organised and ergonomic workspace not only enhances your Typing experience but also reduces the risk of discomfort or injury. Here are some key aspects to consider when preparing your workspace:
a) Ergonomics and keyboard setup: Position your keyboard so that your wrists are in a neutral, straight line. Your elbows should be close to your body, forming a right angle, and your feet should rest flat on the floor. An adjustable keyboard tray or ergonomic keyboard can help achieve the ideal setup. Here's how you should position yourself when Typing:
b) Choosing the right keyboard: Select a keyboard that suits your typing preferences. Mechanical keyboards offer tactile feedback and are favoured by many Touch Typists. At the same time, membrane keyboards are quieter and may be preferred in shared spaces. Explore different options to find the one that feels most comfortable for extended typing sessions.
Take the first step towards becoming a data entry pro with our Data Entry Masterclass - register today!
2) Finger placement
The basis of Touch Typing lies in proper finger placement. It involves the precise allocation of fingers to specific keys on the keyboard, ensuring efficient and error-free Typing. This fundamental skill significantly contributes to your overall typing speed and accuracy.
The home row keys, consisting of ASDF for the left hand and JKL; for the right hand, serve as the anchor point for your fingers. Start by placing your left-hand fingers on the A, S, D, F key and your right-hand fingers on J, K, L and; keys. Each finger has a designated area of responsibility, with the index fingers resting on the F and J keys, which typically have tactile markers for easy identification. Here's how your hand will look like:
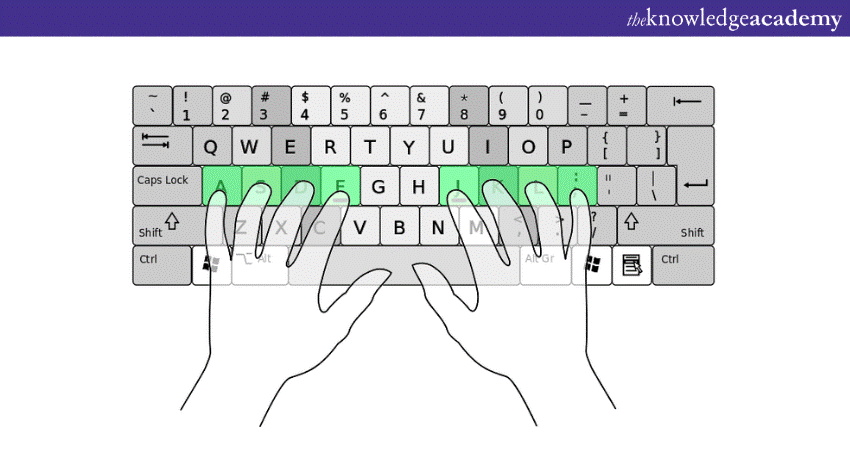
Maintaining the correct hand and finger posture is crucial. Keep your wrists level and fingers slightly curved, hovering over the home row keys. Moreover, avoid resting your wrists on the desk or keyboard, as this can lead to discomfort and strain over time.
3) Mastering the home row
Once you've familiarised yourself with their layout (ASDF for the left hand and JKL; for the right hand), it's time to delve into mastering home row keys. They serve as your anchor point when Touch Typing.
Begin by familiarising yourself with the keys in the top and bottom rows. On the top row, you'll find keys like QWERTY, while the bottom row includes S, X, C, V, B, N and M keys. As you progress, increase the complexity of the text you practice with. Gradually incorporate capital letters and punctuation while maintaining the correct finger placement. The repetition of these exercises will train your fingers to instinctively return to the home row after typing any key.
4) Moving beyond the home row
After you've mastered the home row, expand your skills by learning the top and bottom rows.
Begin by familiarising yourself with the keys in the top and bottom rows. On the top row, you'll find keys like QWERTY, while the bottom row includes S,X,C,V,B,N and M keys.
To practice, start with simple words that incorporate these keys, gradually increasing the complexity of the words and sentences as you gain confidence. Additionally, maintaining proper finger placement is essential as you move to these new rows. It is noteworthy to resist the temptation to look down at the keyboard and, instead, rely on your developing muscle memory.
5) Typing speed and accuracy
One of the key considerations in mastering Touch Typing is finding the delicate balance between typing speed and accuracy. These two aspects are interdependent, and understanding how they relate to each other is vital for becoming a proficient Touch Typist.
Speed, of course, has its advantages. It allows you to complete tasks more quickly, whether you're typing an important report, responding to emails, or engaging in online chat. However, the pursuit of speed should not come at the expense of accuracy. Rapid typing without precision often results in more errors, which can ultimately slow you down as you spend additional time correcting mistakes.
Hence, to strike the right balance, start by prioritising accuracy during your initial Touch Typing practice. As you become more comfortable with the keyboard layout and finger positions, you eventually increase your speed. Consistent practice and muscle memory development will naturally lead to improved speed without compromising accuracy.
6) Follow Touch Typing techniques
Mastering Touch Typing involves more than just memorising key positions; it requires a set of techniques that streamline your Typing process, enhance speed, and ensure accuracy. They are as follows:
a) Proper finger placement: Ensure that each finger is responsible for specific keys. For example, your left pinky should rest on the A key, while your right index finger should be on the J key. This allocation maximises efficiency.
b) Eyes off the keyboard: Resist the urge to look at the keys. Initially, it may be challenging, but with practice, you'll build confidence in your muscle memory. Glancing at the screen or a printed document can help maintain focus.
c) Use of keyboard shortcuts: Familiarise yourself with common keyboard shortcuts for tasks like copy, paste, and undo. These shortcuts can significantly boost your productivity, as you won't need to reach for the mouse as often.
d) Maintain a consistent rhythm: Develop a steady typing rhythm by tapping keys with consistent force. Avoid pounding the keys or pressing them too lightly, as this can lead to errors.
e) Touch Typing drills: Regularly engage in Touch Typing drills to reinforce your skills. These drills often involve typing sentences or paragraphs to improve both speed and accuracy.
7) Practice regularly
Consistent and deliberate practice is the key to developing muscle memory and improving your typing speed and accuracy. Fortunately, there are numerous resources available to help you refine your skills.
Online typing courses and software programs offer a structured approach to practice. They provide a range of exercises and lessons that gradually introduce new keys and increase complexity as you progress. These tools also track your performance, allowing you to identify areas that need improvement.
To make the most of your practice sessions, customise them to focus on your weaknesses. If certain keys or key combinations give you trouble, dedicate more time to practising them. Additionally, challenge yourself with typing tests to measure your progress and set performance goals. Typing games can also inject an element of fun into your practice routine while improving your reflexes and typing speed.
Advance your typing potential and boost productivity with our Touch Typing Training – sign up now!
Common mistakes to avoid while Touch Typing
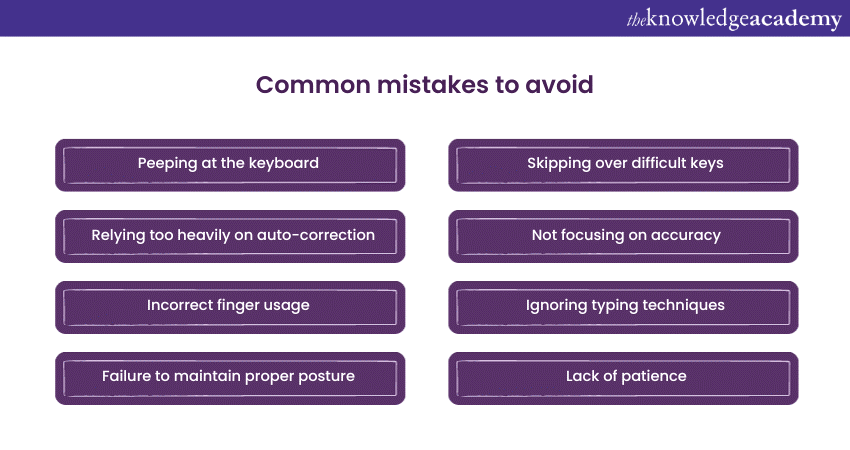
In the journey to master Touch Typing, it's crucial to be aware of common mistakes that can hinder your progress. Correcting these errors early on will lead to more efficient and accurate typing. Let's have a look at some of them:
a) Peeping at the keyboard: One of the most prevalent mistakes is constantly glancing at the keyboard while typing. Break this habit by covering your hands or keyboard with a cloth, sticky notes, or using keyboard covers. Trust your muscle memory to lead your fingers to the correct keys.
b) Relying too heavily on auto-correction: While auto-correct can be a handy feature, relying on it excessively can hinder your typing development. Try turning off auto-correct during practice sessions to force yourself to correct mistakes manually and improve accuracy.
c) Incorrect finger usage: Ensure you're using the right fingers for each key. For instance, don't use your index finger for the A key or your pinky for the Enter key. Correct finger placement is crucial for both speed and accuracy.
d) Failure to maintain proper posture: Slouching or improper hand positioning can lead to discomfort and fatigue. Maintain an ergonomic posture, keep your wrists neutral, and use a keyboard that supports your hand placement.
e) Skipping over difficult keys: Avoid the temptation to skip or neglect practising challenging keys or key combinations. Identify your weaknesses and work on them systematically to strengthen your overall typing ability.
f) Not focusing on accuracy: Typing too fast without paying attention to accuracy can lead to the development of bad habits. Balance speed and precision, and gradually increase your speed as your accuracy improves.
g) Ignoring typing techniques: Proper Typing technique involves using a light touch, avoiding excessive force on keys, and employing a gentle and fluid keystroke motion. Be mindful of these techniques to reduce strain on your hands and fingers.
h) Lack of patience: Learning Touch Typing is a gradual process. Don't get discouraged by initial slow progress or occasional setbacks. Consistent practice and patience are key here.
Conclusion
We hope this blog has provided you with the knowledge on How to Learn Touch Typing and tips you need to begin on your Touch Typing journey. By focusing on Increasing Touch Typing Speed, you can accelerate your learning process, ultimately enhancing your productivity and your digital skills.
Elevate your skills and efficiency with our Shorthand Training – register today for a faster, more efficient typing speed!
Frequently Asked Questions
What are the Other Resources and Offers Provided by The Knowledge Academy?

The Knowledge Academy takes global learning to new heights, offering over 3,000 online courses across 490+ locations in 190+ countries. This expansive reach ensures accessibility and convenience for learners worldwide.
Alongside our diverse Online Course Catalogue, encompassing 19 major categories, we go the extra mile by providing a plethora of free educational Online Resources like News updates, Blogs, videos, webinars, and interview questions. Tailoring learning experiences further, professionals can maximise value with customisable Course Bundles of TKA.
Upcoming Business Skills Resources Batches & Dates
Date
 Touch Typing Course
Fri 23rd May 2025
Fri 25th Jul 2025
Fri 26th Sep 2025
Fri 28th Nov 2025


 Top Rated Course


 If you wish to make any changes to your course, please


