We may not have the course you’re looking for. If you enquire or give us a call on 01344203999 and speak to our training experts, we may still be able to help with your training requirements.
We ensure quality, budget-alignment, and timely delivery by our expert instructors.

Taking screenshots on a Mac has become an essential skill for several users, whether it's for work, education, or creative purposes. Based on a report, approximately 25% of users rely on screenshots daily to capture highly critical information and images. Understanding the complexities of How to Screenshot on a Mac can enhance your productivity and sharing capabilities.
In this blog, you will delve into How to Screenshot on Mac, including the related keyboard shortcuts, third-party apps, and Cloud-sharing options. Additionally, we will address some of the common challenges and provide helpful tips to make your Mac screenshotting experience brilliant.
Table of Contents
1) How Do I Capture a Screenshot in Mac?
2) How to Take a Screenshot of Part of the Screen?
3) How to Take a Screenshot of a Window or Menu?
4) How to View Screenshots on Mac?
5) Different Methods to Take Screenshot on Mac
6) Common Challenges When Making Screenshots on a Mac
7) What is the Easiest Way to Copy a Screenshot on a Mac?
8) Is There a Snipping Tool on a Mac?
9) Conclusion
How Do I Capture a Screenshot in Mac?
To capture a screenshot on a Mac, press “Shift + Command + 3” for the entire screen or “Shift + Command + 4” to select a portion. For a specific window, use “Shift + Command + 4”, then press the Spacebar and click the window. Screenshots are saved to your desktop by default.
How to Take a Screenshot of Part of the Screen?
Taking a screenshot on a Mac is a simple and efficient way to capture critical information on your screen. This flexibility is ideal for anyone working with visual content, conducting research, or remotely collaborating. Follow these steps to take a screenshot of a part of the screen on your Mac:
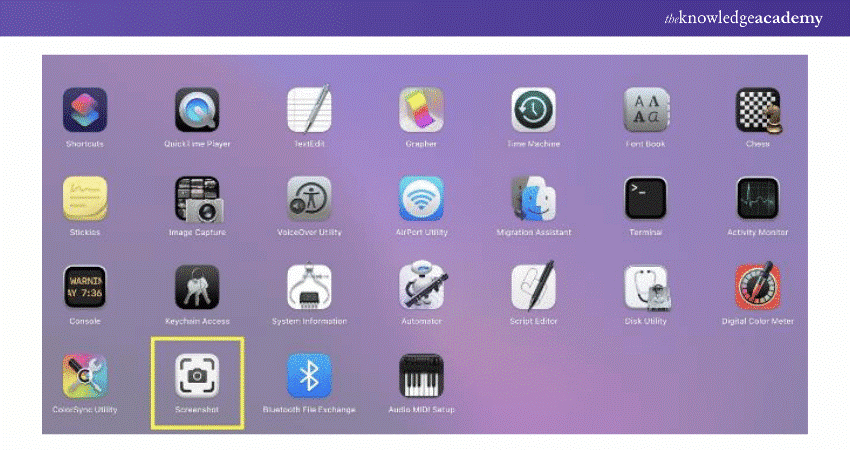
1) Open Screenshot Tool: Press Shift-Command-5 or use Launchpad to open the Screenshot tool.
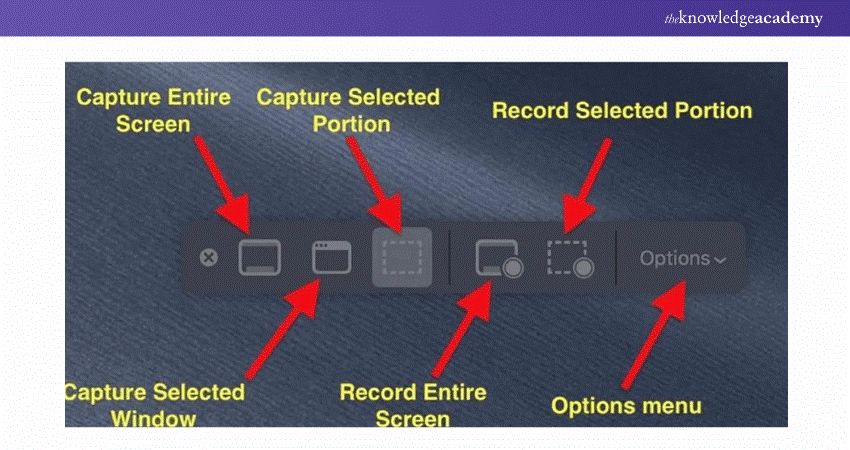
2) Select Capture Tool: Click on the “Capture Tool” to capture a portion of the screen.
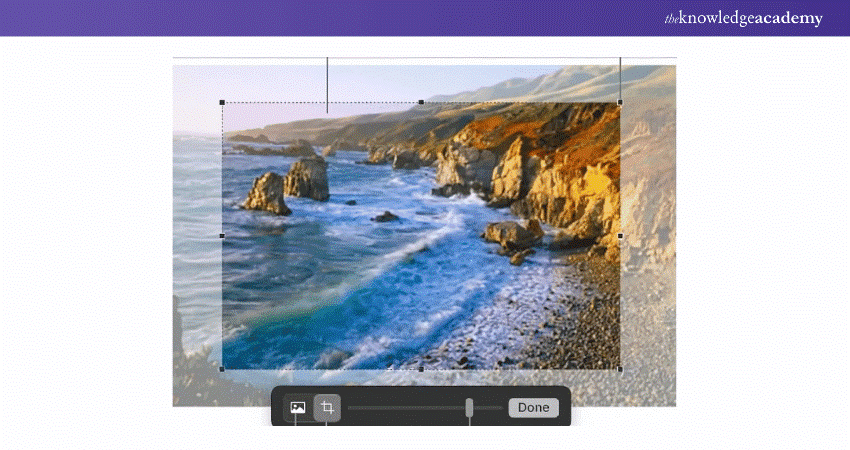
3) Adjust Frame: Drag the frame to reposition or resize the area you want to capture.
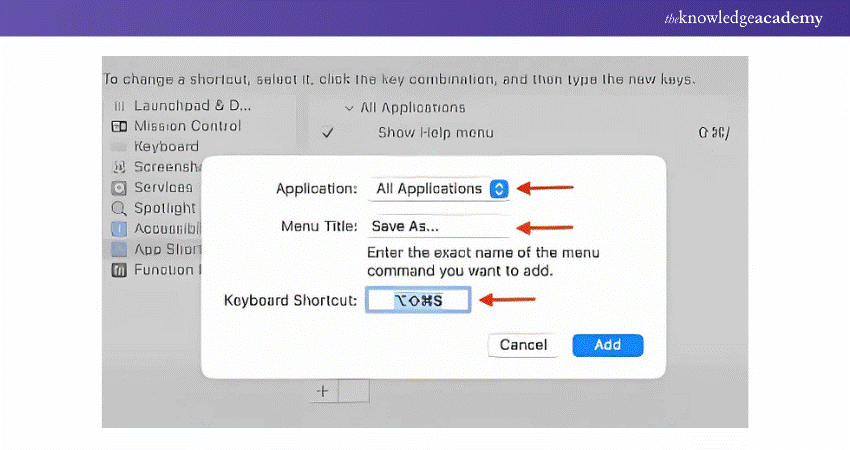
4) Save Options: Choose where to save the file from the Options menu.
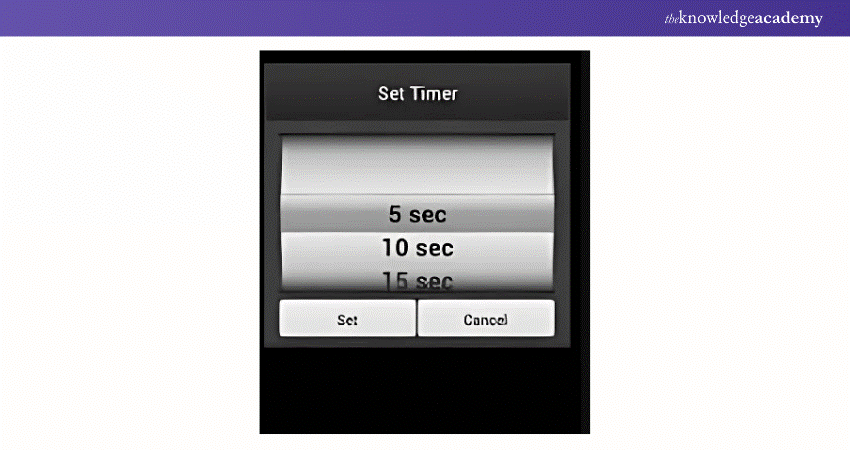
5) Set Timer: Select a delay time under Timer if needed.
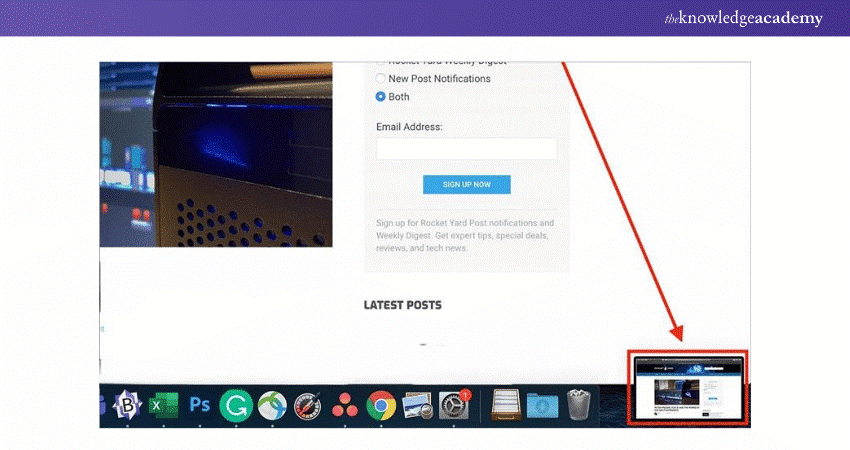
6) Floating Thumbnail: Enable Show Floating Thumbnail to easily work with the screenshot.
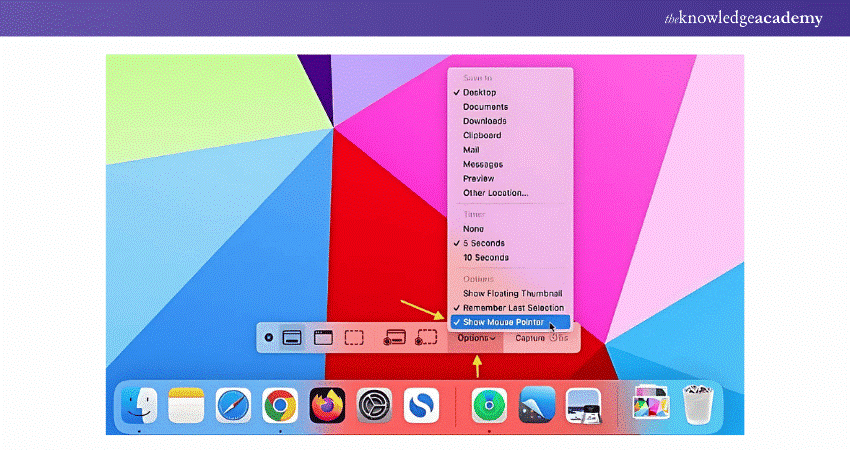
7) Include Mouse Pointer: Select Show Mouse Pointer if you want it included in the screensho
How to Take a Screenshot of a Window or Menu?
To capture a specific window or menu, you can use a quick method that focuses solely on the content you want to screenshot. Follow these steps to take a screenshot of a Mac window or menu:
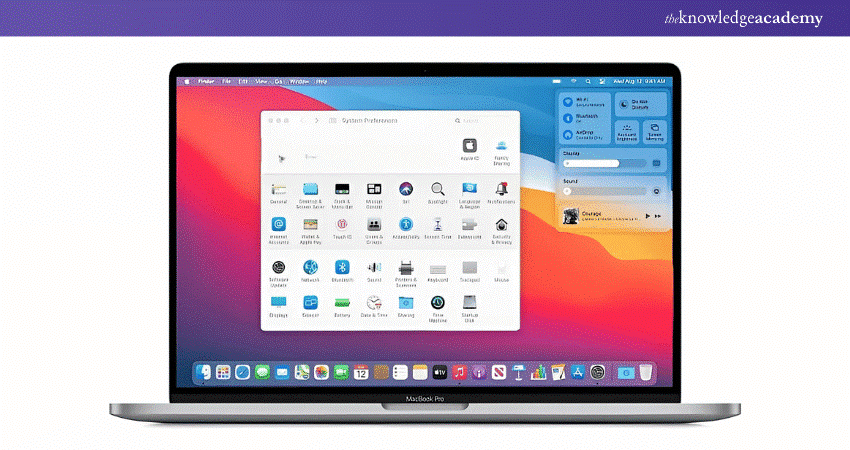
1) Open the Window or Menu: First, open the window or menu you want to capture.
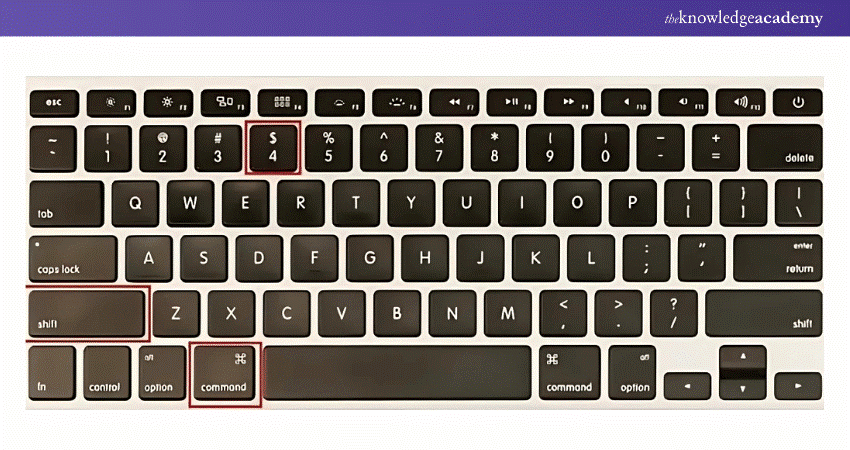
2) Activate Screenshot Tool: Press and hold Shift-Command-4, then press the Space bar. The pointer will after that change to a camera icon.
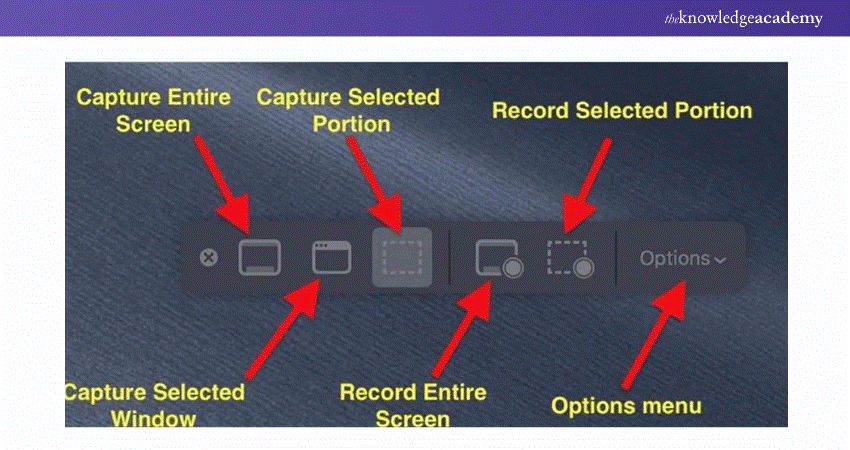
3) Capture the Window or Menu: Click the window or menu to capture it. To exclude the window's shadow, hold the Option key while clicking.
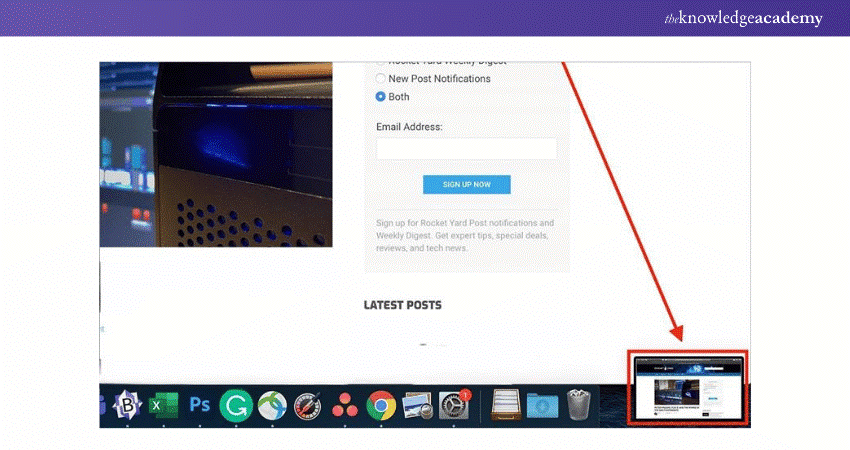
4) Edit or Save: If a thumbnail appears in the screen corner, click it to edit the screenshot. Otherwise, wait for it to save to your desktop.
How to View Screenshots on Mac?
To view Screenshots on Mac:
1) Desktop: Screenshots are saved here by default.
2) Preview: Open via File > Open to view.
3) Finder: Search for ".png" or the file name.
4) Screenshot Utility: Press Shift + Command + 5 to manage files.
Different Methods to Take Screenshot on Mac
You can use several methods to take screenshots on your Mac, depending on your specific needs and preferences. Here are some of the most effective methods to capture effective Mac screenshots:
1) Keyboard Shortcuts
Mac offers several keyboard shortcuts for taking screenshots. For example, pressing Shift-Command-3 captures the entire screen, while Shift-Command-4 allows you to select a specific area.
2) Grab Application
The Grab application, in the Utilities folder, allows you to take entire screen screenshots. It also offers a timed screenshot option, which can be useful for capturing menus or other transient elements.
3) Preview Control
Using the Preview application, you can take screenshots by selecting "Take Screenshot" from the File menu. This method allows you perform entire screen capture and then immediately edit the screenshot within Preview.
4) Save to Clipboard
To directly save a screenshot to the clipboard, press Control along with the standard screenshot shortcuts (e.g., Control-Shift-Command-3). This allows you to paste the screenshot directly into documents or image editors without saving it as a file first.
5) Custom Save Location
You can customise your screenshot locations by using the Screenshot tool (Shift-Command-5). This tool provides options to save screenshots to specific folders, the desktop, or even directly to applications like Mail or Messages.
6) Third-party Apps
There are numerous third-party applications that are available for taking screenshots on a Mac. Apps like Snagit and Lightshot offer advanced features such as Cloud storage integration.
7) Cloud Sharing
Some screenshot tools, including built-in options and third-party apps, offer cloud-sharing capabilities. This allows you to automatically upload your screenshots to Cloud services, making it easy to share and access your images from any device.
Develop full-stack JavaScript apps using MEAN Stack Web Development Training- Sign up today!
Common Challenges When Making Screenshots on a Mac
While taking screenshots on a Mac is generally straightforward, there are certain obstacles users may encounter that can severely complicate the process. Here are some common issues arising in the process and their explanations:
1) Lack of Dedicated "Print Screen" Button: Unlike Windows keyboards, Macs do not have a "Print Screen" button. Users must remember specific keyboard shortcuts for the entire screen or Shift-Command-4 for a portion, which can be confusing for new users or those switching from Windows.
2) Capturing Transient Elements: Capturing transient elements like dropdown menus or tooltips can be difficult. While the Grab application and timed screenshot options can help, they are not as intuitive as built-in shortcuts, making it harder to capture these elements effectively.
3) Managing and Organising Screenshots: Managing and organising screenshots can be cumbersome, especially if the default save location is cluttered. Users often need to manually move files to their desired locations or use third-party applications to streamline the process.
What is the Easiest Way to Copy a Screenshot on a Mac?
To copy a screenshot for pasting into an email or on another device, press and hold the Control key while using the screenshot shortcut. For a full-screen capture, press “Control + Shift + Command + 3”. This will copy the screenshot to your clipboard, ready to be pasted anywhere.
Is There a Snipping Tool on a Mac?
Yes, Mac has a built-in snipping tool called Screenshot Utility. Press Shift + Command + 5 to open it, allowing you to capture the full screen, a window, or a selected portion. It also includes options for screen recording and changing save locations, offering functionality like the Windows Snipping Tool.
Unlock advanced Node.js skills for career growth- Join our Node.JS Course today!
Conclusion
Mastering the various methods of How to Screenshot on Mac is essential for enhancing your productivity, whether you are capturing images for work or personal use. Moreover, with various built-in tools and third-party apps available, you can customise your screenshot experience to fit your needs. Keeping your system updated also ensures smooth functionality, so knowing How to Update MacBook iOS can help maintain optimal performance. Are you all set to streamline your Mac screenshot workflow?
Learn advanced JavaScript and jQuery techniques with our Javascript And JQuery Training-Register today!
Frequently Asked Questions
How to Cut an Image on a Mac?

To cut an image on a Mac, open the image in the Preview app. Use the selection tool to highlight the area you want to keep, then click on the "Tools" menu and choose "Crop." This will trim the image to the selected region. If you wish to save the cropped image, select "File" and then "Save" or "Save As."
How Do I Enable Screenshotting on My Mac?

Screenshotting is enabled by default on a Mac. To take a screenshot, press the shortcut Shift-Command-3 to capture the complete screen or Shift-Command-4 to capture a selected area. If you do not see any response, ensure that your macOS is up to date, and check your keyboard shortcuts in System Preferences under "Keyboard" settings.
What are the Other Resources and Offers Provided by The Knowledge Academy?

The Knowledge Academy takes global learning to new heights, offering over 30,000 online courses across 490+ locations in 220 countries. This expansive reach ensures accessibility and convenience for learners worldwide.
Alongside our diverse Online Course Catalogue, encompassing 19 major categories, we go the extra mile by providing a plethora of free educational Online Resources like News updates, Blogs, videos, webinars, and interview questions. Tailoring learning experiences further, professionals can maximise value with customisable Course Bundles of TKA.
What is The Knowledge Pass, and How Does it Work?

The Knowledge Academy’s Knowledge Pass, a prepaid voucher, adds another layer of flexibility, allowing course bookings over a 12-month period. Join us on a journey where education knows no bounds.
What are the Related Courses and Blogs Provided by The Knowledge Academy?

The Knowledge Academy offers various App & Web Development Training, including IOS App Development Course, Node.js Course, and JavaScript and JQuery Training. These courses cater to different skill levels, providing comprehensive insights into Web3 Gaming.
Our Programming & DevOps Blogs cover a range of topics related to software development and infrastructure management, offering valuable resources, best practices, and industry insights. Whether you are a beginner or looking to advance your programming and DevOps skills, The Knowledge Academy's diverse courses and informative blogs have got you covered.
Upcoming Programming & DevOps Resources Batches & Dates
Date
 iOS App Development Course
Thu 29th May 2025
Thu 24th Jul 2025
Thu 25th Sep 2025
Thu 27th Nov 2025


 Top Rated Course


 If you wish to make any changes to your course, please


