


 Top Rated Course

We may not have the course you’re looking for. If you enquire or give us a call on 01344203999 and speak to our training experts, we may still be able to help with your training requirements.
Photo Retouching Techniques: The Magic of Lighting
Eliza Taylor 08 February 2025In this blog, you will learn about Photo Retouching Techniques, which are the art of enhancing and improving the quality of digital images. Discover the importance of Photo Retouching, essential techniques, and the difference between retouching and editing. Elevate your photography, whether you’re a professional or an enthusiastic amateur.
Training Outcomes Within Your Budget!
We ensure quality, budget-alignment, and timely delivery by our expert instructors.
Have you ever wondered how photographers achieve those flawless, stunning images? What secrets lie behind the perfect portraits you see in magazines and online? The answer often lies in the art of Photo Retouching Techniques. This fascinating process transforms ordinary photos into extraordinary works of art, enhancing their quality and appeal.
Have you ever paused and admired a particular photograph owing to its remarkable quality? They are so flawless that helps you wonder how are those portraits in magazines captured with such perfection? The key here is in the art of Photo Retouching Techniques. These techniques totally transform ordinary photos into some amazing portraits, enhancing their quality and aesthetics.
So, how do you get started with Photo Retouching? What tools and methods should you use to achieve those stunning results? In this blog, let’s explore essential techniques and tips to unlock your images' full potential in this guide. Dive in and discover how to turn your photos from ordinary to extraordinary with the power of Photo Retouching Techniques.
Table of Contents
1) What is Photo Retouching?
2) Importance of Photo Retouching
3) Essential Photo Retouching Techniques
4) Difference between Photo Retouching and Editing
5) Conclusion
What is Photo Retouching?
Photo Retouching is the process of enhancing digital photos and adding quality to them by corrections and certain edits. Photo Retouching can be done for various reasons, including:
a) The removal of unwanted components like dust, scratches, blemishes, creases and such.
b) Enhancing the image by altering the sharpness, contrast, and brightness.
c) Modifying colour settings like colour, saturation, hue, temperate and other values.
d) Adding or changing effects like filters, textures, and gradients.
e) Cropping, scaling, rotating, and other methods of reshaping or enlarging an image.
f) Image manipulation techniques include cloning, warping, and distortions.
Photo Retouching can be done using various software products like Photoshop, Lightroom, and GIMP. In the GIMP vs Photoshop landscape, both offer robust tools for photo retouching, though their interfaces and workflows differ. These programs offer many features and tools to help you complete different Photo Retouching tasks successfully. Some of the most common Photo Retouching Tools you'll use include:
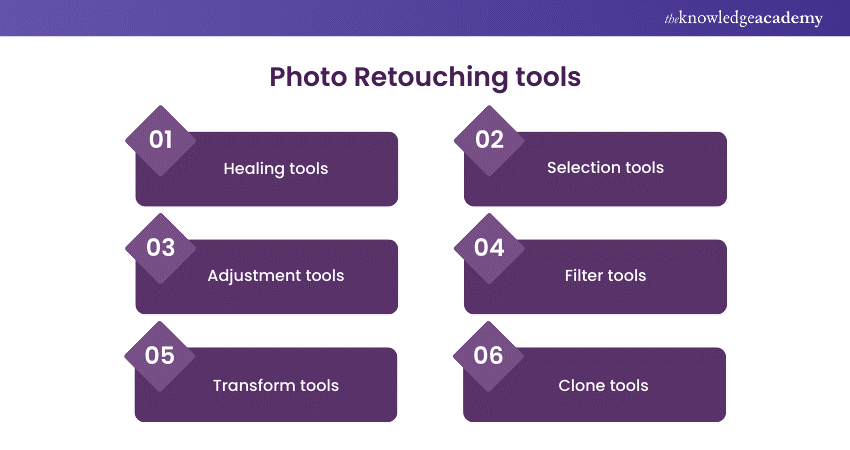
a) Healing tools, such as spot healing, healing brush, patch, etc. These tools help you remove or replace unwanted pixels with similar ones from the surrounding area.
b) Selection tools, such as marquee, lasso, magic wand, etc. These tools help you select specific areas of the image that you want to modify or isolate.
c) Adjustment tools, such as curves, levels, colour balance, etc. These tools help you change the tonal and colour values of the image or a selected area.
d) Filter tools, such as blur, sharpen, noise, etc. These tools help you apply various effects to the image or a selected area.
e) Transform tools, such as crop, scale, rotate, etc. These tools help you change the shape or size of the image or a selected area.
f) Clone tools, such as clone stamps, pattern stamps, etc. These tools help you copy pixels from one area of the image to another.

Importance of Photo Retouching
Photo Retouching is an important skill for any photographer, whether amateur or professional. Photo Retouching can help you achieve various goals, such as:
a) Improving the quality of your images by fixing the flaws and enhancing the details.
b) Expressing your creativity by adding your personal touch and style to your images.
c) Communicating your message by highlighting the main subject and creating the desired mood and atmosphere.
d) Meeting the expectations of your clients by delivering images that match their vision and requirements.
Photo Retouching can elevate your images from good to great, showcasing your skills and expertise and helping you distinguish yourself. This process significantly enhances the final result of your images.
Unlock the power of Lightroom – Start your journey to stunning photos with our Lightroom Course now!
Essential Photo Retouching Techniques
There are many Photo Retouching Techniques that you can use to improve your images, but some of the most important ones are:
1) Spot healing for blemish removal
Spot healing is an easy and effective photo-retouching technique used to remove small blemishes like dust, spots, scratches, and acne. It works by automatically replacing the selected pixels with similar ones from the surrounding area, creating a smooth result.
To use spot healing:
1) Select the spot healing tool from the toolbar
2) Adjust the brush size and hardness to fit your needs
3) Click on the area you want to heal
Alternatively, you can use the healing brush tool, which lets you manually select the source area you want to replicate.
2) Frequency separation for skin smoothing
Frequency separation is a powerful photo-retouching technique that smoothens the skin while keeping the natural texture and details. It involves splitting the image into two layers:
a) Low-Frequency Layer: Contains colour and tone.
b) High-Frequency Layer: Contains texture and detail.
By working on these layers separately, you can smooth the skin tone and remove blemishes on the low-frequency layer while keeping the skin texture and pores on the high-frequency layer.
To use frequency separation:
1) Duplicate the original image layer twice
2) Name the layers "low-frequency" and "high-frequency"
3) Apply a Gaussian blur filter to the low-frequency layer
4) Apply an image command to the high-frequency layer
5) Change the blending mode of the high-frequency layer to linear light
6) Use the healing or clone tools to retouch the skin on each layer
Want to master photo retouching? Learn How to Become a Photo Retoucher now!
3) Dodge and burn for contrast enhancement
Dodge and burn are classic and versatile Photo Retouching Techniques used to enhance the contrast and depth of images by lightening or darkening specific areas. This technique works by applying exposure adjustments with a soft brush.
To use dodge and burn:
1) Develop a new layer and fill it with 50% grey
2) Change the layer's blending mode to overlay
3) Select the dodge tool (to lighten) or the burn tool (to darken) from the toolbar
4) Adjust the brush size and hardness to fit your needs
5) Paint over the areas you want to lighten or darken
You can also use the curves or levels tool for more precise and subtle dodge and burn effects.
4) Eye retouching for a striking gaze
Eye retouching is a key Photo Retouching technique that makes subjects look more attractive and expressive by enhancing the eyes. This involves applying various adjustments and corrections to the eyes, such as:
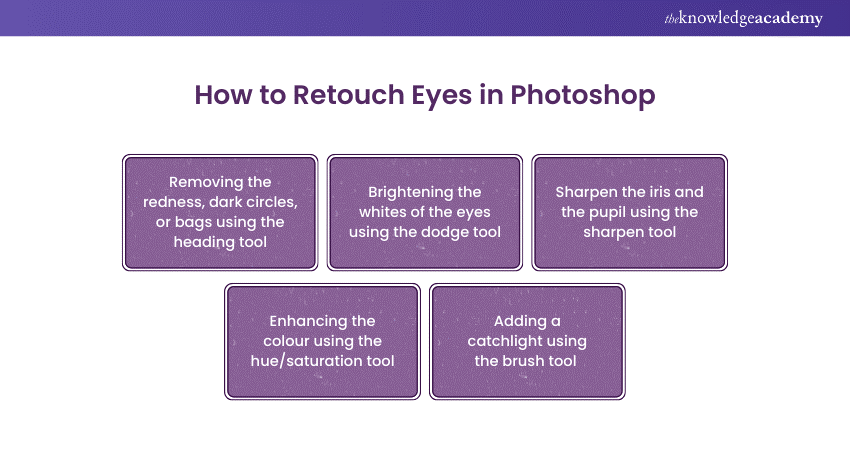
a) Removing the redness, dark circles, or bags under the eyes using the healing tools or the clone tools.
b) Brightening the whites of the eyes, using the dodge tool or the curves tool.
c) Sharpen the iris and the pupil using the sharpen tool or the high-pass filter.
d) Enhancing the colour and the contrast of the iris using the hue/saturation tool or the colour balance tool.
e) Adding a catchlight or a sparkle to the eyes using the brush tool or the gradient tool.
5) Toning with colour balance, levels, and hue/saturation
Toning is a creative Photo Retouching technique used to change the mood and atmosphere of your images by altering colours. It works by applying different colour adjustments to the entire image or specific areas. Some of the tools you can use for toning include:
1) Colour balance: Adjusts the colour balance of shadows, mid-tones, and highlights by changing the cyan, magenta, and yellow values.
2) Levels: Changes the tonal range and contrast by adjusting the black, white, and grey values.
3) Hue/Saturation: Alters the hue, saturation, and lightness using sliders or the colour picker.
Other tools and features like curves, selective colour, and gradient maps can also be used to create more complex and sophisticated toning effects.
6) Resizing for optimal dimensions
Resizing is a basic yet crucial Photo Retouching technique that changes the size and resolution of your images to fit your needs. It works by adjusting the number of pixels and the aspect ratio using transform tools or the image size command.
To resize an image:
1) Select the crop tool or scale tool from the toolbar
2) Set the dimensions of the image
3) Apply the changes
You may also utilise the image size command to change pixel dimensions and resolution by entering specific values or choosing from preset options.
7) Clone stamp for object removal
The clone stamp is a useful and efficient picture editing technique for removing unwanted components from your images, such as wires, poles, or individuals. It works by duplicating pixels from one area of the image to another, resulting in a smooth look.
To use the clone stamp:
1) Choose the clone stamp option from the toolbar
2) Adjust the brush size and hardness to fit your needs
3) Hold the Alt key and click on the source area you want to copy
4) Click on the target area where you want to apply the copied pixels
8) Highlight adjustment using curves
Highlight adjustment is a subtle yet effective Photo Retouching technique to improve the lighting and exposure of your images by adjusting highlights and shadows. It works by changing the shape of the tonal curve using the curves or levels tool.
To use highlight adjustment:
1) Create a new adjustment layer.
2) Select the curves tool or levels tool.
3) Drag the endpoints or midpoints of the curve to lighten or darken the highlights and shadows.
4) Optionally, use the eyedropper tool to pick the image's white point and black point, adjusting the curve based on these selections.
Difference between Photo Retouching and editing
Photo Retouching and editing are often used interchangeably, but they have different meanings and purposes.
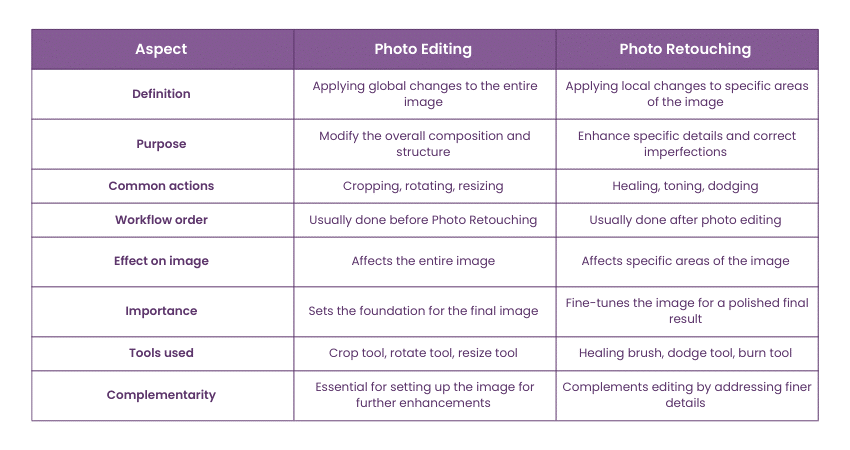
1) Photo Editing: This involves making global changes to the entire image, such as cropping, rotating, or resizing. It is usually done first and affects the whole image.
2) Photo Retouching: This involves making local changes to specific areas of the image, like healing blemishes, toning, or dodging. It is usually done after editing and targets specific parts of the image.
Unlock your creative potential – Join our Photo Retouching Training today!
Conclusion
Photo Retouching Techniques are essential tools for transforming your images from ordinary to extraordinary. Mastering these strategies not only enhances the quality of your photos but also allows you to express your unique creative vision. Understanding the difference between Photo Retouching and editing helps you use both to achieve stunning, professional results.
Bring your creations to life – Join our Animation and Design Training now!
Frequently Asked Questions
What are the best Photo Retouching software applications that I can use?
There are many Photo Retouching software applications that you can use, based on your requirements and interests. Some of the most popular and widely used ones are:
a) Photoshop
b) Lightroom
c) GIMP
How can I learn Photo Retouching skills and techniques?
There are many ways that you can learn Photo Retouching skills and techniques, such as:
a) Read books, blogs, articles, and tutorials on Photo Retouching
b) Watching videos, webinars, podcasts, and courses on Photo Retouching.
c) Practice Photo Retouching on your own images and experiment.
d) Seeking feedback and advice from other photo retouches.
What are the other resources and offers provided by The Knowledge Academy?
The Knowledge Academy takes global learning to new heights, offering over 3,000 online courses across 490+ locations in 190+ countries. This expansive reach ensures accessibility and convenience for learners worldwide.
Alongside our diverse Online Course Catalogue, encompassing 19 major categories, we go the extra mile by providing a plethora of free educational Online Resources like News updates, Blogs, videos, webinars, and interview questions. Tailoring learning experiences further, professionals can maximise value with customisable Course Bundles of TKA.
What is the Knowledge Pass, and how does it work?
The Knowledge Academy’s Knowledge Pass, a prepaid voucher, adds another layer of flexibility, allowing course bookings over a 12-month period. Join us on a journey where education knows no bounds.
What are the related courses and blogs provided by The Knowledge Academy?
The Knowledge Academy offers various Animation and Design Courses, including Photo Retouching Training, Design Patterns Training and many more. These courses cater to different skill levels, providing comprehensive insights into 2D Animation Styles.
Our Office Applications Blogs cover a range of topics related to Photo Retouching offering valuable resources, best practices, and industry insights. Whether you are a beginner or looking to advance your knowledge on Photo Retouching, The Knowledge Academy's diverse courses and informative blogs have you covered.
Upcoming Office Applications Resources Batches & Dates
Date
 Photo Retouching Training
Photo Retouching Training
Fri 11th Apr 2025
Photo Retouching Training
Fri 13th Jun 2025
Photo Retouching Training
Fri 15th Aug 2025
Photo Retouching Training
Fri 10th Oct 2025
Photo Retouching Training
Fri 12th Dec 2025
 If you wish to make any changes to your course, please


