We may not have the course you’re looking for. If you enquire or give us a call on +1800812339 and speak to our training experts, we may still be able to help with your training requirements.
We ensure quality, budget-alignment, and timely delivery by our expert instructors.

Blender, a powerful open-source tool, offers endless possibilities for creative expression. Understanding How to Render in Blender is vital to your rendering process, whether for a static image or an animated sequence.
Moreover, the rendering process is a seemingly daunting yet rewarding process with steps demonstrated to generate visually stellar results. Learn How to render in Blender and create stunning visuals by setting up scenes, materials, and lighting, and then render life-like images and animations effortlessly.
Table of Contents
1) An overview of the Rendering process
a) Image Render in Blender
b) Animation Render in Blender
2) Steps on How to Render in Blender
a) Scene preparation
b) Render engine selection
c) Rendering process launch
d) Patience
e) Save your Render
3) How you can preview your Render in Blender
4) Conclusion
An overview of the Rendering process
Rendering in Blender is the intricate process of converting a 3D scene into a 2D image or animation. It's akin to translating an artist's vision onto a digital canvas. The process begins with setting up the scene, which involves placing objects, adjusting lighting, and applying materials and textures.
Once the scene is set, the user selects a rendering engine, such as Cycles for photorealistic results or Eevee for real-time rendering. The camera's perspective is then configured to frame the scene properly.
Finally, the rendering process is initiated, and Blender's algorithms work to create a stunning visual representation of the 3D model. The rendering process in Blender is both an art and a science, allowing creators to bring their imaginative concepts to life in a visually captivating way.
Image Render in Blender
An image Render in Blender is the process of converting a 3D scene into a 2D image, employing engines like Cycles and Eevee. It involves the configuration of elements such as lighting, camera perspective, materials, and textures to create a lifelike or stylised visual representation, used widely in various creative industries.
Here is a list giving a detailed description of image rendering in in Blender, as shown below:
a) Rendering engine selection: Blender provides different engines like Cycles and Eevee, each with unique qualities.
b) Scene setup: This involves placing objects, applying materials, and setting up lighting to create a lifelike scene.
c) Camera configuration: The camera's perspective is chosen, framing the scene and determining the viewpoint for the render in Blender.
d) Lighting control: Lighting can be adjusted to create different moods in Blender, much like a film set.
e) Materials and textures application: Materials and textures add realism, defining how surfaces look and feel.
f) Resolution setting: Users can select the desired image size and quality.
g) Render preview: Blender enables a quick view of the final image for you to check for any necessary adjustments.
h) Render settings configuration: Detailed controls like sampling rates, noise reduction, and ray tracing are adjusted here.
i) Image format selection: The output can be saved in various formats like JPEG, PNG, or TIFF.
j) Rendering execution: The actual process of creating the image in Blender, transforming the 3D scene into a 2D representation.
k) Post-processing options: Tools to enhance or adjust the rendered image, including colour correction or adding effects.
l) File saving and export: The final rendered image can be saved to the computer or exported to different platforms.
Animation Render in Blender
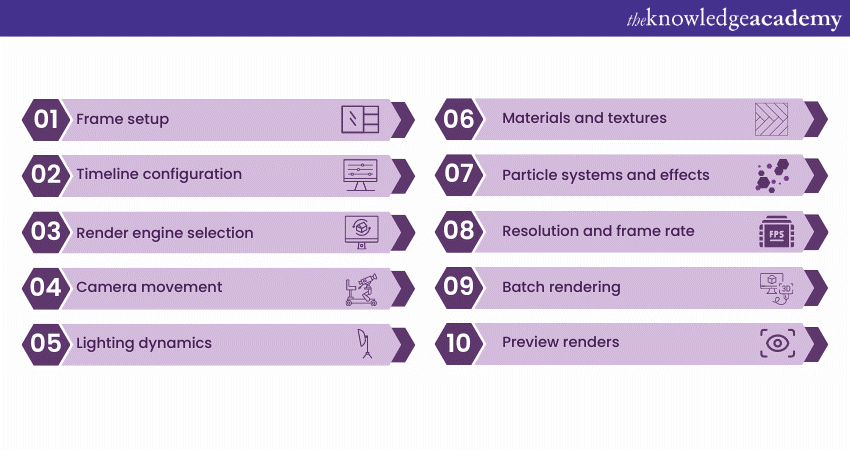
An animation Render in Blender is the process of turning 3D scenes into moving visuals. It encompasses setting up frames, configuring timelines, selecting rendering engines, and applying effects. The result is a fluid sequence that brings models to life, widely utilised in filmmaking, gaming, and other creative digital industries.
Here is a list giving a detailed description of animation rendering in in Blender, as shown below:

a) Frame setup: Animation rendering in Blender involves setting up multiple frames to create motion.
b) Timeline configuration: Users set keyframes on a timeline to define movement, transitions, and effects.
c) Render engine selection: Options like Cycles and Eevee in Blender offer different rendering styles for animation.
d) Camera movement: The camera can be animated to follow the action or provide various angles.
e) Lighting dynamics: Animating lights adds depth and realism to the scene in Blender
f) Materials and textures: Applying these creates believable surfaces, enhancing the visual appeal.
g) Particle systems and effects: Blender supports complex particle simulations and effects for added dynamism.
h) Resolution and frame rate: Selecting the appropriate resolution and frame rate is crucial for smooth playback.
i) Batch rendering: Blender allows the automatic rendering of multiple frames, essential for animation.
j) Preview renders: Quick previews help in refining animation before the final render.
k) Post-processing and Compositing: Combining rendered sequences with effects or other media in the compositor.
l) Real-time previews with Eevee: Eevee enables real-time previews, aiding in the animation design process.
m) Integration with sound: Soundtracks and sound effects can be synchronised with the animation in Blender
n) 3D to Motion translation: Transforming 3D objects and scenes into moving visuals.
Learn the importance of modular level design, by signing up for the Blender 3D Modelling for Unity Training now!
Steps on How to Render in Blender
Here are the various steps you can follow to Render in Blender:

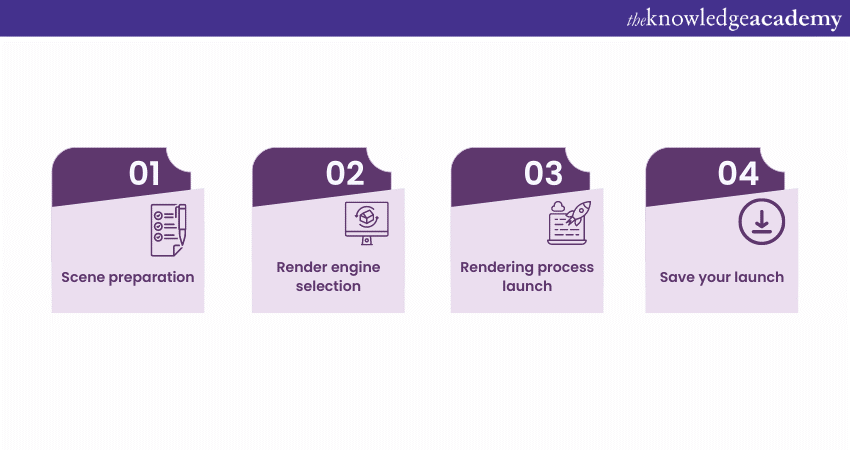
Scene preparation
Preparing a scene in Blender involves positioning 3D objects, setting up lighting, applying materials and textures, and configuring the camera's perspective. These elements work together to create a virtual environment that mirrors real-world spaces, setting the stage for rendering an image or animation that achieves the desired visual effect.
Render engine selection
In Blender, selecting a render engine is crucial for achieving the desired visual output. Options like ‘Cycles’ offer photorealistic rendering, while Eevee provides real-time results. The choice depends on the project's needs and the effect sought, impacting factors such as lighting, materials, and overall processing time.
Rendering process launch
Launching the rendering process in Blender involves finalising the scene setup, choosing the render engine, and configuring settings like resolution and output format. Once everything is aligned, the render button is pressed, initiating the intricate calculations that transform the 3D scene into a 2D image or animated sequence.
Save your Render
In Blender, after completing the rendering process, you can save the render by navigating to the 'Image' menu and selecting 'Save As'. You can then choose your desired file format and location, ensuring that your visual creation is safely stored for future use or editing.
How you can preview your Render in Blender
Here are the steps that you can follow to preview your Render in Blender, as shown below:
a) Viewport shading: By switching to the Rendered mode in the viewport, users can see a real-time preview.
b) Render preview button: Clicking this provides a quick rendered preview of the scene.
c) Preview region: Users can render only a portion of the view for a faster preview.
d) Eevee engine: Utilising Eevee for real-time preview allows users to see how lighting and materials interact.
e) Material preview: This shows how materials will appear in the final render.
f) Resolution settings: Adjusting these allows previews at different quality levels.
Conclusion
You have now understood the key steps on How to Render in Blender, thereby empowering your process to generate captivating visuals. From the stage of scene preparation to choosing the engine for rendering, and saving the final rendered product, every aspect contributes to the immersive visual scape that you can create.
Learn about 3D effects in games and videos, by signing up for the Blender Creator Training now!
Frequently Asked Questions
Upcoming Office Applications Resources Batches & Dates
Date
 Articulate Storyline Training
Fri 7th Mar 2025
Fri 23rd May 2025
Fri 18th Jul 2025
Fri 12th Sep 2025
Fri 12th Dec 2025


 Top Rated Course


 If you wish to make any changes to your course, please


