We may not have the course you’re looking for. If you enquire or give us a call on +1800812339 and speak to our training experts, we may still be able to help with your training requirements.
Training Outcomes Within Your Budget!
We ensure quality, budget-alignment, and timely delivery by our expert instructors.

In this comprehensive guide for beginners, we'll explore the world of React Props. If you're just starting your journey into React, understanding how to use React Props is a fundamental step. We'll cover what React Props are, how to use them effectively, and why they are crucial in creating versatile web applications.
In the web development sphere, especially when building with React, the term "React Props" is often heard and talked about. But what exactly are React Props, and why are they so important? Imagine it as a way for components to talk to each other, sharing important details to make your web application work as intended.
In this blog, we will break down the concepts of React Props, how to declare and use them, Prop Types, etc., into simple parts. Read more!
Table of Contents
1) Understanding React Props
2) How do you declare and use Props?
3) Default Props
4) Prop Types
5) How to use React Props with Source Code
6) How to use Props with Destructuring?
7) React Prop pitfalls
8) Conclusion
Understanding React Props
In React, "props" is short for "properties," and they play a vital role in how components communicate and share information with each other. Think of components as building blocks of a web application. These components often need to talk to each other, and that's where props come in.
React props are like messengers. They carry data from one component to another. When a parent component wants to share some information with its child component, it does so by using props. This information can be various things, like text, numbers, or even more complex data.
How do you declare and use Props?
The below steps will help you understand the basics of declaration and the use of Props:
a) Declaration of Props: When working with React, declaring props is the first step to passing data from one component to another. In simpler terms, think of props as containers for information that you want to share. To declare a prop, you give it a name, much like labelling a box to know what's inside. This name becomes the key that the child component uses to access the data.
b) Passing data via Props: Once you've declared a prop, you need to fill it with the data you want to share. This is akin to putting the message inside the labelled box. When you render the child component, you attach the specific data you want to share to the "message" prop. This is typically done in the parent component where you're rendering the child.
c) Receiving and using data from Props: In the child component, it's time to access and make use of the data stored in the "message" prop. This is like opening the box labelled "message" to see what's inside. You can display the message, manipulate it, or perform any action that your component needs with this data.

Default Props in React
In React, default Props are like a safety net for your components. They provide a predefined value for a prop, ensuring that if that prop doesn't receive a specific value. Imagine you're making a sandwich. The bread is a default component of the sandwich. If you forget to add any special filling (the prop), you'll still have a plain but edible sandwich with the default component (bread). Here's a breakdown:
a) Safety net: Default Props act as a safety net. They are there in case you forget to pass a value to a prop. This prevents your application from crashing or displaying unexpected errors.
b) Predefined value: When you declare a default prop, you specify a value for it. This value serves as a backup in case no other value is provided. It's like having a default choice.
c) Preventing errors: Without default Props, if a component expects a prop to have a value and it doesn't receive one, it can lead to errors or unexpected behaviour. Default Props help you avoid such issues.
d) Flexibility: Default Props also make your code more flexible. They allow you to set sensible defaults, but if needed, you can override them by passing a different value to the prop when rendering the component.
Prop Types
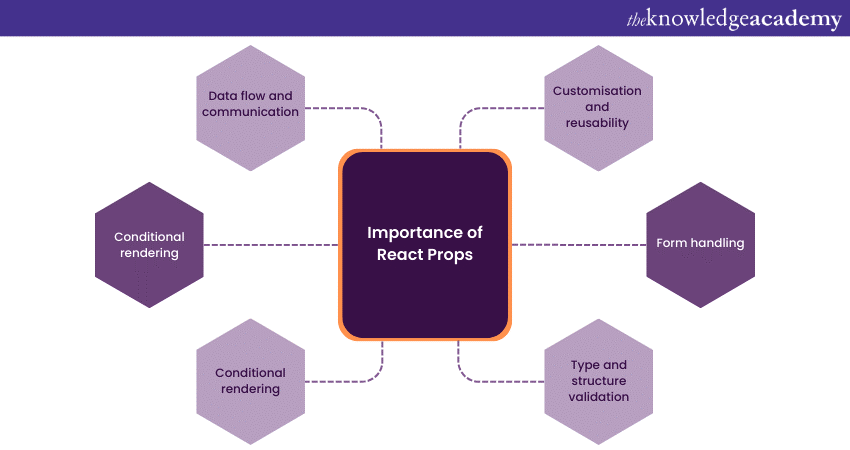
In React, "Prop Types" are like a set of rules that help you ensure that the data your components receive is of the right type and shape. This can be crucial in preventing bugs and improving the reliability of your code. Discussed below are some of the importance of Prop Types in React:
a) Type validation: Prop Types are used to validate the types of data that your component expects to receive through its Props. Think of it as a way to double-check that the data you get is the type you anticipated.
b) Ensuring data shape: It's not just about the data type; Prop Types also help in ensuring that the data has the expected structure. For example, if your component expects an object with specific properties, Prop Types can help confirm that the incoming data matches this structure.
c) Early error detection: One of the big advantages of Prop Types is that they identify issues early. If a component receives data that doesn't match the defined types or shapes, React will throw a warning or error during development. This means you can spot and fix problems before they cause unexpected behaviour in your application.
d) Improved documentation: Prop Types also serve as a form of documentation for your components. They make it clear what kind of data the component requires and what to expect when working with it. This can be especially helpful in larger projects with multiple developers.
Take the next step in your career with our Mobile App Development Training. Join today!
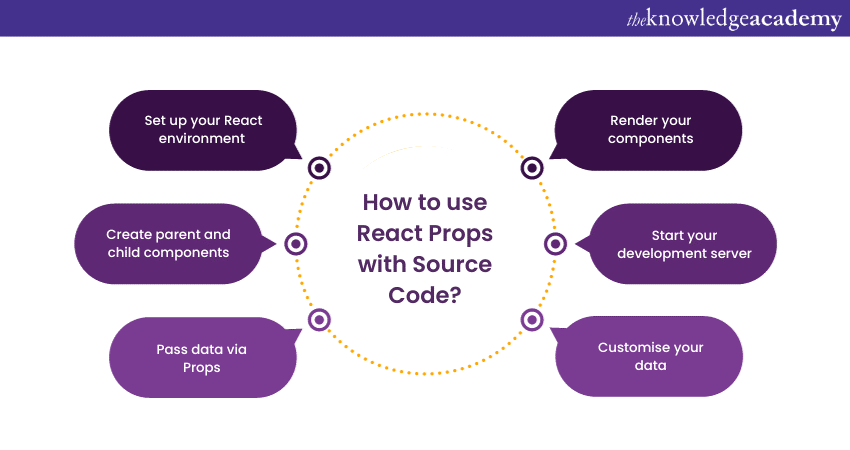
How to use React Props with Source Code?
React Props are a fundamental concept in building dynamic and interactive web applications. They allow you to pass data between different parts of your application, making it flexible and powerful. In this step-by-step guide, we'll walk you through using React Props with practical examples and source code.

Step 1: Set up your React environment
Before you can start working with React Props, you need to set up your development environment. Ensure you have Node.js and npm installed. Create a new React application using Create React App or your preferred method.
Step 2: Create parent and child components
In React, you often have a parent component that passes data to a child component. For our example, let's create two components: ParentComponent and ChildComponent.
|
import React from 'react'; const ParentComponent = () => { const message = "Hello from Parent!"; return ( ); }; export default ParentComponent; // ChildComponent.js import React from 'react'; const ChildComponent = (props) => { return ( {props.message} );
}; export default ChildComponent; |
Step 3: Pass data via Props
In the ParentComponent, you declare a variable called message and pass it to the ChildComponent as a prop named message. In the ChildComponent, you can access this data through the Props parameter. The value of props.message will be "Hello from Parent!"
Step 4: Render your components
To see your components in action, render the ParentComponent in your main application file.
|
import React from 'react'; import ParentComponent from './ParentComponent'; function App() { return ( ); } export default App; |
Step 5: Start your development server
Now, run your development server using npm start. You should see your parent component rendering the child component with the message "Hello from Parent!".
Step 6: Customise your data
React Props offers the flexibility to pass different data to the child component based on your needs. You can change the message variable in the ParentComponent to display any message you want.
Unlock your potential in web development with our React Native Training! Elevate your skills today!
How to use Props with Destructuring?
In React, when you want to access and use Props in a component, you can employ a technique called "Destructuring." This approach simplifies the process of extracting data from Props, making your code cleaner and more readable. Here's how you can use Destructuring to work with Props in a React component:
a) Function argument: Instead of writing this.props.propName every time you want to access a prop, you can destructure it right in the function argument. For example:
|
// Now you can directly use `propName` in your component } |
b) Simplifying your component: Destructuring not only simplifies your code but also makes it more readable. Instead of repeatedly referring to this.props, you can work with the extracted variables directly within your component's function body.
React Prop pitfalls
Discussed below are some of the common disadvantages of React Props.
a) Prop drilling: In complex component hierarchies, you may face prop drilling, where you have to pass Props through multiple intermediary components to reach the intended child component. This can make your code harder to maintain and understand.
b) Overly nested components: Excessive nesting of components can lead to readability issues. Keeping components shallow and focused is crucial. Deeply nested components can make it challenging to manage and debug your application.
c) Lack of Prop validation: Skipping the validation of prop types using PropTypes or TypeScript can lead to unexpected errors and debugging difficulties. Properly defined prop types help catch issues early during development.
d) Overusing default Props: While default Props can be helpful, overusing them can hide issues where components aren't receiving the correct data. It's important to use default Props judiciously and ensure that your components receive the right data.
e) Mutating Props: React Props should be treated as read-only. Modifying them directly can lead to unpredictable behaviour in your application. Instead, create and use state within your component to manage mutable data.
f) Prop confusion: Similar prop names in different components can lead to confusion. Make sure your prop names are clear and specific to avoid unintentional overwriting or misinterpretation.
g) Misusing state as Props: Sometimes, developers use component state when Props would be more suitable. This can lead to inconsistencies and difficulties in tracking the source of truth for your data. Use state for component-internal data and Props for passing data between components.
Conclusion
In this blog, we've explored fundamental aspects of React Props. They are labels attached to data, ensuring it reaches the right destination and allowing components to share information. Understanding how to declare and use Props, the significance of default Props, the use of prop types, and employing destructuring for Props are essential skills when working with React. Hope you enjoyed reading our blog.
Unlock your skills in app and web development with our expert training courses on App & Web Development Training. Start your journey today at The Knowledge Academy.
Frequently Asked Questions
Upcoming Programming & DevOps Resources Batches & Dates
Date
 React Native Training
Thu 16th Jan 2025
Thu 6th Mar 2025
Thu 22nd May 2025
Thu 24th Jul 2025
Thu 4th Sep 2025
Thu 18th Dec 2025


 Top Rated Course


 If you wish to make any changes to your course, please


