


 Top Rated Course

We may not have the course you’re looking for. If you enquire or give us a call on +44 1344 203 999 and speak to our training experts, we may still be able to help with your training requirements.
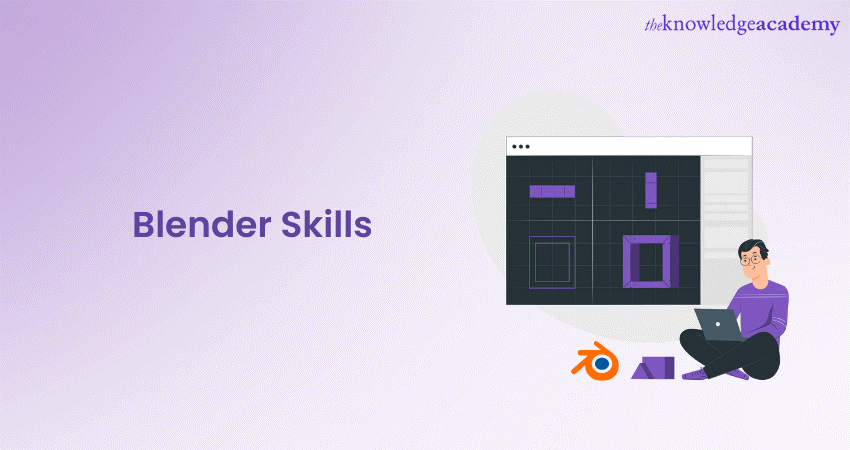
Blender Skills: A Comprehensive Overview
Sienna Roberts 25 September 2023Discover the art of Blender Skills! Uncover the secrets to creating 3D models and animations in this comprehensive blog. From beginner basics to advanced techniques, we'll guide you through the world of Blender, helping you sharpen your Blender Skills and unleash your creativity like never before. Read more to find out!

Training Outcomes Within Your Budget!
We ensure quality, budget-alignment, and timely delivery by our expert instructors.
Table of Contents
Blender is a robust open-source tool used primarily for 3D modelling, animation, and rendering. However, this only scratches the surface of its capabilities as an ever-growing community showcases a wide array of Blender Skills. A comprehensive overview of these skills can help you master this animation tool and navigate its vast ecosystem.
According to Statista, the market for 3D animation will continue to grow, surpassing 21.31 billion GBP by 2026. This demonstrates the scope of animation tools like Blender in the rising popularity of animation. Are you curious about how to improve your Blender Skills? Keep reading this blog and unlock your creative potential in modelling, texturing, animation, and rendering.
Table of Contents
1) Fundamental Blender Skills
2) Advanced Blender Skills
3) Texturing and materials
4) Lighting and rendering
5) Animation and rigging
6) Simulation and effects
7) Conclusion
Fundamental Blender Skills
Blender is a powerhouse of 3D design, and to harness its full capabilities, one must start with the basics. Layout is your first port of call: it's essential to acquaint yourself with Blender’s intuitive interface. The viewport serves as a canvas, showcasing your 3D models and scenes in all their glory.
Adjacently, the timeline stands as a beacon for animators, mapping out the sequence of frames and events in Blender. Meanwhile, the outliner meticulously lists every object and piece of data, ensuring you never lose track of your elements. Complementing these is the properties panel, an indispensable feature that dives into the finer settings of each selected tool.
Venturing deeper, one cannot emphasise enough the importance of Hotkeys. Blender prides itself on efficiency, and this is epitomised by its keyboard shortcuts. A newcomer might feel overwhelmed, but mastering essential hotkeys can be the wind beneath your wings. Simple commands such as 'G' to move, 'S' to scale, and 'R' to rotate can drastically alter your productivity, transforming arduous tasks into seamless operations.
Learn to bring mesmerising art to life with our Animation and Design Training!
Advanced Blender Skills
Once you have mastered the basic skillset in Blender. You can dive into more complex practices. This segment on Advanced skills will help you bridge the foundational knowledge with intricate design nuances. Some of these skills are as follows:
Sculpting
Sculpting in Blender transcends the confines of basic modelling, offering an experience comparable to moulding digital clay. Here are some pivotal skills in this domain:
1) Brush techniques: The power of sculpting lies in the variety of brushes available in Blender. Brushes like 'Draw', 'Clay Strips', and 'Crease' allow for adding volume, shaping, and defining sharp features, respectively. Each brush has a distinct effect, and mastering when and how to use them is essential.
2) Dynamic Topology (Dynatopo) and remeshing: While sculpting in Blender, it's often necessary to add geometry dynamically where you need more detail. Dynatopo does exactly that, refining the mesh as you sculpt. Conversely, remeshing is about recalculating the mesh for a uniform distribution of vertices, ensuring consistent detail levels across the model.
3) Multi-resolution workflows: This approach allows modellers to work on different detail levels of a model simultaneously. Starting with a basic mesh, you can add finer details with each subsequent subdivision level without losing the flexibility of the lower resolution base.
Retopology
Retopology is a critical step, especially if the end model is intended for animation. It's all about:
1) Optimised mesh creation: After sculpting in Blender, you often end up with a mesh that has an unnecessarily high number of vertices or a chaotic flow of edge loops. Retopology is the process of drawing a new mesh over this sculpture. The goal? To have a lower, more manageable count of vertices and a logical flow of geometry that deforms well during animation.
2) Maintaining details: While the idea is to reduce complexity, it's also vital that the retopologised Blender model retains the artistic nuances of the original sculpture. Techniques like normal baking allow for the capture of high-resolution details onto the low-poly model, ensuring that none of the crafted intricacies are lost.
Learn to craft fascinating lore with our Articulate Storyline Training Masterclass!
Texturing and materials
In the field of 3D modelling, once a model has been sculpted and retopologised in Blender, the next critical step is to bring it to life with textures and materials. Here's a deeper dive into this process:
UV unwrapping
Before any texture can adhere to a Blender model, a 'map' must be created to dictate how 2D images wrap around the 3D shape. UV unwrapping is precisely this process. Picture peeling the skin from an orange and laying it flat; in this analogy, the orange represents your 3D model, and the flattened skin is the UV map. By carefully unwrapping a model, you ensure textures adhere seamlessly and accurately to its contours.
Shader nodes
Materials in Blender are designed using nodes — a visual way of defining how surfaces should look and react to light. These nodes can be connected in myriad ways, giving artists a vast playground to craft realistic or stylised materials. Key nodes include:
1) Principled BSDF: A versatile shader in Blender that can emulate a variety of materials, from shiny metals to translucent glass, using a single node.
2) Mix shader: This node lets you combine two shaders in Blender, allowing for nuanced effects, such as a surface that's both glossy and rough.
3) Texture coordinates: Dictate how textures are mapped onto your Blender model, be it based on the UV map, generated coordinates, or other methods.
Texture painting
For those who crave a unique touch, Blender offers a texture painting mode. Here, artists can paint details directly onto their 3D models, be it intricate patterns, wear and tear, or any other bespoke designs. This method offers a layer of personalisation that pre-made textures can't achieve, allowing for truly one-of-a-kind creations.
Make eye-catching animations for games with our Blender Creator Training!
Lighting and rendering
Illuminating a scene and generating a final image or animation from your 3D models is perhaps the most transformative step in the 3D creation process. This phase can truly bring your scenes to life or set the mood of your narrative. Let's dive into the essentials of lighting and rendering in Blender:
Light types
Lighting feature has a great effect on setting the mood, highlighting essential features and achieving realism or stylisation. In Blender, there are several light types, each offering distinct characteristics:
1) Point lights: Emitting light uniformly in all directions; think of point lights as light bulbs illuminating the space around them.
2) Spot lights: These project a cone of light in a specific direction, like a torch or stage spotlight.
3) Sun lights: Representing a distant light source (like the sun), this light type casts parallel rays across the entire scene, ensuring consistent illumination.
4) Area lights: These produce light across a defined shape (like a rectangle or circle), often used to mimic softboxes in photography or light panels in studios.
Camera settings
Your camera is the viewer's eye into your digital world. As such, understanding its settings is vital to conveying your vision effectively:

1) Focal length: This determines how 'zoomed in' your shot appears in Blender. A short focal length leads to a wide-angle view, while a long one offers a zoomed, telephoto look.
2) Depth of field: By adjusting this in Blender, you can control which parts of your scene are in sharp focus and which are blurred, adding a cinematic touch.
3) Composition techniques: Rule of thirds, leading lines and framing are just a few methods that can enhance the aesthetic appeal and storytelling prowess of your shots.
Render engines
Once your scene is set, you'll need to transform it into a final image or animation. This is where Blender's render engines come into play:
1) Cycles: A ray-tracing engine, Cycles calculates the path of light rays as they travel through your scene. This method results in highly realistic outputs, albeit often requiring longer render times.
2) Eevee: A real-time engine, Eevee delivers speedier results suitable for tasks like game design or quick previews. While not as physically accurate as Cycles, with the right settings, Eevee can produce stunning visuals in a fraction of the time.
Create eye catching logos that can become face of a brand! Try our Logo Design Training!
Animation and rigging
Animating and rigging breathe life into static 3D models, transforming them from mere sculptures into dynamic characters and objects that move, react, and tell a story. Let's explore these vital aspects in the world of Blender:
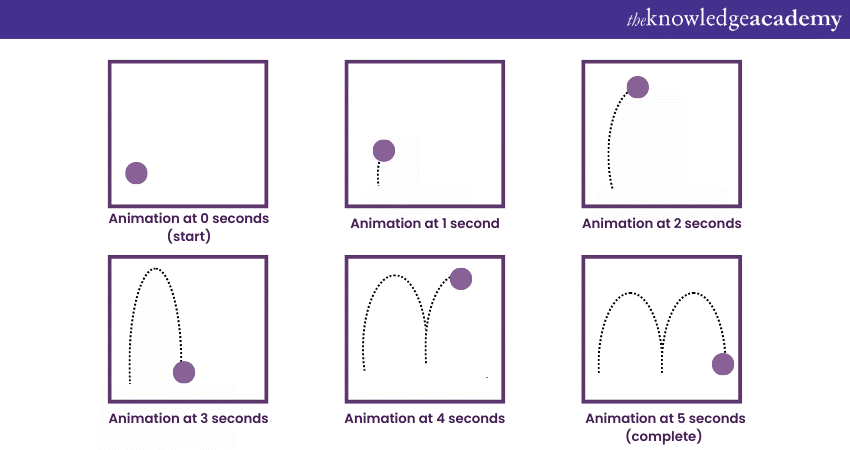
Keyframing
At the heart of animation lies the concept of keyframing. Keyframes capture the 'key' positions, rotations, or scales of an object at specific moments. Between these key moments, the software interpolates the in-between states, creating fluid movement. For instance, if you set a keyframe of a ball at the top of a slope and another with it at the bottom two seconds later, Blender will animate the ball's descent for you.
1) Rigging: Rigging is akin to providing a puppet with strings, allowing it to move, dance, or gesture.
2) Armatures: These are the digital 'bones' used to create a skeleton for your Blender model. Each bone can control a specific part of your model, like a limb or a facial feature.
3) Weight painting: Once the armature is set, weight painting in Blender dictates how much influence each bone has over the surrounding mesh. For example, when a forearm bone rotates, you'd want the wrist to follow, but maybe not the fingertips. Weight painting achieves this fine control.
Drivers and constraints
For more nuanced and interactive animations, Blender offers drivers and constraints:
1) Drivers: These are relationships where the property of one object influences another. Imagine a car's speedometer needle rotating in response to the car's speed. This is a driver relationship.
2) Constraints: These limit or control movement. A classic example is ensuring a character's foot stays planted on the ground during a step rather than sliding around.
Create a masterpiece with our Sketchbook Essential Training today!
Simulation and effects
While modelling and animation form the core of most 3D projects, the addition of simulations and effects can elevate a scene from impressive to truly awe-inspiring. Blender boasts a wide array of tools designed to simulate real-world phenomena. Here's a glimpse into some of these features:
Fluid and smoke
Blender's simulation capabilities are not to be underestimated. Its built-in simulators allow for the creation of:
1) Fluid simulations: Whether it's a gentle stream, a raging waterfall, or a wine glass tipping over, Blender can capture the intricate dynamics of liquids, including splash and foam.
2) Smoke and fire: Create captivating plumes of smoke or roaring flames in Blender. These simulations can react to external forces, like wind, ensuring they move and evolve realistically within your scene.
Particle systems
Particles are tiny individual objects or points that can be controlled en masse to create a variety of effects:
1) Flocks and swarms: Simulate the coordinated movement of groups in Blender, like birds in flight or fish in water.
2) Nature effects: Use particles to emulate falling rain, drifting snowflakes or leaves blowing in the wind.
3) Hair and fur: Craft lifelike hair or fur on characters in Blender. Each hair strand can be styled, coloured, and even animated, resulting in rich and detailed surfaces.
Cloth and soft body
The field of soft materials holds unique challenges in 3D, but with Blender's tools, these can be tackled head-on:
1) Cloth simulation: Perfect for draping dresses, fluttering capes, or waving flags. This simulator in Blender accounts for factors like weight, wind, and collision, producing realistic fabric movement.
2) Soft body dynamics: Go beyond rigid structures and animate soft, malleable entities. This tool in Blender is ideal for jelly-like creatures, bouncing balls, or any object you'd like to have a degree of squishiness.
Conclusion
Blender, renowned for its vast potential, is a gateway to limitless creativity. Mastering Blender Skills might seem overwhelming, but by focusing on key techniques, the path becomes clearer. Remember, every expert started as a novice, and with dedication, these features will become second nature to you. Whether for professional projects or a hobby, the world of Blender beckons you to unleash your creative mindset!
Interested in making awesome animation? Try out our Animation Masterclass!
Frequently Asked Questions
Upcoming Office Applications Resources Batches & Dates
Date
 Blender Creator Training
Blender Creator Training
Fri 24th Jan 2025
Blender Creator Training
Fri 28th Mar 2025
Blender Creator Training
Fri 23rd May 2025
Blender Creator Training
Fri 25th Jul 2025
Blender Creator Training
Fri 26th Sep 2025
Blender Creator Training
Fri 28th Nov 2025
 If you wish to make any changes to your course, please


