We may not have the course you’re looking for. If you enquire or give us a call on +08000201623 and speak to our training experts, we may still be able to help with your training requirements.
We ensure quality, budget-alignment, and timely delivery by our expert instructors.

iOS is one of the most popular and widely used mobile operating systems in the world. It powers millions of devices, such as iPhones, iPads, and iPods. You might have wondered How to Create an iOS App If you have ever wanted to create your own iOS App. In this blog, you will learn how to create an iOS App, which involves several steps and typically requires knowledge of programming languages.
Table of Contents
1) Basic requirements to develop iOS Apps
2) Building an iOS App in 6 simple steps
a) Establishing your development environment
b) Signing up for an Apple developer account
c) Crafting your App’s user interface
d) Implementing code and functionality using Swift
e) Verifying your iOS App
f) Releasing on the App Store
3) Conclusion
Basic requirements to develop iOS Apps
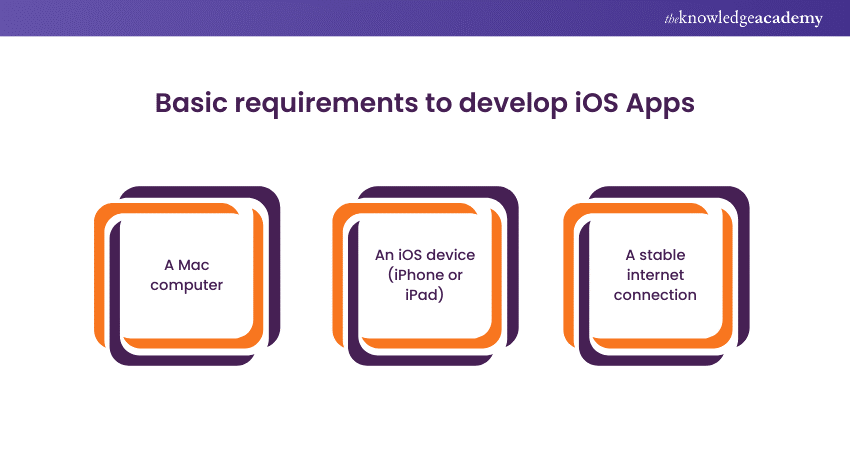
Before you start developing your iOS App, you need to have some basic requirements. These are:

a) A Mac computer running macOS Catalina or later: This is because you need to use Xcode, the integrated development environment (IDE) for iOS development, which is only available for Mac.
b) An iOS device, such as an iPhone or an iPad: This is optional, but recommended, as you can use it to test and run your App. You can also use a simulator on your Mac, but it might not have all the features and functionalities of a real device.
c) A stable internet connection: This is needed to download and install Xcode, Swift Playgrounds, and other tools and resources that you might use for your App development.
Building an iOS App in 6 simple steps
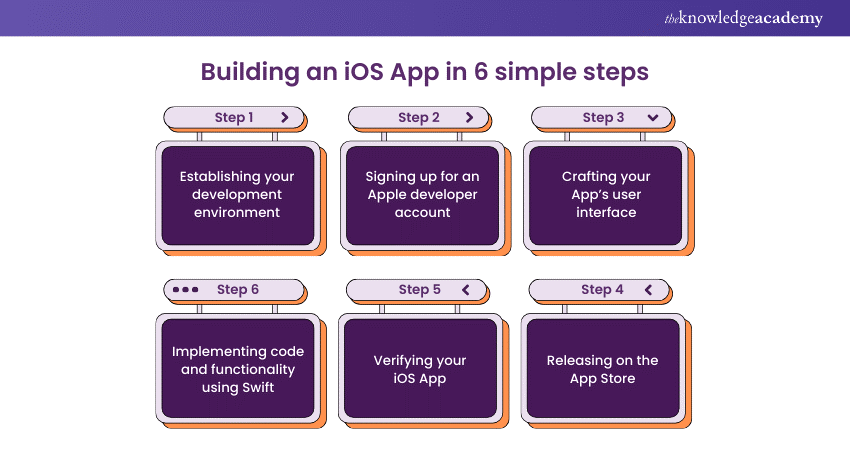
Now that you have the basic requirements, you are ready to start building your iOS App. Here are the six steps that you need to follow:

1) Establishing your development environment
To begin the development of an iOS App, the initial step involves establishing your development environment, starting with obtaining the necessary tools. The key tool for creating iPhone Apps is Xcode, Apple's official integrated development environment (IDE). You can procure Xcode directly from the Mac App Store. After installation, allocate some time to acquaint yourself with its interface, as this is where the majority of your development efforts will be concentrated, especially when exploring the nuances of Xcode vs Swift and how each contributes to the app development process.
2) Signing up for an Apple developer account
The second step is to sign up for an Apple Developer account. This is a free account that gives you access to various tools and resources for iOS development, such as documentation, tutorials, forums, and more. You also need an Apple Developer account to test your App on a real device and to publish your App on the App Store.
To sign up for an Apple Developer account, follow these steps:
a) Go to the Apple Developer website and click on the Account button.
b) Sign in with your Apple ID and password. If you don't have an Apple ID, you can create one for free.
c) Agree to the Apple Developer Program License Agreement and the Apple Developer Program Membership Agreement.
d) Complete your personal and professional information and verify your email address.
3) Crafting your App’s user interface
Once your environment is configured, initiate the App development process by opening Xcode and establishing a new project. This will furnish you with a foundational template. Subsequently, delve into the UI design phase of your App using Xcode's visual interface designer, enabling the seamless placement of diverse UI elements such as buttons, labels, and images. This graphical depiction is referred to as the storyboard.
Escalate your skills in Application development with App & Web Development Training and stay ahead of the learning curve! Join today!
4) Implementing code and functionality using Swift
The fourth step is to implement code and functionality using Swift. This means writing the logic and behaviour of your App, and how it responds to the user's actions and inputs. You will use Swift Playgrounds to learn and practice coding in Swift, and then transfer your code to Xcode to integrate it with your App's user interface.
To implement code and functionality using Swift, follow these steps:
a) Launch Swift Playgrounds and create a new one named "MyFirstApp" using the Blank template.
b) In the editor, find `import UIKit`, which brings in the UIKit framework for iOS App interface elements.
c) Write your Swift code below the import statement, taking advantage of Swift's modern, expressive syntax.
d) Click the Run button to execute your code and view results in the live display; check the console for output and errors.
e) Swift Playgrounds offers interactive lessons on various concepts like variables, functions, loops, etc.
f) Explore Swift's documentation and help menu for more information.
g) To transfer code to Xcode, copy from Swift Playgrounds and paste it into the Appropriate file, like ViewController.swift.
h) Utilise the assistant editor in Xcode for a side-by-side view of code and interface, making connections between them using outlets and actions.
5) Verifying your iOS App
The fifth step is to verify your iOS App. This means testing and debugging your App, and making sure that it works as expected, and that it is free of errors and bugs. You will use Xcode to verify your iOS App, using various tools and features, such as the simulator, the debugger, the breakpoints, the console, and more.
To verify your iOS App, follow these steps:
a) Clean your Xcode project by selecting "Clean Build Folder" from the Product menu to remove temporary files and caches.
b) Build your project by choosing the "Build" option from the Product menu to compile code and check for errors or warnings in the issue navigator.
c) Run your App by selecting "Run" from the Product menu to launch the simulator, enabling interaction and testing various features like rotation, location, and network.
d) Debug your code using the "Debug Workflow" option from the Debug menu, utilizing tools like breakpoints and the console to identify and fix errors.
e) Repeat the process until you're satisfied with your App's functionality, performance, and have addressed all errors and bugs.
Gain an understanding on front-end and back-end development with Web Development Training. Sign up now!
6) Releasing on the App Store
The sixth and final step is to release your iOS App on the App Store. This means preparing and submitting your App for review and Approval by Apple, and making it available for download and purchase by users around the world. You will use Xcode and the App Store Connect website to release your iOS App on the App Store.
To release your iOS App on the App Store, follow these steps:
a) Archive your App in Xcode by selecting "Archive" from the Product menu, creating a distribution-ready build.
b) Sign in to App Store Connect with your Apple Developer account to manage app details like name, description, and screenshots.
c) Click "My Apps," then the Plus button to create a new app, providing essential information such as platform, name, bundle ID, language, and SKU.
d) Complete app details and settings, including version, rating, category, keywords, and screenshots, by clicking "Prepare for Submission" after selecting your app.
e) Submit your app for review by clicking "Submit for Review" and agreeing to terms and conditions.
f) Wait for Apple's review, receiving email notifications for approval or rejection, with feedback for improvement.
g) Once approved, choose to release your app manually by clicking "Release This Version" or automatically, allowing it to launch on the App Store immediately upon approval.
Conclusion
You have now learned the basics of how to create an iOS app and steps to develop iOS apps. You have also gained a basic understanding of iOS app development and Swift programming. As you continue your journey, preparing for a career in iOS development, it's also important to check out Mobile App Developer Interview Questions to get a deeper insight into the kind of questions you might encounter in interviews. This will help you be well-prepared as you explore more features and functionalities of iOS development and create more apps of your own.
Unlock your iOS App Development potential with our comprehensive IOS App Development Course – empower your skills, innovate with confidence.
Frequently Asked Questions
Is it hard to learn iOS development?

Learning iOS development can be challenging, especially for beginners, but it is achievable with dedication. Apple provides comprehensive resources, including documentation and tutorials. Swift, the preferred programming language, is designed to be user-friendly. Online courses and communities offer valuable support. Consistent practice and hands-on projects contribute to mastering iOS development. Success largely depends on individual commitment and persistence in navigating the learning curve.
What coding language is used for iOS apps?

The primary coding language for iOS app development is Swift. Developed by Apple, Swift is a modern, safe, and expressive programming language. It replaced Objective-C as the preferred language, offering a more intuitive syntax, enhanced performance, and compatibility with Apple's frameworks. Swift is versatile, supporting various programming paradigms, making it accessible for both beginners and experienced developers. Additionally, developers may use Objective-C, especially in older projects, but Swift is the predominant language for creating innovative and efficient iOS applications.
What are the other resources and offers provided by The Knowledge Academy?

The Knowledge Academy takes global learning to new heights, offering over 3,000 online courses across 490+ locations in 190+ countries. This expansive reach ensures accessibility and convenience for learners worldwide.
Alongside our diverse Online Course Catalogue, encompassing 19 major categories, we go the extra mile by providing a plethora of free educational Online Resources like News updates, Blogs, videos, webinars, and interview questions. Tailoring learning experiences further, professionals can maximise value with customisable Course Bundles of TKA.
What is Knowledge Pass, and how does it work?

The Knowledge Academy’s Knowledge Pass, a prepaid voucher, adds another layer of flexibility, allowing course bookings over a 12-month period. Join us on a journey where education knows no bounds.
What are related Web Development courses and blogs provided by The Knowledge Academy?

The Knowledge Academy offers various App and Development Courses including web development foundation, HTML Courses, and Website Design. These courses cater to different skill levels, providing comprehensive insights into Web Development Training methodologies.
Our Programming and DevOps blogs covers a range of topics related to Web Development, offering valuable resources, best practices, and industry insights. Whether you are a beginner or looking to advance your Programming skills, The Knowledge Academy's diverse courses and informative blogs have you covered.
Upcoming Programming & DevOps Resources Batches & Dates
Date
 iOS App Development Course
Thu 3rd Apr 2025
Thu 8th May 2025
Thu 10th Jul 2025
Thu 11th Sep 2025
Thu 6th Nov 2025


 Top Rated Course


 If you wish to make any changes to your course, please


