We may not have the course you’re looking for. If you enquire or give us a call on 800600725 and speak to our training experts, we may still be able to help with your training requirements.
Training Outcomes Within Your Budget!
We ensure quality, budget-alignment, and timely delivery by our expert instructors.

Makeup is an art form that empowers you to express yourself, increase your natural beauty, and boost your confidence. Whether you’re preparing for a special event or simply perfecting your daily look, knowing How to Apply Makeup can transform your routine. But with several products and techniques available, it can be overwhelming to know where to start. That’s why this step-by-step blog breaks it down, making makeup application easy and enjoyable for beginners and beauty enthusiasts alike.
In this blog, we’ll walk you through 15 essential steps on How to Apply Makeup, offering tips and tricks to help you achieve a professional finish every time. Each step helps you create a look that reflects your personal style, while ensuring that your makeup remains fresh and radiant throughout the day.
Table of Contents
1) 15 Steps to Apply Makeup
a) Start with Skincare
b) Gently Apply Primer
c) Put on Foundation
d) Conceal Areas for Extra Coverage
e) Create Some Dimension
f) Restore Colour to Your Face
g) Illuminate Your High Points
h) Groom Your Brows
i) Explore Eyeshadow Options
j) Accentuate Your Eyes with Eyeliner
2) Conclusion
15 Steps to Apply Makeup
If you've tuned into a Makeup tutorial on YouTube or tried out a beauty tip on TikTok, you're not alone if the instructions appeared overly intricate. The focus has shifted away from covering the fundamentals for beginners, and now it's all about achieving dramatic winged eyeliner, intricate eyelid decorations, and avant-garde negative-space eyeliner.
If you find yourself with a collection of Makeup products in your bathroom drawer and are eager to learn how to apply them like a seasoned professional, below are the key steps to have your perfect look for a perfect day:
a) Start with Skincare
Skincare is the foundation for flawless makeup application. Well-hydrated, nourished skin ensures your makeup applies smoothly and lasts longer. A well-cared-for complexion ensures your makeup applies evenly, looks more natural, and lasts longer throughout the day. Ignoring this vital step often results in uneven application, and your makeup can end up accentuating imperfections rather than hiding them.
The key to flawless makeup begins with understanding your skin type and choosing products that meet its unique needs. Start with cleansing your face to remove any dirt, oil, and impurities, using a cleanser suited to your skin type. This step clears your pores and preps your skin for the products to follow.
Next, apply a toner to balance your skin's pH and tighten pores—choose one that matches your skin’s needs, whether hydrating or mattifying. Finish with a moisturiser, preferably with SPF, to hydrate and protect your skin. Properly prepped skin prevents makeup from looking cakey and helps it blend seamlessly for a natural finish.
b) Gently Apply Primer
While a makeup primer may not be a constant necessity, it proves highly beneficial in maintaining makeup longevity, particularly on hectic or warm days. For instance, a well-formulated primer ensures uniform makeup wear across the face. This means that makeup won't vanish or settle on dry skin patches while also preventing separation on oilier areas like the T-zone. A ‘T-zone’ is an area of your face that comprises your forehead, nose, and chin.
For those with dry skin, a suitable choice is a hydrating makeup primer. For example, choose one with watermelon extract rich in vitamin C, antioxidants, and hyaluronic acid. Such a primer would effectively seal in any non-greasy hydration. Conversely, individuals with oily skin should opt for a primer designed to absorb oil or blur pores.
More importantly, it's essential to be mindful of the primer's impact on the foundation’s finish. A primer with a luminous effect can impart an airbrushed look and a soft, lit-from-within appearance to the base.
Conversely, a primer with a more matte texture can contribute to a velvety appearance. If a matte finish is desired, a lightweight primer would prove effective in keeping the complexion shine-free and reducing the visibility of pores. Such products have become a staple in our makeup routine, setting the foundation for impeccable makeup looks.
c) Put on Foundation

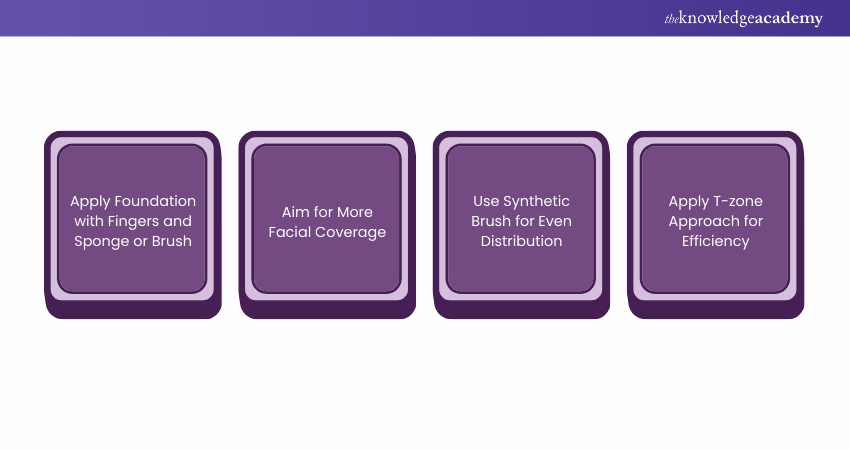
The choice of applying foundation is flexible, allowing you to use your fingers, a makeup sponge, or a foundation brush based on your comfort. A great option is to use fingers, especially when applying a modest amount, like a single layer of lightweight liquid foundation or a cream.
Moreover, you can use a synthetic brush to evenly distribute the foundation evenly when aiming for more extensive coverage. Starting with the flat areas of the face, you can gradually move to the T-zone with a reduced amount on the brush. This technique creates the visual illusion of wearing less makeup.
d) Conceal Areas for Extra Coverage
Similar to foundation, concealer application offers flexibility, allowing you to use a makeup brush, beauty blender, or simply your fingers, noting that a brush yields a more extensive coverage look. However, exercising restraint when applying concealer is crucial, as a little goes a long way. Apply it selectively to the areas that require coverage.
To address dark circles, start by dotting concealer under your eyes, beginning with a small amount and gradually adding more if necessary. It is a precautionary measure for individuals to avoid the potential cakey appearance of concealer on the delicate skin around the eyes. Additionally, use a modest amount of blemishes or red spots, allowing the formula to set for a few minutes before applying any powder.
Understanding the various types of concealers and their specific purposes is essential. Concealers with a creamy texture offer versatility, seamlessly blending into the skin, making them suitable for use under the eyes and on other facial areas. On the other hand, thicker formulations like stick or pot concealers excel in covering spots and blemishes.
For creamy formulas, it is recommended to pat them in with clean fingertips or a makeup sponge. When dealing with richer stick or pot concealers, investing in a precision concealer brush is suggested. This allows for targeted application of extra coverage, and after application, gentle dotting with the brush helps blend the concealer seamlessly into the skin.
e) Create Some Dimension
Contouring and highlighting are key techniques for adding structure and dimension to your face, transforming a flat base into a sculpted, radiant look. Contouring involves using a product, either powder or cream—that is a few shades darker than your natural skin tone to create shadows, giving the illusion of greatly defined cheekbones, a slimmer nose, or a sharper jawline.
Start by applying contour to the hollows of your cheeks, along the sides of your nose, and around the edges of your forehead. These areas naturally recede, so adding depth here helps create a more structured, balanced appearance.
Highlighting complements contouring of your face by bringing light to the high points, where light naturally hits. Using a highlighter on areas like the tops of your cupid’s bow, the bridge of your nose, and your cheekbones will give your face a luminous, lifted effect. The combination of contouring and highlighting upgrades your overall look, giving you a naturally sculpted, polished finish.
f) Restore Colour to Your Face
When it pertains to facial colour restoration, Bronzer serves as a remarkably versatile makeup product, serving dual purposes as both a contouring tool and a source of sun-kissed warmth reminiscent of a beach vacation.
When applied for contouring to define your cheeks and jaw, it's essential to focus on areas where the sun would naturally tan your face, including the hairline, bridge of the nose, and the high points of your cheeks. The contouring shade should emulate the colour of natural shadows on your skin, ensuring you choose a hue that complements your skin tone.
For a conventional bronzer application, it is suggested to adopt the continuous "3 shape" method. Begin at the forehead, sweeping under the cheekbone and moving backwards towards the hairline, then continue down towards the jaw along the outer periphery of the face. This technique not only refines bone structure but also imparts warmth. A fluffy yet tapered brush is recommended for achieving sculpting results.
Furthermore, you can use an excellent matte bronzer to blend onto the face's high points. Infused with macadamia oil, matte bronzers soften and moisturise the skin for a very soft feel. The palette's multiple colour options ensure a seamless transition with your skin tone throughout the seasons.
Following the application of bronzer, the next step is for you to apply blush, with the increasingly popular draping technique. Individuals are recommended to place the blush higher than just on the apples of their cheeks, creating a vivacious look and adding dimension to the face. Starting at the apple of the cheek, sweep the brush higher towards the hairline in a teardrop shape. This draping technique is suitable for cream, gel, liquid, and powder blushes.
While the draping technique remains consistent across various formulas, the choice of applicator varies. For gel and liquid blushes, you can use a soft makeup sponge, while a soft, fluffy cheek brush is recommended for powder blush, allowing for a gentle circular movement to blend the blush effortlessly into the skin for a natural look.
g) Illuminate your Your High Points

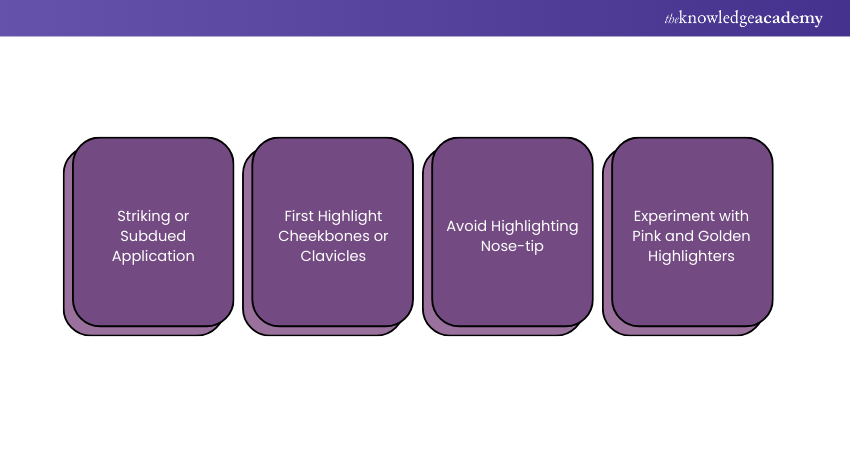
A Makeup ensemble remains incomplete without the touch of highlighter. You have the option A makeup ensemble remains incomplete without the touch of a highlighter. You can opt for a striking application that catches attention from afar or a more subdued, natural-looking radiance. It is suggested to start by applying a highlighter wherever you want to draw attention, such as the cheekbones or even the clavicles.
It is cautioned that you stay against the trend of highlighting the tip of the nose, which may appear overly dramatic and unnatural in real life. Unless, of course, that's the desired effect, in which case, go ahead and embrace it!
Furthermore, have fun experimenting with pink and golden highlighters. You can even apply a small amount with your finger to the cheeks, brow bones, and cupid's bow for a subtle effect, or grab a fan brush and layer on the glow for a more pronounced radiance.
h) Groom Your Brows
Well-groomed eyebrows are important for framing your face and enhancing your overall makeup look. They act as a defining feature, bringing balance and structure to your facial features. Begin by brushing your brows upward utilising a spoolie brush to reveal their natural shape and identify areas that may need filling. This simple step helps create a lifted, polished appearance while keeping unruly hairs in check.
Next, fill in any sparse areas using a brow pencil, powder, or pomade in a shade that closely matches your natural brow colour. Use light, short, feather-like strokes to mimic the appearance of real brow hairs, focusing on areas that need more volume or definition. Be careful not to overfill, as a heavy hand can make your brows look unnatural. The goal is to enhance your brows while maintaining a soft, natural appearance.
If your brows are naturally full, you can skip the filling step and simply set them in place with a clear or tinted brow gel. The gel will help hold your brows in position, giving them a sleek, defined finish. Taking a few minutes to groom your brows can make a big difference in your overall look, giving your face a more polished and put-together appearance with minimal effort.
i) Explore Eyeshadow Options
When it comes to applying eyeshadow, there are numerous techniques to explore, but understanding the basics is key. Light shades that resemble your skin tone serve as a base, while darker shades contribute to shaping, defining, and contouring the eyes. The intermediate shades work on the lids, seamlessly blending the two for a cohesive look.
As for adding a touch of shimmer, apply it to the inner corners of your eyes to create the illusion of larger, brighter eyes. Explore the comprehensive range of eyeshadow colours, perfectly balancing soft glam and intense colour pigment payoff. The buttery texture of many of these eyeshadows ensures seamless blending, especially when used with a flat or crease eyeshadow brush.
Exploring eyeshadow options allows for endless creativity in enhancing your eye makeup. Consider experimenting with different colour combinations, techniques, and finishes to discover what best complements your style and personality.
From subtle day looks to bold evening statements, the eyeshadow application offers a versatile canvas for expressing your unique beauty. Don't be afraid to play with various textures, from matte to shimmer, and find the perfect eyeshadow palette that caters to your preferences, bringing your eye makeup to life with every application.
j) Accentuate Your Eyes with Eyeliner
The use of eyeliner varies among individuals; some consider it a daily essential, while others reserve it for special occasions. Nevertheless, having a basic black eyeliner in your makeup arsenal is always a wise choice for those spontaneous moments. You should employ a pencil eyeliner to intensify your eyeshadow, adding a touch of depth and drama!
It can also be strategically dotted between lashes to enhance lash fullness, and when applied sharply or smudged, it defines the eyes with precision. There are double-take eyeliners on the market that are appreciated for their dual-ended design catering to various possibilities.
Now the liquid eyeliner side is perfect for creating crisp lines or sharp wings, while the clay-infused gel pencil on the opposite end is ideal for enhancing your waterline and making your eyes pop.
What's particularly appealing is the ease of correction. If a mistake occurs, a Q-tip soaked in micellar water efficiently cleans it up, offering a hassle-free eyeliner experience. Having a versatile eyeliner like this in your makeup collection ensures you're prepared for any eye makeup style, from subtle enhancements to bold, dramatic looks.
k) Coat Your Lashes with Mascara

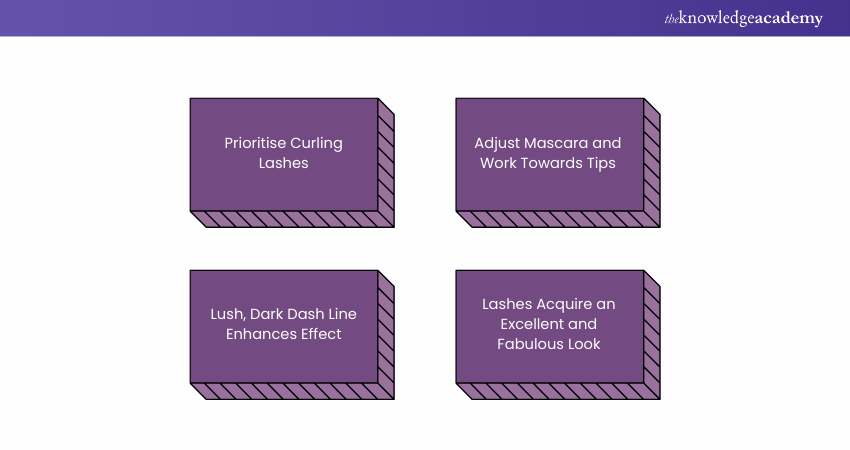
The application of mascara by makeup artists often deviates from your everyday techniques. If your usual approach involves layering it on, consider adopting this tip, where it is highly recommended that you start by curling the lashes, then wiggling the mascara wand at the roots and working it towards the tips.
This technique yields a lush, dark lash line at the base, enhancing the overall effect. Look out for volumising mascaras on the market that stand out as they offer the convenience of skipping the lash curler, simultaneously providing curl and volume.
More importantly, they are Infused with a vegan formula enriched with vitamin E and marine algae, giving your lashes a fabulous, conditioned look and preventing the undesirable crunchy or spidery appearance, even with multiple coats.
Moreover, such mascara options boast a smudge-proof and smear-proof formula, ensuring a flawless look throughout the day. Embracing these types of mascaras not only simplifies your routine but also elevates the beauty of your lashes with a nourishing and long-lasting formula.
l) Optionally Apply False Lashes
If you've been scrolling through social media lately (and who hasn't?), you've probably noticed that false lashes are currently bigger and fuller than ever. While magnetic lashes have gained considerable popularity, traditional glue-on falsies remain the go-to choice. If you're eager to incorporate this step into your Makeup routine, here are the complete steps for achieving a seamless application:
a) Begin by applying eyeliner along the upper lash line, serving as a guide for a polished finish. Opt for a pencil liner for a softer appearance or a liquid liner for a more refined look.
b) Following that, curl your lashes, and if possible, gently warm the eyelash curler with a hair dryer on low heat beforehand to ensure a more substantial and enduring curl.
c) Apply a coat of mascara to prepare your natural lashes.
d) Carefully remove strip lashes from the packet with tweezers and measure them along your eyes. Trim the lash strip to fit your eyes using sanitised nail scissors for precision.
e) Use a cotton swab to apply a thin layer of eyelash glue to the lash band.
f) A crucial step follows, where you apply a little extra glue, creating an additional blob on the inner and outer ends of the lash.
g) Allow the glue to reach a tacky texture by waiting approximately 30 seconds.
h) Place the false eyelash as close to your natural lash line as possible.
i) Start by pressing down on the centre of the lashes and then move on to the inner and outer corners.
j) To complete the process, use a lash applicator or tweezers to clamp your natural lashes and the false lashes together. This final step ensures a seamless blend between the real and false lashes for a polished and natural-looking result.
m) Define Your Lips with Liner
Enhancing your lips with lip liner serves a dual purpose, providing both contouring and extending the longevity of your lipstick. Professionals strongly advocate for a technique where the lips are lined to contour, and the remaining lip area is gently shaded.
This strategic approach, when combined with lipstick application, yields a plumping 3D effect. Furthermore, as the lipstick gradually fades, the lip liner becomes visible underneath, preventing the lips from appearing bare.
For an optimal experience, consider using three-in-one lip liners, which are natural-looking with a plum mauve shade that complements all skin tones, and its unique formula stands out. Packed with hydrating and plumping ingredients, it minimises the appearance of lip lines, ensuring both lipstick and liner stay intact without fading or feathering.
The long-wearing, waterproof formula is vegan and cruelty-free, making it a comprehensive choice for lip enhancement, combining aesthetics, performance, and ethical considerations.
n) Apply Lipstick and Lip Gloss
The sequence in which lip products are applied holds the utmost importance. You can initiate the process with lip liner, followed by lipstick, and conclude with lip gloss. Now, take note that you can apply your lipstick directly from the bullet or with a lip brush, emphasising both lining and filling the lips.
A suitable choice, like an antimatter lipstick, offers a semi-matte, semi-satin finish in a true red shade. If you wish to achieve a fuller pout, consider adding lip gloss on top, concentrating it in the centre of your lips. A better approach would be to make a ‘kiss’ pout and tap the gloss onto the lips for a precise application.
In the case of a more casual appearance, you can opt to apply lip gloss all over the lips using the doe-foot applicator. This approach allows for versatility in your lip Makeup routine, catering to both enhanced and relaxed looks. Continue experimenting with various lip product combinations and techniques to discover the style that resonates best with your personal taste and complements your overall Makeup look.
Master the enhancement of your facial features by signing up for our Makeup – Eyebrows and Eyelashes Course now!
o) Setting Spray
After completing your makeup routine, it's essential to set your look using setting powder, setting spray, or a combination of both to ensure a flawless appearance throughout the day. The choice of the formula depends on your skin type and the desired longevity of your makeup. It is recommended to use a velour puff saturated with setting powder, although a fluffy brush can also be effective.
Now, to apply the setting powder, you can start working the product into the puff, tapping off any excess on the back of your hand, and then rolling the puff over areas where you want to set your makeup until you achieve the desired matte finish. Remember to focus on areas prone to oiliness and makeup creasing, such as under the eyes and around the T-zone.
For those who prefer a less matte and more natural look, setting spray is an excellent option, whether applied on top of powder or on its own. High-performance setting sprays are an excellent option; with their alcohol and fragrance-free formula, they stand out for setting makeup for up to 24 hours.
Additionally, such sprays contain fermented algae extract to defend the skin against free radicals and environmental pollutants, providing a dual benefit as skincare. This two-in-one feature makes it a versatile and practical choice for maintaining a long-lasting and well-protected makeup look.
Lights, camera, action! Discover the skills you need to direct your own film with our comprehensive Filmmaking Course – Join today!
Conclusion
Makeup is an opportunity to express yourself and boost your confidence. The journey of learning How to Apply Makeup is fun and allows you to experiment, find your style, and create looks that make you feel empowered. With the right foundation—literally and figuratively—you can achieve any look, from a fresh daytime glow to glamorous evening elegance.
Elevate your fashion skills with expert guidance! Join our Fashion Designing Training and design your way to success -Join now!
Frequently Asked Questions

It's generally best to apply foundation first. This creates an even base, reducing the amount of concealer needed. Afterward, use concealer to target any remaining imperfections like dark circles or blemishes for a smoother, more flawless finish.

Yes, applying setting spray after foundation helps lock your makeup in place, ensuring it lasts longer. For best results, use it at the end of your entire makeup routine to set everything, from foundation to eyeshadow and lipstick, giving you a flawless, long-lasting finish.

The Knowledge Academy takes global learning to new heights, offering over 30,000 online courses across 490+ locations in 220 countries. This expansive reach ensures accessibility and convenience for learners worldwide.
Alongside our diverse Online Course Catalogue, encompassing 19 major categories, we go the extra mile by providing a plethora of free educational Online Resources like News updates, Blogs, videos, webinars, and interview questions. Tailoring learning experiences further, professionals can maximise value with customisable Course Bundles of TKA.

The Knowledge Academy’s Knowledge Pass, a prepaid voucher, adds another layer of flexibility, allowing course bookings over a 12-month period. Join us on a journey where education knows no bounds.

The Knowledge Academy offers various Hobbies & Interests Courses, including the Fashion Designing Course, and the Makeup - Eyebrows and Eyelashes Course. These courses cater to different skill levels, providing comprehensive insights into How to Become a Makeup Artist
Our Business Skills Blogs cover a range of topics related to Makeup, offering valuable resources, best practices, and industry insights. Whether you are a beginner or looking to advance your Makeup skills, The Knowledge Academy's diverse courses and informative blogs have got you covered.
Upcoming Programming & DevOps Resources Batches & Dates
Date
 Make Up - Eyebrows and Eyelashes
Fri 7th Mar 2025
Fri 2nd May 2025
Fri 4th Jul 2025
Fri 5th Sep 2025
Fri 7th Nov 2025


 Top Rated Course


 If you wish to make any changes to your course, please


