


 Top Rated Course


We may not have the course you’re looking for. If you enquire or give us a call on 800600725 and speak to our training experts, we may still be able to help with your training requirements.
How To Use Microsoft Planner: A Step-By-Step Guide
Sophia Ellis 13 September 2023Discover the intricacies of using Microsoft Planner with our comprehensive, step-by-step blog. From the introduction to Microsoft Planner to setting up your account, navigating the user interface, assigning them to team members, and utilising labels and categories - this blog covers it all. Learn to set due dates, attach files, and engage in task discussions.

Training Outcomes Within Your Budget!
We ensure quality, budget-alignment, and timely delivery by our expert instructors.
Table of Contents

How to use Microsoft Planner is something every person working in an organisation must know about. It is a powerful tool that helps individuals and teams organise tasks, collaborate and stay on top of their projects. Master project organisation with a step-by-step guide on how to use Microsoft Planner. Learn to optimise tasks, deadlines, and team collaboration for success.
Table of Contents
1) Introduction to Microsoft Planner
2) How to use Microsoft Planner?
a) Step 1- Setting up your Microsoft Planner account
b) Step 2- Navigating the user interface
c) Step 3- Setting up a new plan
d) Step 4- Adding tasks and details
e) Step 5- Assigning tasks to team members
f) Step 6- Using labels and categories
g) Step 7- Setting due dates and
h) Step 8- Attaching files and documents
i) Step 9- Commenting and discussing tasks
j) Step 10- Mentions and notifications
3) Conclusion
Introduction to Microsoft Planner
Microsoft Planner is a handy tool found in Microsoft 365. It is aimed at aiding people and teams in sorting out and following their tasks. It's a virtual to-do list that makes managing work easier. Whether you're on your own or working together with others, Planner is here to help.
Imagine having a neat digital board where you can list all the tasks you need to do. You can even give them names, explain what they're about, and say who should do them. And guess what? You can work with others smoothly.
If you have a group project, you can all see the tasks, chat about them, and make sure everyone's doing what they should. It's like teamwork made simple! Microsoft Planner is all about making work organised, teamwork smooth, and getting things done without the hassle.

How to use Microsoft Planner: A step-by-step guide
Here we discuss the steps you have to follow to use Microsoft Planner effectively. This section will also give you an insight into the features of this versatile tool from Microsoft Office 365.
Step 1- Setting up your Microsoft Planner account
To begin using Microsoft Planner, you'll need a Microsoft 365 account. If you're part of an organisation or have a personal Microsoft account, you can access Planner through your web browser.
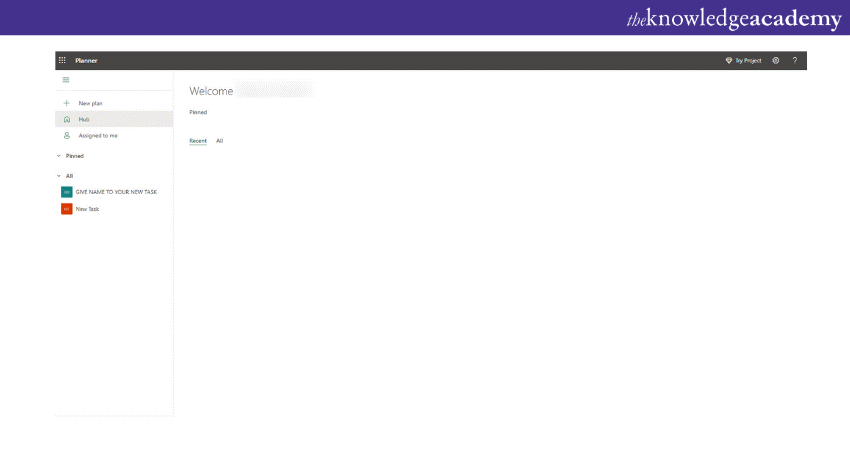
Step 2- Navigating the user interface
Think of the Planner interface as a map for your work journey. It has different places you'll visit, like a dashboard showing all your plans, a section for each plan's tasks, and a spot for notifications. Getting comfortable with this layout is like knowing your way around a new place. So, spend a little time here to make your Planner experience even better!
Elevate your Microsoft Office 365 proficiency through our in-depth Microsoft Office 365 Masterclass course from The Knowledge Academy.
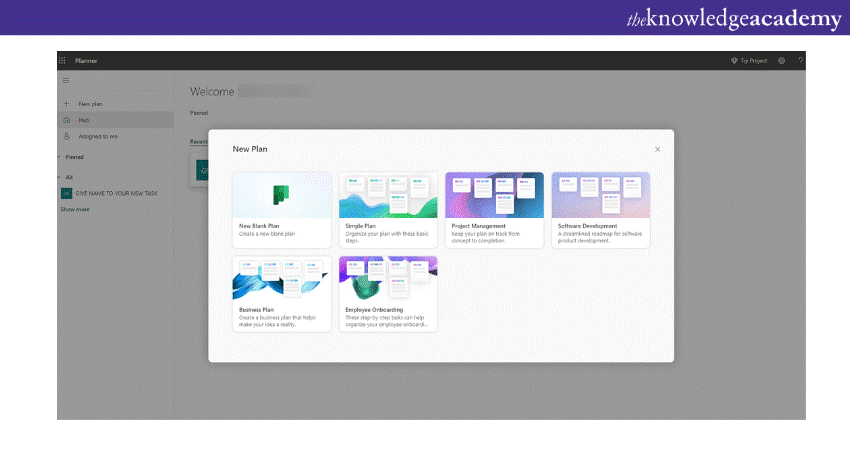
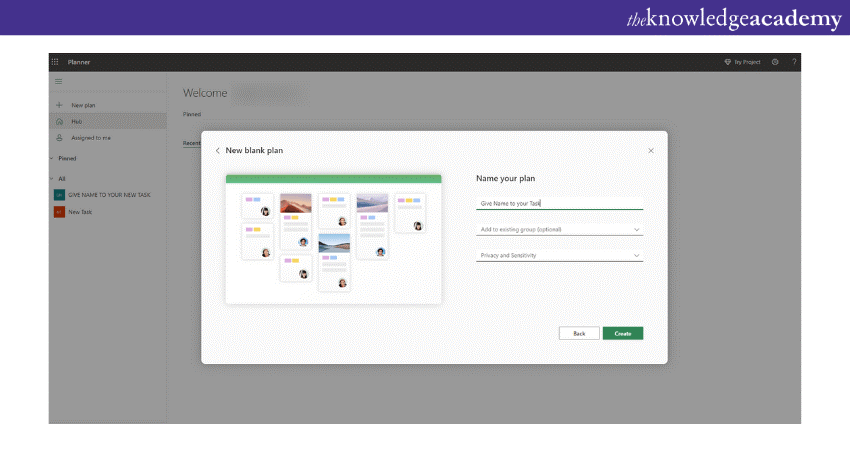
Step 3- Setting up a new plan
Once you're in the Planner dashboard, click on the "New Plan" button to initiate the process. Here, you'll be prompted to give your plan a title and provide a concise description. This step is crucial as it sets the foundation for your plan, offering a clear context to your team about its purpose and objectives.
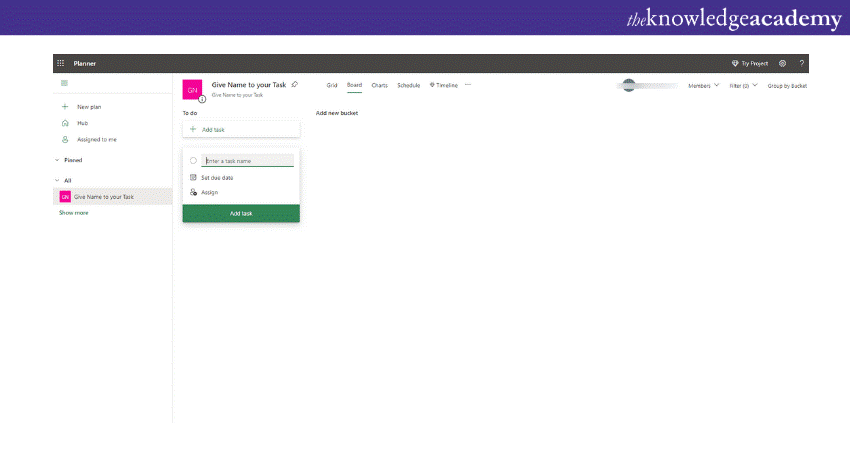
Step 4- Adding tasks and details
Once your plan is ready, it's time to add tasks – those little jobs that make up the big picture. Give each task a name and describe what it's all about. You can even attach important files to tasks and set how important they are. If some tasks rely on others, you can show this by linking them together.
Step 5- Assigning tasks to team members
To delegate tasks in Microsoft Planner, begin by opening the task you wish to assign. Within the task details, locate the "Assign" field and click on it. From there, you can choose the team member(s) responsible for the task. It's essential to distribute work thoughtfully, considering both workload and team members' skills.

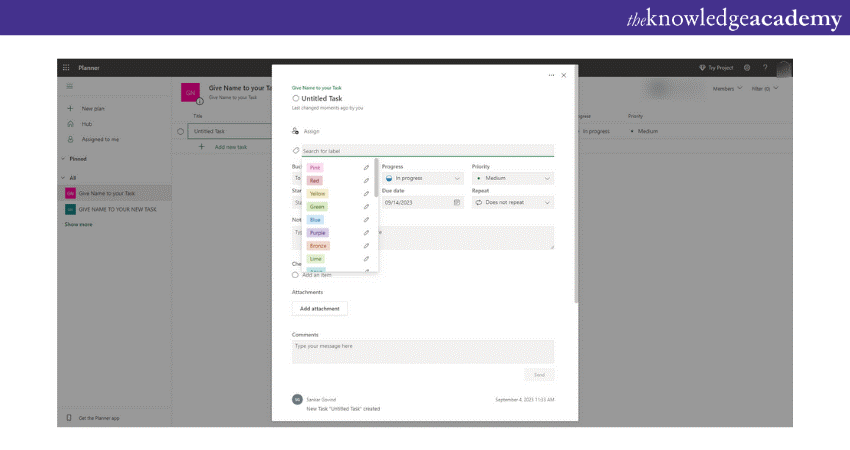
Step 6- Using labels and categories
Within the task list, locate the "Labels" option, often represented by a tag icon. Click on this option to create new labels or utilise existing ones that suit your project's needs. Once labels are set up, assign them to each task by simply clicking on the desired label. This action groups tasks together providing a visually clear way to organise and categorise your tasks.

Take your Microsoft Word skills to the next level with our Microsoft Word Masterclass course from The Knowledge Academy.
Step 7- Setting due dates and reminders
Within the task details, locate the "Due Date" field and click on it. From there, choose the date by which the task should be finished. You can set reminders to stay on top of your tasks by clicking on the "Add Reminder" option. Decide when you want to be reminded, and Planner will notify you, helping you and your team stay focused and meet deadlines efficiently.

Step 8- Attaching files and documents
First, open the task you want to add files to and locate “Attachments”. Click on this icon, and a menu will appear allowing you to upload files – either by selecting them or even dragging and dropping. To access the attached files, simply open the task again and click on the name of the attached file.

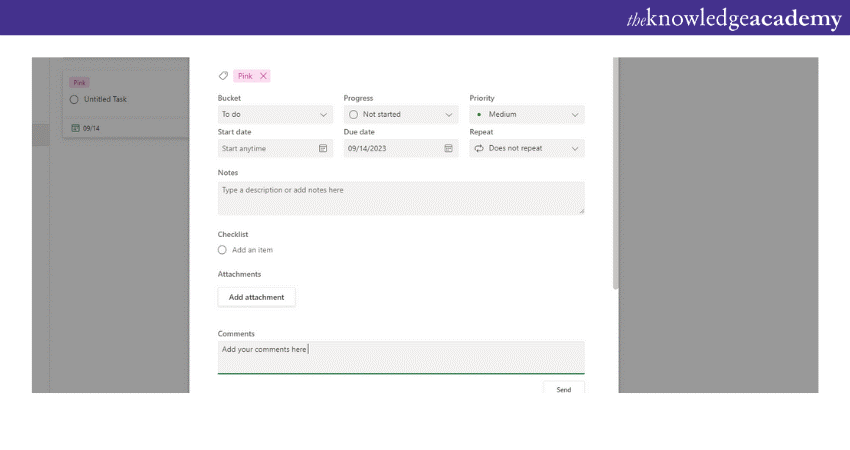
Step 9- Commenting and discussing tasks
Click on the specific task to open its details. Scroll down to find the comments section, often labelled as "Comments" or "Discussion". Here, you can engage in discussions by typing your comment in the provided area and pressing "Send" to share. This initiates real-time conversations where team members can reply, allowing a smooth communication of task-related matters.
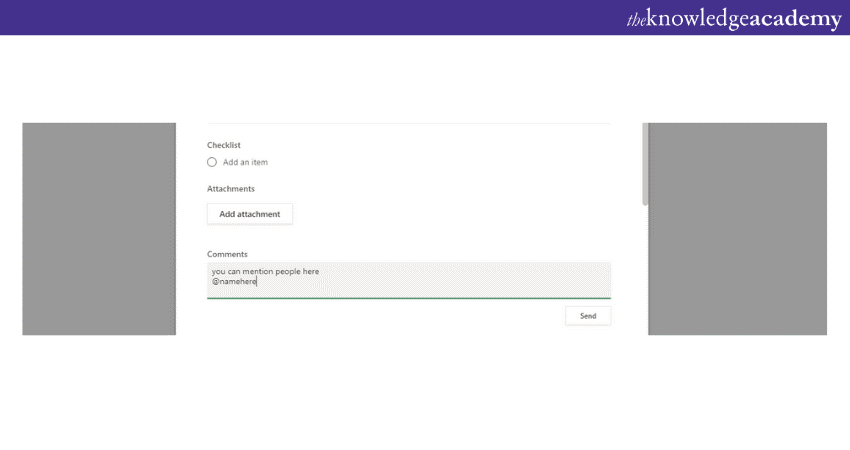
Step 10- Mentions and notifications
To involve specific team members, simply type "@" followed by their name within task comments or description. A dropdown list will appear, allowing you to select the right person. Once mentioned, the team member will receive a notification, indicating their involvement is required in the ongoing discussion or task. This efficient system ensures timely engagement.
Master the art of efficient communication with our Microsoft Outlook Masterclass course from The Knowledge Academy.
Step 11- Using the progress tracker
Click on the "Tasks" tab within the plan, and there you'll find a list of tasks. Each task is accompanied by a progress indicator. It signifies various task statuses, such as 'Not Started', 'In Progress', or 'Completed'. As you scroll through the list, these status indicators offer a quick visual summary of how tasks are advancing, allowing you to look the overall progress of the project briefly.
Click on this indicator and choose the suitable status – whether it's 'Not Started,' 'In Progress,' or 'Completed.' As you make these changes, the Progress Tracker responds in real-time.
This feature offers an instant snapshot of how tasks are progressing across the entire plan. It allows you to stay informed and effectively manage your project's advancement.
![]()
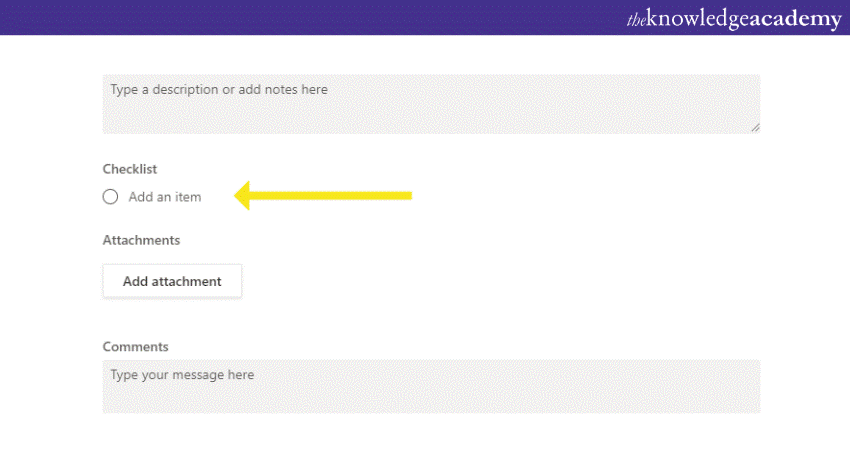
Step 12- Creating checklists and subtasks
To enhance task management within Microsoft Planner, consider utilising checklists and subtasks for better clarity. Simply access the task you wish to break down into smaller steps. Within the task details, locate the checklist option and click on it.
Start entering the items or subtasks you want to include in the checklist. As you progress, you can check off each subtask upon completion. This feature aids in effectively managing complex tasks by breaking them into manageable components.
Step 13- Using custom labels and filters
Begin by accessing "Labels" on the main Planner dashboard to create or modify labels to suit your team's workflow. When creating or editing tasks, apply relevant labels to categorise tasks appropriately.
To further enhance organisation, utilise the filter icon in the task view, allowing you to select a specific label and view tasks associated with it. This feature optimises task sorting and prioritisation, aligning your workflow seamlessly with your team's unique needs.
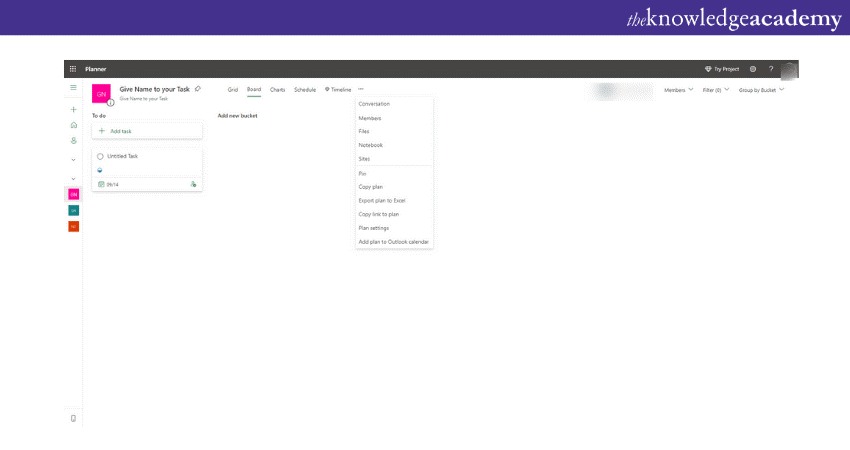
Step 14- Integrating planner with other Microsoft apps
In Microsoft Planner, find the three-dot option, then select the preferred Microsoft 365 application to integrate with, such as Outlook or Excel. Follow the provided prompts to configure the integration, ensuring effortless communication and task management across application.
Step 15- Access and Permissions
To solve access and permission issues in the Microsoft Planner web version, begin by going to plan settings and check if team members have the correct access. If someone has trouble accessing it, invite them using their Microsoft 365 email and double-check their email. If issues continue, ask your organisation's admin for help as they can fix more complicated permission problems.
Conclusion
Microsoft Planner is a tool that can bring significant change in the productivity of your organisation. By following the above step-by-step guidelines, you can learn how to use Microsoft Planner effectively.
Looking to master Microsoft Planner? Enhance your skills with Microsoft Planner Training course from The Knowledge Academy
 If you wish to make any changes to your course, please


