We may not have the course you’re looking for. If you enquire or give us a call on +91 8037244591 and speak to our training experts, we may still be able to help with your training requirements.
Training Outcomes Within Your Budget!
We ensure quality, budget-alignment, and timely delivery by our expert instructors.

As a beginner, are you eager to master digital drawing? If so, then exploring How to Draw in Adobe Illustrator with simple techniques can transform your creative ideas into stunning vector artwork. Adobe Illustrator is a powerful tool that simply enhances your digital art skills. But how do you navigate its vast array of features without feeling overwhelmed?
This blog will break down the process step-by-step, ensuring that you understand How to Draw in Adobe Illustrator efficiently and effectively. Be it designing a sleek logo, or creating intricate illustrations, this blog has got you covered. Let’s dive in and discover the simplicity and power of Adobe Illustrator!
Table of Contents
1) Introduction to Adobe Illustrator
2) Getting Started With Adobe Illustrator
3) Tools and Basic Techniques
4) How to Draw in Adobe Illustrator by Using the Pen tool?
5) How to Draw in Adobe Illustrator by Using the Pencil tool?
6) How to Draw in Adobe Illustrator by Using the Brush tool?
7) How to Draw in Adobe Illustrator by Using the Curvature Tool?
8) How to Draw in Adobe Illustrator by Using the Ellipse Tool?
9) How to Draw in Adobe Illustrator by Using the Zig Zag Tool?
10) Conclusion
Introduction to Adobe Illustrator
Adobe Illustrator is a premier Vector Graphics editor that allows users to create detailed, scalable artwork, maintaining quality across various platforms and sizes. As a flagship product in Adobe’s Creative Cloud suite, Illustrator is renowned for its precision, flexibility, and creative potential, making it an industry standard.
Unlike raster-based software like Adobe Photoshop, Illustrator uses vectors—mathematical equations defining paths, shapes, and lines. This approach ensures that artwork can be scaled without losing quality, making it ideal for everything from logos to intricate illustrations. Illustrator’s comprehensive toolkit, including the Pen tool for precise paths and the Gradient Mesh tool for realistic shading, caters to artists of all skill levels.
Getting Started With Adobe Illustrator
Before you embark on your creative journey, you must install Adobe Illustrator on your computer. If you have not already done so, follow these steps to install the software:
1) Subscription: Adobe Illustrator is available through Adobe's Creative Cloud subscription service. If you are not a subscriber, visit the official Adobe Creative Cloud website to explore subscription plans.
2) Downloading the Creative Cloud app: Once you have a subscription, download and install the Adobe Creative Cloud desktop app. This application is a hub for managing all Adobe software installations and updates.
3) Installing Illustrator: In the Creative Cloud app, locate Adobe Illustrator and click the "Install" button. The application will help you through the installation process, and you will have Adobe Illustrator up and running in no time.
Take control of your design career with in-depth Adobe Training. Master the tools, and create like a pro!
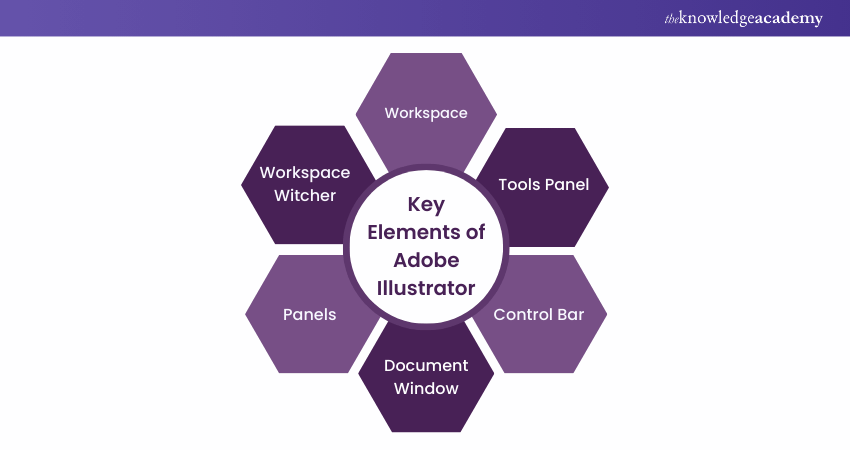
Upon launching Adobe Illustrator, you will be greeted by its user-friendly and intuitive interface. Following are some key elements:

1) Workspace: Adobe Illustrator offers various workspaces tailored for different tasks, such as essentials, typography, and painting. You can select a workspace that suits your workflow or customise your own.
2) Tools Panel: You can locate it on the left side of the screen; the tools panel houses a wide array of tools for creating, editing and manipulating artwork. Familiarise yourself with essential tools like the selection, direct selection, pen, and shape tools.
3) Control Bar: Positioned at the top of the screen, the Control bar displays context-sensitive options and settings for the selected tool or object. It is a convenient way to access frequently used functions.
4) Document Window: The central area of the interface is the document window, where your artwork comes to life. This is where you'll create and edit your illustrations.
5) Panels: Adobe Illustrator offers various discussions that provide additional functionality and options. Panels like layers, colours, switches, and appearances are crucial for managing your artwork's elements.
6) Workspace Switcher: Located at the top-right corner, the workspace switcher allows you to switch between predefined workspaces. You can also create custom workspaces tailored to your preferences.
Now that you're acquainted with the interface, it is time to create your first digital canvas:
1) File > New: Go to the "File" menu and select "new" to open the new document dialogue box.
2) Document Profile: Choose the document profile that best fits your intended use. Options include print, web, mobile, and more. Each profile comes with predefined settings optimised for that purpose.
3) Artboard: An artboard is the canvas on which you will create your artwork. Specify the artboard size, orientation (portrait or landscape), and number of artboards if you are working on a multi-page project.
4) Units and Colour Mode: Select your preferred measurement units (inches, pixels, etc.) and colour mode (RGB for digital or CMYK for print).
5) Advanced options: You can customise your document's settings, such as specifying the number of columns, gutters, and margins for layout design.
6) Create: Click the "Create" button, and Illustrator will generate your new document based on the specified settings.
Selecting the appropriate document settings is crucial to ensure your artwork is tailored to its intended use:
1) Print: If you are creating artwork for print (such as posters, business cards, or brochures), choose the Print profile. Set the colour mode to Cyan, Magenta, Yellow, and Key (CMYK), as print materials use a different colour model than digital screens.
2) Graphics: For web design, social media graphics, and digital illustrations, opt for the Web profile. Use the RGB colour mode, which is suitable for screens and online platforms.
3) Mobile app: If you're designing for mobile apps, select the Mobile profile. This option provides presets for popular mobile device screen sizes.
4) Artboard Sizes: Adobe Illustrator offers preset artboard sizes, but you can also define custom dimensions based on your project requirements.
Elevate your design game with our Adobe Illustrator Training – join us now and bring your creative visions to life!
Tools and Basic Techniques
With your canvas set up and Adobe Illustrator's interface at your fingertips, it's time to delve into the fundamental tools and techniques that form the cornerstone of digital drawing and design. Understanding these tools will empower you to create shapes, lines, and paths that lay the foundation for more intricate and captivating artwork.

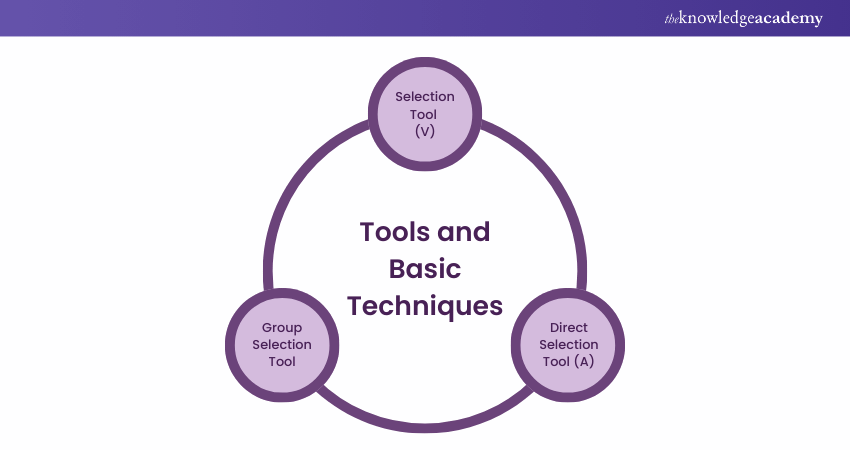
Before diving into drawing, it's crucial to familiarise yourself with the selection tools. These tools allow you to manipulate, move, and adjust objects on your canvas:
1) Selection Tool (V): This is your primary tool for selecting and moving objects. Click on an object to like it, then drag it to a new position. Press the shift key to select multiple objects.
2) Direct Selection Tool (A): The Direct selection tool selects individual anchor points within a shape or path. This tool is essential for fine-tuning and editing the intricate details of your artwork.
3) Group Selection Tool: If you have objects grouped, the group selection tool lets you select and manipulate individual objects within the group.
The pen tool is the heart of vector drawing in Adobe Illustrator. While it might seem intimidating at first, mastering the pen tool opens a world of precision and creativity:
1) Anchor Points and Paths: The Pen tool creates anchor points and ways. An anchor point is a point on your canvas; routes connect these points to create shapes and lines.
2) Click and Drag: To create straight lines, click to place anchor points and remove them to create paths. Click and drag to adjust the direction handles for curved lines, controlling the curvature.
3) Anchor Point Manipulation: The direct selection tool allows you to adjust anchor points after they've been created. Click and drag anchor points to reshape paths.
The line segment tool, along with the arc tool, is invaluable for creating both straight and curved lines:
1) Line Segment Tool (): Click and drag to create straight lines. Hold down the shift key to constrain the bar to a specific angle (e.g., horizontal or vertical).
2) Arc Tool: Create curves with precision using the Arc tool. Click to place the start and end points, then drag to adjust the curvature.
Adobe Illustrator offers a variety of shape tools that make it easy to create primary geometric forms:
1) Rectangle Tool (M): Click and drag on the screen to make a rectangle. Hold the shift key while dragging to make a perfect square.
2) Ellipse Tool (L): Like the Rectangle tool, click and drag to create an ellipse. Hold shift to maintain its proportions.
3) Polygon Tool: Create polygons with a specified number of sides. Click to place the centre, then drag to determine the size.
4) Star Tool: Craft stars with varying numbers of points. Click to place the centre and drag to determine the outer radius.
In Adobe Illustrator, objects have a fill (interior colour) and a stroke (outline). Here's how to work with them:
1) Fill: The fill option can be found in the Tools panel. Click the colour box to choose a fill colour. You can also apply gradients and patterns or even make objects transparent.
2) Stroke: Adjacent to the fill option is the stroke option. Here, you can set the colour strokes, weight (thickness), and style. Experiment with dashed lines and various stroke profiles.
Transform raw data into actionable insights with our Adobe Analytics Training - register today and drive smarter business decisions!
How to Draw in Adobe Illustrator by using the Pen tool?
Here’s a step-by-step tutorial on How to Draw in Adobe Illustrator by using the Pen tool:

1) Select the Pen tool from the toolbar or press P on the keyboard.
2) Click anywhere on the artboard to set the first anchor point.
3) Move the pointer and click again to draw a straight-line segment or Shift-Click to constrain the angle of the segment to a multiple of 45 degrees.
4) To draw a curve, drag the Pen tool on the artboard and release it to create direction handles of the anchor point. Drag again to set the slope of the curve segment and then release.
5) Position the Pen tool over the first (hollow) anchor point to close the path and double click. When positioned correctly, a small circle appears next to the Pen tool pointer.
6) To leave the path open, press Ctrl-Click (Windows) or Command-Click (macOS) anywhere away from all objects.
How to Draw in Adobe Illustrator by using the Pencil Tool?
Here’s a step-by-step tutorial on How to Draw in Adobe Illustrator by using the Pencil tool:

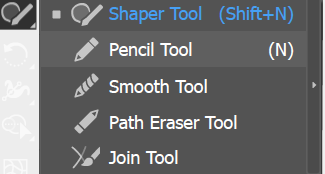
1) Select the Pencil tool from the toolbar or press N on the keyboard.
2) Click and drag to draw your freeform shape on the artboard.
3) Drag the anchor points that appear on the path to define the shapes.
4) To close the path, click on the first anchor point. When positioned correctly, a small circle appears next to the Pencil tool pointer.
5) To leave the path open, press Ctrl-Click (Windows) or Command-Click (macOS) anywhere away from all objects.
How to Draw in Adobe Illustrator by Using the Brush Tool?
Here is a possible step by step process to draw in Adobe Illustrator by using the Brush tool:
1) Select the Paintbrush tool from the Tools panel or press B to select it.
2) Choose a brush from the Brush menu of the Properties panel. You can also access more brushes from the Brush Libraries or the Brushes panel.
3) Adjust the brush options, such as size, shape, and fidelity, based on your desired stroke style.
4) Click and drag on the canvas to draw freehand strokes using the selected brush.
5) To draw a closed path, press and hold Option (macOS) or Alt (Windows) while you drag.
6) To edit the path or the brush stroke, use the Direct Selection tool or the Width tool.
Don’t miss out on the opportunity to enhance your design and editing skills – register for our Adobe Creative Cloud Training today!
How to Draw in Adobe Illustrator by Curvature Tool?
Look at the steps to draw using the Curvature Tool in Adobe Illustrator:
1) Select the Curvature Tool: You can find it in the Tools panel or press Shift + ~ on your keyboard.
2) Set the First Point: Click anywhere on the artboard to set your starting point
3) Create Additional Points: Click again to create a second point. A line segment will appear. Continue clicking to add more points and shape your path.
4) Adjust the Path: Move the pointer to preview the resulting path. You can drag points to adjust the curves as needed.
5) Close the Path: To complete your shape, click back on the starting point or press Enter to leave the path open.
6) Modify Points: Double-click an anchor point to switch between curved and straight segments. You can also add or delete points by clicking on the path.
How to Draw in Adobe Illustrator by Ellipse Tool?
Here are the steps to draw using the Ellipse Tool in Adobe Illustrator:
1) Select the Ellipse Tool: Select the Ellipse Tool from the Tools panel, or use the shortcut key L.
2) Draw the Ellipse: Click and drag on the artboard to create an ellipse. To draw a perfect circle, you need to hold down the Shift key while dragging.
3) Specify Dimensions: If you need specific dimensions, click on the artboard and enter the height and width values in the dialogue box that appears.
4) Adjust Fill and Stroke: Use the Properties panel or the toolbar to adjust the fill and stroke colours and other options.
5) Modify the Shape: Use the Selection Tool (shortcut V) to move, resize, or further adjust your ellipse.
Sign up for our Adobe Acrobat Training and discover powerful tools for managing and sharing PDFs.
How to Draw in Adobe Illustrator by Zig Zag Tool?
Let’s explore the steps to draw using the Zig Zag Tool in Adobe Illustrator:
1) Create a Line:
a) Select the Line Segment Tool (shortcut: )
b) Click and drag across your canvas to make a straight line. Hold the Shift key to keep it perfectly horizontal or vertical.
2) Apply the Zig Zag Effect:
a) With the line selected, go to the top menu and choose Effect > Distort & Transform > Zig Zag
b) A dialogue box will appear with fields to customise your zigzag line
3) Customise the Zig Zag:
a) Size: Adjusts the height of the zigzags
b) Ridges per Segment: Controls the number of zigzags
c) Points: Choose between “Corner” (sharp points) or “Smooth” (rounded points)
d) Check the “Preview” box to see changes in real-time
4) Finalise: Once you’re satisfied with the settings, click “OK” to apply the effect
Conclusion
Becoming proficient in How to Draw in Adobe Illustrator unlocks a realm of creative opportunities, allowing you to effortlessly and accurately bring your artistic ideas to fruition. By following these simple techniques, you can flawlessly create professional-quality vector artwork.
Elevate your design game with our Adobe Illustrator Training – join us now and bring your creative visions to life!
Frequently Asked Questions

Use the Pencil Tool for freehand drawing. Adjust the smoothness in the tool options for cleaner lines. The Brush Tool also offers various stroke styles for more artistic effects.

The Pen Tool and shape tools provide precision. Adjust anchor points for accuracy. The Zoom Tool helps with detailed work, ensuring precise adjustments.

The Knowledge Academy takes global learning to new heights, offering over 30,000 online courses across 490+ locations in 220 countries. This expansive reach ensures accessibility and convenience for learners worldwide.
Alongside our diverse Online Course Catalogue, encompassing 17 major categories, we go the extra mile by providing a plethora of free educational Online Resources like News updates, Blogs, videos, webinars, and interview questions. Tailoring learning experiences further, professionals can maximise value with customisable Course Bundles of TKA.

The Knowledge Academy’s Knowledge Pass, a prepaid voucher, adds another layer of flexibility, allowing course bookings over a 12-month period. Join us on a journey where education knows no bounds.

The Knowledge Academy offers various Adobe Courses, including Adobe Illustrator Training, Adobe After Effects Course etc. These courses cater to different skill levels, providing comprehensive insights into Adobe Illustrator Tools.
Our Office Applications blogs covers a range of topics related to Adobe Illustrator, offering valuable resources, best practices, and industry insights. Whether you are a beginner or looking to advance your Office Applications skills, The Knowledge Academy's diverse courses and informative blogs have you covered.
Upcoming Office Applications Resources Batches & Dates
Date
 Photoshop Course
Wed 27th Nov 2024
Wed 22nd Jan 2025
Wed 12th Feb 2025
Wed 19th Mar 2025
Wed 16th Apr 2025
Thu 29th May 2025
Wed 18th Jun 2025
Wed 23rd Jul 2025
Wed 13th Aug 2025
Wed 17th Sep 2025
Wed 15th Oct 2025
Wed 19th Nov 2025
Wed 10th Dec 2025


 Top Rated Course


 If you wish to make any changes to your course, please


