We may not have the course you’re looking for. If you enquire or give us a call on +91-181-5047001 and speak to our training experts, we may still be able to help with your training requirements.
Training Outcomes Within Your Budget!
We ensure quality, budget-alignment, and timely delivery by our expert instructors.

Learning How to Edit Video Backgrounds is an essential skill in the modern multimedia era. This technique involves replacing or enhancing the original backdrop of footage to achieve a desired aesthetic or thematic effect. Its significance cannot be overstated, especially in realms like professional video production, vlogging, corporate interviews, and even virtual event hosting.
According to Statista, the Video Editing software market is set to reach 732.17 million GBP by 2025. This demonstrates the rising popularity of manipulating backgrounds, as it ensures the content resonates with its intended audience. If you wish to dive deeper and understand the tools and techniques that bring this art to life, you’ve found the right blog. Keep reading further to discover How to Edit Video Backgrounds like a pro. Elevate your content quality and mesmerise your audience with industry-leading techniques.
Table of Contents
1) Why should you edit Video Backgrounds?
2) Understanding video layers and keying
3) Tools you need
4) Setting up your recording environment
5) Steps to edit Video Background
6) Common mistakes to avoid
7) Conclusion
Why should you edit Video Backgrounds?
In the realm of visual communication, first impressions can make or break an audience's engagement. Editing Video Backgrounds exudes professionalism, ensuring that the viewer's attention remains undistracted and purely on the presentation. It's a subtle yet powerful technique that amplifies the subject's presence, allowing them to stand out.
Manipulating Video Backgrounds allows creators to weave unique narratives or solidify branding aesthetics. Imagine replacing a dull office setting with the vibrant streets of Tokyo or the serene beaches of Maldives; it’s an invitation to a more captivating storytelling adventure.
Finally, not all recorded backgrounds are perfect. There may be unwanted elements, passing strangers, or even technical glitches that mar the scene. Instead of reshooting, which might be costly or logistically challenging, editing the Video Background offers a more efficient solution, correcting or replacing those imperfect scenes and ensuring the final output aligns with the creator’s vision.
Learn to bring mesmerising art to life with our Animation and Design Training!
Understanding video layers and keying
Delving into the realm of Video Editing requires an understanding of foundational concepts, with video layers and keying being primary among them. Video layers can be likened to transparent sheets stacked upon one another. Each layer can house different elements such as a main subject, background, text, or effects. By manipulating these layers individually or collectively, editors craft the desired visual experience.
Keying, particularly chroma keying, is an innovative technique pivotal in Video Background layering process. Commonly known as "Green Screen technology", chroma keying allows editors to isolate a particular colour (usually bright green or blue) and make it transparent. This transparency reveals the layer beneath, enabling the insertion of a new background or visual element. When executed perfectly, the original green backdrop vanishes, seamlessly replaced by, say, a bustling cityscape or a tranquil meadow, thus unlocking endless creative potential in video production.
Want to learn how to manipulate backgrounds? Try our Video Editing Training today!
Tools that you need
Venturing into the realm of Video Background editing for the first time? Arming yourself with the right tools can be the difference between a seamless masterpiece and a jarring visual experience. Here’s what you’ll need:
A computer or editing device: This is your primary workstation. Select a device with a robust processor, ample storage, and sufficient RAM. High-resolution Video Editing can be resource-intensive, so investing in a powerful machine ensures smooth operation.

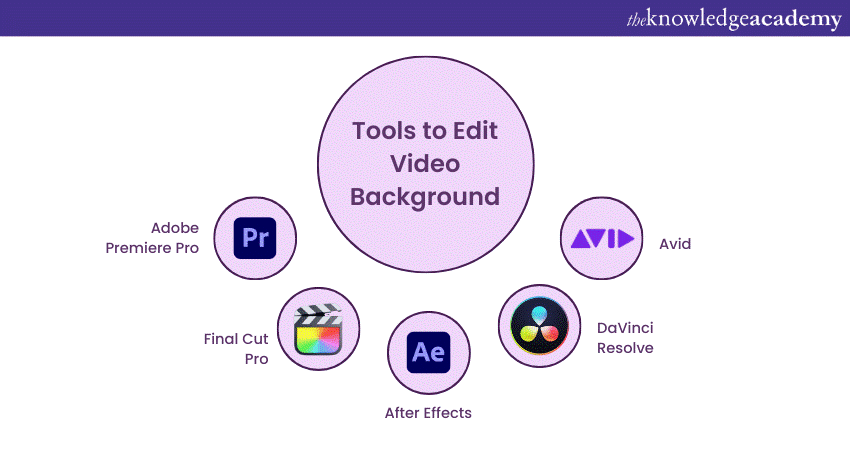
Editing software: The magic happens here. Adobe Premiere Pro is a popular choice, known for its vast features and compatibility. Final Cut Pro is another favourite, especially for Mac users. After Effects, while often used for animations and effects, can be a powerhouse for background editing. Alternatively, DaVinci Resolve and Avid offer robust colour grading tools that can be pivotal in ensuring harmony between your subject and the new background.
Green or Blue Screen: The linchpin of chroma keying. These screens are coloured distinctly to easily differentiate and remove the background. Green is often preferred due to its rare occurrence in natural skin tones, but blue can be handy if the subject has green elements.
Proper lighting equipment: Lighting can make or break your final output. An evenly lit green or blue screen ensures consistent keying. Invest in soft boxes or ring lights to avoid harsh shadows and ensure an even spread of light.
Learn to craft fascinating lore with our Articulate Storyline Training Masterclass!
Setting up your recording environment
Setting the stage for video recording, especially when intending to edit the background, is an art and science amalgamated. Let’s break down the essentials:
Choosing the right background colour: Opt for a green or blue screen, as these colours are distinct and can be easily keyed out. The choice often hinges on your subject's attire; if they’re wearing blue, go for a green screen, and vice versa.
Lighting your background evenly: Uniform lighting is paramount. Uneven lighting can create gradients on your background, making keying a challenge. Invest in soft boxes or LED panels to ensure consistent lighting across the entire screen.
Minimising shadows and reflections: Shadows can complicate the keying process. Ensure your subject stands at a distance from the background and adjust your lights to minimise shadow casting. Reflective objects or accessories should be used judiciously.
Dressing your subject appropriately: Wardrobe choices matter. Avoid colours that match your background. If you’re using a green screen, avoid green attire, as it'll get keyed out, making your subject partially invisible.
Make eye catching animations for games with our Blender Creator Training!
Steps to edit Video Background
Venturing into the world of video editing can be both exhilarating and challenging. Editing Video Backgrounds demands precision and an understanding of the nuances of your editing tools. Here's a step-by-step guide to help you seamlessly replace or enhance your Video Backgrounds:
Importing your video
Start your editing journey by bringing your footage seamlessly into your workspace. The steps to do so once you have edited your Video Background are as follows:
a) How to import footage into your editing software: Each software has its unique method. For instance, in Adobe Premiere Pro, you’d use the Media Browser panel, navigate to your clip, then drag and drop it into the Project panel. Similarly, in Final Cut Pro, the 'Import' button in the Media Browser lets you select and add your videos.
b) Organising your files: Keeping your workspace organised is crucial. Create bins or folders within your software, categorising footage by scenes, takes, or any other method that suits your workflow. Labelling and color-coding can also streamline the editing process.
Keying out the background
Inject new life into your videos by introducing captivating backdrops. The steps to do so are as follows:
a) Using colour selection tools: The primary tool here is the 'Keyer' or 'Ultra Key' tool, depending on your software. Once activated, use the eyedropper tool to select the colour of your green/blue screen. The software will automatically make that colour transparent, revealing the layers beneath.
b) Addressing imperfections: No key is perfect at first. You might notice patches that haven't been keyed out or parts of your subject becoming transparent. Adjusting settings like 'Pedestal' or 'Tolerance' can help refine the key and correct these issues.
Adding a new background
Inject new life into your videos by introducing captivating backdrops. The steps to do so are as follows:
a) Importing the desired background footage or image: Just like you imported your main footage, navigate to your desired background and bring it into your editing software.
b) Ensuring the new background matches: This step is pivotal for realism. The perspective, lighting, and mood of your new background should complement your main subject. For example, if your subject is front-lit, a background with a visible sun behind won’t make sense. Pay attention to these details.
Adjusting the edges
Fine-tuning the boundaries allows for a natural blend and smooth transitions during video editing. The steps to do so are as follows:
a) Smoothing and feathering: Edges can often appear harsh or unnaturally sharp after keying. Most keying tools offer 'Feathering' or 'Edge Softness' options. Adjusting these will give your subject smoother borders, allowing for a more natural blend with the background.
b) Addressing 'Green Spill': Occasionally, light reflecting off the green screen might cast a greenish hue onto your subject, especially around the edges. Tools like 'Spill Suppressor' in After Effects or similar features in other software can help neutralise this colour spill.
Final touches
Polish your background editing to perfection, ensuring harmony in colour, lighting, and details.
a) Colour grading and correction: To ensure visual harmony, the colours of your subject and background should match in tone and temperature. Colour grading tools allow you to adjust hues, saturation, and luminance, ensuring both elements of your video appear as if they were shot together.
b) Adding shadows or reflections: If your subject was originally filmed with shadows cast on the green screen, their sudden absence can be jarring. Use shadow tools or effects to recreate them on the new background. Similarly, if the new background has reflective surfaces, some manual work might be needed to simulate reflections for enhanced realism.
Create eye catching logos that can become face of a brand! Try our Logo Design Training!
Common mistakes to avoid
Video Editing, especially background replacements, can be transformative for content, but certain pitfalls await the unwary. Avoid these common mistakes during Video Editing for backgrounds to ensure your edits shine with professional finesse:

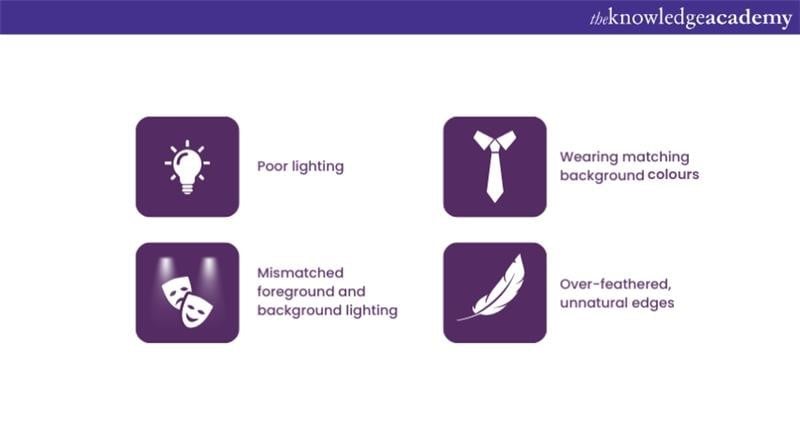
1) Poor lighting leading to uneven keying: Lighting is the backbone of video quality. Poorly lit green or blue screens can lead to uneven keying, where parts of the background aren't fully removed, resulting in a patchy look in a Video Background. Investing in good lighting equipment and ensuring even illumination is pivotal.
2) Wearing clothes similar to the background colour: A rookie mistake that even seasoned professionals make sometimes. When your attire matches the background colour, parts of you will be keyed out along with the background, leading to a ghostly or floating effect which is rarely intended.
3) Not matching the lighting between the new background and the foreground: If your subject appears lit from the left, but your new background suggests lighting from the right, the scene loses credibility. Always aim for lighting consistency to maintain a natural, immersive look.
4) Over-feathering edges leading to an unnatural look: While feathering is a handy tool to smoothen the transition between the subject and the new background, overdoing it can lead to an unrealistic halo around the subject. Balance is the key in Video Editing, so always opt for a natural blend.

Conclusion
Understanding How to Edit Video Backgrounds is pivotal in today's multimedia landscape, underscoring the content's professionalism and appeal. Embracing this skill can make a world of difference. While mastery comes with time, each attempt provides a valuable lesson. Dive in, experiment, and with practice, you'll perfect this transformative technique. Happy editing!
Create a masterpiece with our Sketchbook Essential Training today!
Frequently Asked Questions
Upcoming Digital Marketing Resources Batches & Dates
Date
 Video Editing Course
Fri 7th Feb 2025
Fri 4th Apr 2025
Fri 6th Jun 2025
Fri 8th Aug 2025
Fri 3rd Oct 2025
Fri 5th Dec 2025


 Top Rated Course


 If you wish to make any changes to your course, please


