


 Top Rated Course

We may not have the course you’re looking for. If you enquire or give us a call on +44 1344 203 999 and speak to our training experts, we may still be able to help with your training requirements.
How to Download & Install MongoDB
Scarlett Adams 07 April 2025Uncover the step-by-step process on "How to Download and Install MongoDB." From downloading MongoDB to configuring it, follow the sequential steps in this blog to complete the installation process. Whether you're new to MongoDB or need a refresher, this English-language tutorial will help you get started with MongoDB effortlessly.
Training Outcomes Within Your Budget!
We ensure quality, budget-alignment, and timely delivery by our expert instructors.
Table of Contents

Learning to Install MongoDB, an open-source NoSQL database, is a key step to harness its power, known for its scalability and flexibility. This installation process is essential for those working with data models requiring dynamic queries and unconventional row-and-column structures.
According to Statista, MongoDB ranked second as the most popular database skill, with 17.89 per cent of Developers stating they wish to use this language. As the popularity of MongoDB continues to grow, understanding its installation on Windows becomes increasingly crucial. Read this blog to learn about the step-by-step that you must follow to Install MongoDB and set it up for your Database Management needs.
Table of Contents
1) How to download and Install MongoDB?
a) Step 1: Download MongoDB
b) Step 2: Install MongoDB
c) Step 3: Configure MongoDB
d) Step 4: Install MongoDB
e) Step 5: Complete the installation
2) Conclusion
How to download and Install MongoDB?
MongoDB is among the leading Database Management platforms and software used by numerous users throughout the world, learning how to install it is essential. You must follow the below steps to Install MongoDB:
Step 1: Download MongoDB
Initiating your journey with MongoDB begins with downloading the necessary installation package. This package is readily available on the official website. Here are the detailed steps to initiating your MongoDB download:
a) Open your web browser: Launch your preferred web browser and navigate to MongoDB's official website.
b) Navigate to the download page: In the address bar of your browser, type in (https://www.mongodb.com/try/download/community) and hit the 'Enter' key. This action will take you to the MongoDB Community Server download page.
c) Choose your version: Upon landing on the MongoDB download centre, you will find several options to tailor your download. The first is the version. MongoDB recommends the latest stable release for the most secure and reliable version. However, you might need an older version depending on your specific requirements.
d) Select your Operating System (OS): Next, you will need to choose your operating system. In this case, as the focus is on the Windows platform, you should select 'Windows' under the 'Platform' dropdown.

e) Choose the package type: MongoDB offers various package types. For Windows, you will select the 'MSI' package. This is an installer package file format used by Windows.
f) Download the installer: Having selected all appropriate options, you're now ready to download the MongoDB package. Click the green 'Download' button. The .msi file should start downloading and will appear in your default download location once the download is complete.
Learn about various technologies with our App & Web Development Training!
Step 2: Install MongoDB
Once you've successfully downloaded the .msi file, the next step is to Install MongoDB on the Windows system. Here is a detailed, step-by-step guide to navigating you through the installation process:
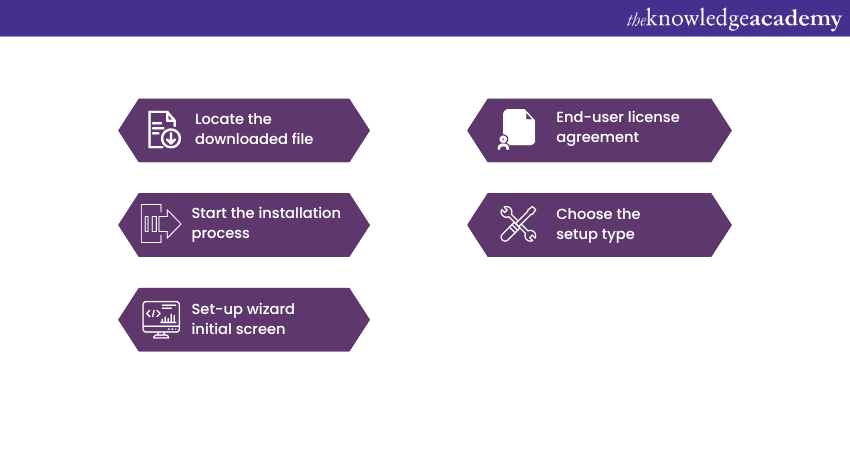
a) Locate the downloaded file: Open your download folder or the location you've chosen to save the downloaded file. You should find the MongoDB .msi file you just downloaded.
b) Start the installation process: Double-click the .msi file to initiate the installation. Your system will prompt you with a set-up wizard designed to guide you through the rest of the process.
c) Set-up wizard initial screen: The first screen of the set-up wizard provides you with an overview of MongoDB and the version you are installing. To proceed with the installation, click 'Next'.
d) End-user license agreement: The subsequent screen displays the End User License Agreement (EULA). It is essential to review this agreement thoroughly, as it defines the terms of use for MongoDB. If you agree with the stipulated terms, select the 'I accept the terms in the End User License Agreement' checkbox, and after carefully reading it, click 'Next'.
e) Choose the setup type: Next, you will be asked to select a Setup Type. There are two options:
1) Complete: This option will install all program features ideal for users to utilise all MongoDB offers.
2) Custom: This option allows you to pick a specific feature to install and specify the installation location. This choice is suitable for advanced users or those with unique requirements.
Learn the fundamentals of MongoDB with our MongoDB Developer Course Today!
Step 3: Configure MongoDB
Once you've successfully installed MongoDB, the next crucial step is to configure MongoDB as a Windows service. Configuring MongoDB in this manner allows the database service to start up automatically whenever your computer boots, eliminating the need for manual startup. Here's a step-by-step guide on how to do this:
a) Service configuration: After you select your setup type and click 'Next', you'll be directed to the 'Service Configuration' screen. Here, MongoDB allows you to set it up as a service that runs automatically when your system starts.
b) Select the user type: On the Service Configuration screen, you'll notice that 'Run service as Network Service user' is preselected. It's advisable to leave this selected, as running MongoDB as a Network Service user is considered the most secure way to run the database.
c) Specify service name: The default service name 'MongoDB' is also pre-filled. You can change this name if required, but it is typically best to leave this as the default unless you have a specific need to alter it.
d) Data directory and log directory: MongoDB also allows you to specify the Data Directory and Log Directory. These directories are where MongoDB will store its data files and log files, respectively. By default, these directories are set to the following command for the Data Directory and the next command for the Log Directory. You can change these directories according to your preference, but ensure you remember their location.
|
'C:Program FilesMongoDBServer{mongodb-version}data' |
|
'C:Program FilesMongoDBServer{mongodb-version}log' |
e) Proceed with configuration: Once you've verified the settings, click 'Next' to proceed. This action will save your configurations and set up MongoDB as a service on your Windows machine.
Learn to build beautiful websites with our Elm Web Development Training!
Step 4: Install MongoDB
After finalising your configurations, click 'Install' to start the installation process. You may be asked for permission by your system to install the software. After granting permission, the installation will commence. This process may take several minutes.
Step 5: Complete the installation
After the installation process is complete, the wizard will show a notification and will close. Click 'Finish' to exit the setup wizard. To ensure MongoDB has been installed correctly, open a Command Prompt as an administrator. Proceed to type the following command: 'mongo --version'. If MongoDB is successfully installed, it will display the version of MongoDB you have installed.

Conclusion
Congratulations, you have now successfully managed to download and Install MongoDB on your Windows system! Your journey towards handling large data sets with a database offering high performance, high availability, and easy scalability has now officially begun. Remember, this guide is the first step. To make the most of MongoDB, consider exploring MongoDB Interview Questions and learning about its powerful features, such as MongoDB Upsert, for efficient data management.
Learn the basics of web development with our Introduction to HTML Course!
Upcoming Programming & DevOps Resources Batches & Dates
Date
 Introduction to HTML
Introduction to HTML
Fri 23rd May 2025
Introduction to HTML
Fri 25th Jul 2025
Introduction to HTML
Fri 26th Sep 2025
Introduction to HTML
Fri 28th Nov 2025
 If you wish to make any changes to your course, please


