


 Top Rated Course


We may not have the course you’re looking for. If you enquire or give us a call on +61 1-800-150644 and speak to our training experts, we may still be able to help with your training requirements.
Use Blender Video Editing Like A Pro
Sophia Ellis 08 September 2023Elevate your video editing skills with "Use Blender Video Editing Like A Pro." Discover the essentials of setting up your workspace, master basic video editing techniques, and push the boundaries with advanced methods. Whether you're a beginner or an experienced editor, this comprehensive blog will empower you to use Blender for video editing like a pro.

Training Outcomes Within Your Budget!
We ensure quality, budget-alignment, and timely delivery by our expert instructors.
Table of Contents

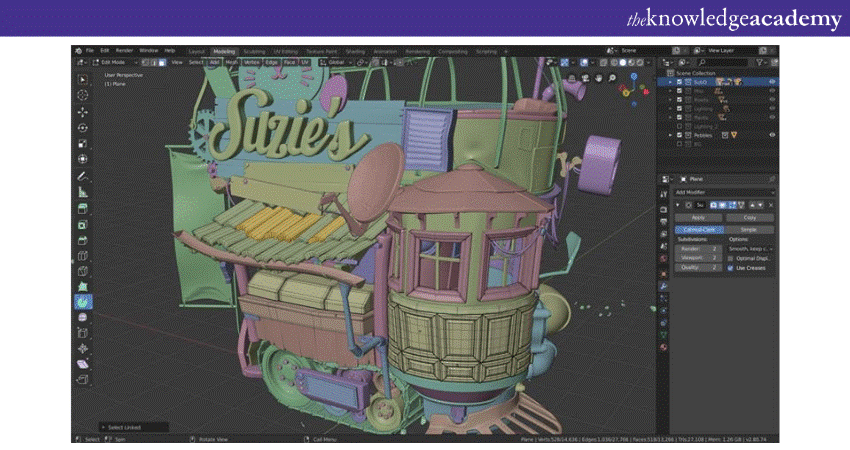
Blender Video Editing might not be the first thing that comes to mind when thinking of this robust software, primarily hailed for its 3D modelling prowess. However, hidden within its vast suite of tools is the Video Sequence Editor (VSE), a formidable contender in video post-production. Blender's VSE is a hidden gem for aspiring and professional video editors alike due to its compelling blend of advanced features without a hefty price tag.
According to Statista, the market for 3D Animation will continue to grow, surpassing 21.31 billion GBP by 2026. If you too are fascinated by the world of Animation and wish to harness the full power of Blender, one such powerful Animation software, this blog is what you need. Harness the power of Blender Video Editing like a pro and sharpen your expertise in trimming and infusing effects to produce and export breathtaking videos.
Table of Contents
1) Introduction to Blender's VSE
2) Setting up your workspace
3) Basic Blender Video Editing techniques
4) Advanced Blender Video Editing techniques
5) How to use Blender Video Editor for rendering?
6) Tips and tricks for professional results
7) Conclusion
Introduction to Blender's Video VSE
When diving into the realm of Video Editing, there are numerous software options available. But if you're looking for a tool that's not only free but also multifunctional, then Blender's VSE might be your perfect match. Housed within the expansive ecosystem, VSE is a robust Video Editing suite that often remains in the shadow of Blender's more recognised features. Yet, for those in the know, the VSE is a hidden gem awaiting discovery.
At its core, the VSE is designed for post-production tasks. From slicing and dicing video clips to syncing soundtracks, it is equipped with features to transform raw footage into polished videos. And because it’s non-linear, you retain full flexibility throughout the editing process. Want to rearrange your clips? Simply drag and drop. Need to trim a bit off the end? Slice it off without a second thought – your original file remains untouched.
One of the standout attributes of Blender's VSE is its integration capability. Suppose you're creating a video that requires some 3D elements, like a title sequence with depth or a 3D object overlay. In that case, there's no need to juggle between different software. With Blender, you can craft your 3D model and animate it within the same environment, then seamlessly transition to the VSE to incorporate it into your video. This integration eliminates the need for cumbersome exports and imports, streamlining the editing workflow.
Learn to bring mesmerising art to life with our Animation and Design Training!
Setting up your workspace
Beginning with a well-organised workspace is essential for efficient Video Editing. A cluttered or inefficient layout can disrupt your creative flow, waste time, and lead to errors. Fortunately, Blender's VSE offers a customisable and intuitive interface to ensure you get the most out of your editing sessions.
Layout essentials
Upon launching Blender, you'll be greeted with its default layout, primarily tailored for 3D modelling. However, the real magic for Video Editors begins when you switch to the Video Editing workspace. Here’s how to get started:
Navigating to the Video Editing Workspace: On the top, you'll find different tabs named 'Layout', 'Modelling', 'Sculpting', etc. Click on the one that says, 'Video Editing'.
Understanding the panels
Panels are the most common element in Blender, thus having familiarity with them can make the Video Editing process. Some of them are as follows:
1) Sequencer: This is the heart of the VSE. It's where you'll spend most of your time, arranging video and audio clips on a timeline.
2) Preview: Adjacent to the sequencer, the preview panel gives you a real-time view of your edits. It lets you visualise changes as you make them.
3) Graph editor: Useful for managing keyframes and animation curves. While it might not be used as often as other panels, it's essential for fine-tuning effects or animations.
4) Properties panel: Here, you can adjust various settings related to your project and the effects you apply.
Dialling in the right settings
Before diving into the actual editing, it's crucial to set the stage. This means configuring your project settings to ensure smooth editing and accurate rendering.
1) Accessing project settings: In the Properties panel, you'll notice several tabs. Click on the one that looks like a printer or a camera; this is your output settings tab.
2) Resolution: Define the width and height of your video. For standard HD, it's 1920x1080 pixels, but you might want to match the resolution of your source footage.
3) Frame rate: This is vital for smooth playback. Common frame rates include 24, 30, or 60 FPS. Ensure this matches the frame rate of your source footage to prevent playback issues.
4) Start/End frames: This determines the length of your timeline. Initially, set this to the length of your longest clip. You can adjust it later as your project evolves.
Learn to craft fascinating lore with our Articulate Storyline Training Masterclass!
Basic Blender Video Editing operations
Embarking on your journey with Blender's Video Sequence Editor (VSE) is an exciting venture. As with any new software, starting with the basics ensures a solid foundation upon which to build your skills. Let's delve into some fundamental operations to kickstart your Video Editing endeavours:
Adding clips to your timeline
Your project comes to life when you start adding clips to the timeline. Here's how:
1) Video clips: In the Sequencer, navigate to the menu, select 'Add', then choose 'Movie'. A file browser will pop up, allowing you to locate and select your desired video file.
2) Audio clips: The process is similar. In the Sequencer, click 'Add' and choose 'Sound'. Trace your audio file and click on it to select it.
Once added, you'll see your clips represented as strips on the timeline. Video clips will typically have both a video and an audio strip.
Manipulating clips
Mastering the manipulation of clips is key to efficient editing. Here are the core actions:
1) Move: Simply left click on a strip and drag it to your desired position on the timeline.
2) Cut/Split: To split a clip at a specific point, position your playhead where you want the cut, then use the razor tool from the tool panel or press 'K'. Afterwards, click on the strip to make the cut.
3) Extend/Shorten: To adjust the length of a clip, hover over either end of the strip. When the cursor changes, click and drag to lengthen or shorten.
Synchronising audio and video
It's not uncommon for audio and video to be slightly out of sync, especially if recorded separately. To remedy this:
1) Waveforms: Enable waveforms on the audio strip. This visual representation helps match peaks in the audio with corresponding actions in the video.
2) Matching frames: If you know both the video and audio start at the same frame, align the beginnings of both strips on the timeline.
Transitions between clips
Seamless transitions elevate the quality of your video, and here's a simple way to achieve it:
Cross effect: Overlap two clips on the timeline, ensuring the end of the first clip is over the beginning of the second. With both strips selected, go to 'Add' → 'Effect Strip' → 'Cross'. The duration of the overlap determines the length of the fade transition between the two clips.
Make eye-catching Animations for Games with our Blender Creator Training!
Advanced Blender Video Editing techniques
Once you've gotten a grasp of the basic editing operations in Blender's Video Sequence Editor (VSE), it's time to explore the more advanced techniques. These will give your projects a more polished, professional look, and enable greater creativity and flexibility in your edits.
Effects to enhance visuals
Here’s how you can enhance the visuals for your projects:
1) Colour grading: Elevate the look of your clips with colour correction. The 'Colour Balance' strip provides shadows, midtones, and highlights adjustments. Alternatively, the 'Curves' effect strip lets you adjust colour channels and brightness with precision.
2) Transforms: Need to resize or reposition a clip within the frame? The 'Transform' effect strip is your go-to. Whether it's rotating, scaling, or moving, this strip provides extensive control over a clip's appearance.
3) Text and titles: Introduce titles or captions using the 'Text' effect strip. Beyond just typing, Blender allows you to animate the text, change its font, size, and colour, creating dynamic titles that catch the viewer's attention.
Control playback with speed control
Whether you want a slow-motion effect or a time-lapse, the 'Speed Control' effect strip allows you to manipulate the playback speed of your clips. This can dramatically change the mood or narrative of a scene.
Dive deep with audio editing
While Blender's VSE is visually oriented, it doesn't skimp on audio editing capabilities:
1) Volume levels: Adjust the loudness of audio clips, ensuring a consistent audio experience for the viewer.
2) Fades: Gradually increase or decrease audio levels at the beginning or end of clips, providing smooth transitions.
3) Filters: Enhance the clarity of your audio using filters. You can use the high and low-pass filters to eliminate unwanted frequencies, refining the audio's quality.
Seamless integration with 3D
One of Blender's standout features is the synergy between its 3D modelling/rendering capabilities and the VSE:
1) 3D scene rendering: Create a 3D scene using Blender's primary workspace. Once you're satisfied, render it out.
2) Combining in VSE: Import the rendered scene into the VSE as you would any other video clip. This allows for a seamless blend of 3D elements and real footage, giving your projects a unique edge.
Create eye catching Logos that can become the face of a brand! Try our Logo Design Training!
How to use Blender Video Editor for rendering?
After hours of meticulous editing, adding effects, and perfecting transitions, you're finally at the finish line. The last step in the Video Editing process is exporting and rendering your project. Blender's VSE provides a streamlined interface to ensure your masterpiece is rendered in the best quality.
Setting up render properties
Your render settings influence the quality, size, and format of the final output:
1) Navigating to output settings: In the Properties panel on the right, locate the tab with a printer or camera icon. This is the 'Output' section where you'll define how and where Blender saves the rendered video.
2) File format: Here, you'll decide the format of your output file. For video projects, select 'FFmpeg video'. This format supports a wide range of codecs and maintains good video quality.
3) Output path: Direct Blender to where you want to save the final video by setting the output path. Click on the folder icon, navigate to your preferred location and specify a name for the file.
Encoding your video
Encoding determines the quality and size of your video, so it's crucial to get it right:
1) Container: In the Encoding section, set the container to 'MPEG-4'. This is a popular format that offers a good balance between quality and file size.
2) Video codec: Choose 'H.264'. It’s widely supported and offers great quality without excessively large file sizes.
3) Audio codec: Depending on your needs, you can choose between 'AAC' (which offers better quality) or 'MP3'. Most modern platforms support AAC, so it's generally a safe choice.
4) Bitrate and quality: Adjust these settings if you need to control the output size and quality further. Higher bitrates result in better quality but larger file sizes.
Rendering your masterpiece
With everything set, it's time to render:
1) Initiating render: Navigate to the top menu, select 'Render', and then choose 'Render Animation'. Alternatively, the shortcut 'Ctrl' + 'F12' gets the job done faster.
2) Progress monitoring: As rendering begins, Blender will display the progress, showing you each frame as it's completed. Depending on your project's complexity and your computer's power, this might take some time.
Create a masterpiece with our Sketchbook Essential Training today!
Tips and tricks for professional results in Blender's VSE
Venturing into Video Editing with Blender's VSE can be both thrilling and challenging. But, as with any craft, there are certain insider tips and tricks that can elevate your results from amateur to professional. Let’s dive into some of these nuances:
Proxy Editing for fluid workflow
Proxy Editing is a technique employed by Video Editors to address the challenges posed by high-resolution footage. When such detailed footage is played back within an editor, it often leads to sluggish or interrupted playback, hindering the editing process. The solution? Proxies. They serve as low-resolution stand-ins for your original clips, allowing for smoother and more efficient editing.
To leverage this in Blender, one needs to dive into the properties of a chosen video strip. Here, by activating the 'Proxy/Timecode' option and selecting a desired resolution percentage, Blender takes over, generating these proxy clips. Conveniently, within the preview pane, you retain the flexibility to toggle between the proxy version and the original full-resolution clip as needed.
The art of colour consistency
Inconsistent colours can distract viewers and come across as unprofessional. Whether it's due to varying lighting conditions during shooting or using footage from different cameras, maintaining a consistent colour grade is paramount. You can use the 'Colour Balance' or 'Curves' effect strips mentioned earlier. Eyeball your clips side by side and adjust until they match or use tools like scopes and histograms for a more analytical approach.
Sound design: The underestimated hero
Sound design can often make or break a video. Well-timed sound effects, ambient noise, or a stirring soundtrack can deeply immerse viewers. Use the VSE to layer and adjust audio tracks. Don't forget to balance audio levels so nothing is too jarring and consider using fades for smoother transitions between audio clips.
Mastering shortcuts for efficiency
You might be curious why Shortcut Keys in Blender are important. Simply put, while navigating menus is fine, these shortcuts expedite tasks, allowing for a faster, more fluid editing process. Some of these key shortcuts are as follows:
1) 'S': Scale (used for resizing strips in the timeline).
2) 'G': Grab (for moving strips around).
3) 'K': Cut (splits strips at the playhead's position).
4) 'Shift + A': Add (to quickly insert new clips or effects).
5) 'H': Mute/Unmute a strip.
Review on different devices
Different devices (phones, tablets, TVs) might display your video differently due to varying screen technologies and calibrations. After rendering, watch your video on several devices. Check for any inconsistencies in colours, audio levels, or playback quality. It ensures your audience gets a consistent experience, regardless of how they view it.

Conclusion
The beauty of Blender Video Editing lies in its comprehensive editing tools and ability to merge the worlds of Video Editing and 3D Modelling. The VSE offers a rich palette of features to bring your creative visions to life, whether you're a Filmmaker, YouTuber, or Animator. So, the next time you're considering video editing software, remember the capabilities hidden within Blender and give the VSE a spin. You might find it's the tool you never knew you needed.
Interested in making awesome Animation? Try out our Animation Masterclass!
 If you wish to make any changes to your course, please


