


 Top Rated Course

We may not have the course you’re looking for. If you enquire or give us a call on +44 1344 203999 and speak to our training experts, we may still be able to help with your training requirements.
How To Use Adobe Photoshop? A Beginner's Guide
Sienna Roberts 03 December 2024Discover the potential of Adobe Photoshop with our step-by-step blog on How To Use Adobe Photoshop. Unlock your creativity as we walk you through essential tools, techniques, and tips to enhance your photo editing and design skills. Whether you're a beginner or an experienced user, this blog will help you master the art of Photoshop.

Training Outcomes Within Your Budget!
We ensure quality, budget-alignment, and timely delivery by our expert instructors.
Table of Contents
Adobe Photoshop, the world-renowned image editing software, can seem daunting for beginners. However, with proper guidance, anyone can master its tools and transform their images into masterpieces. In this blog, we will provide beginners with a step-by-step introduction on How to Use Adobe Photoshop and implement its several features.
Table of Contents
1) Setting up your workspace
2) How to Use Adobe Photoshop?
a) Basic tools and their functions
b) Understanding Layers
c) Basic image adjustments
d) Text and typography
e) Filters and effects
3) Saving and exporting your work
4) Conclusion
Setting up your workspace
Configuring your Adobe Photoshop workspace efficiently can vastly improve your workflow and productivity. Start by choosing a preset layout from the 'Window' menu, such as 'Essentials' or 'Photography'. For a tailored experience, drag panels and toolbars to desired locations, grouping related Adobe Photoshop Tools together.
Use 'Workspace' in the top right corner to save your custom layout for future sessions. Don't forget to calibrate your monitor for accurate colour representation. Regularly updating shortcuts for frequently used tools can also prove beneficial. An optimised workspace ensures smoother transitions between tasks and a more intuitive creative process.

How to Use Adobe Photoshop?
Now that you know how to set up your workplace, we will dive right into How to Use Adobe Photoshop for beginners.
Basic tools and their functions
This section of the blog will expand on some basic Adobe Photoshop tools and their functions.
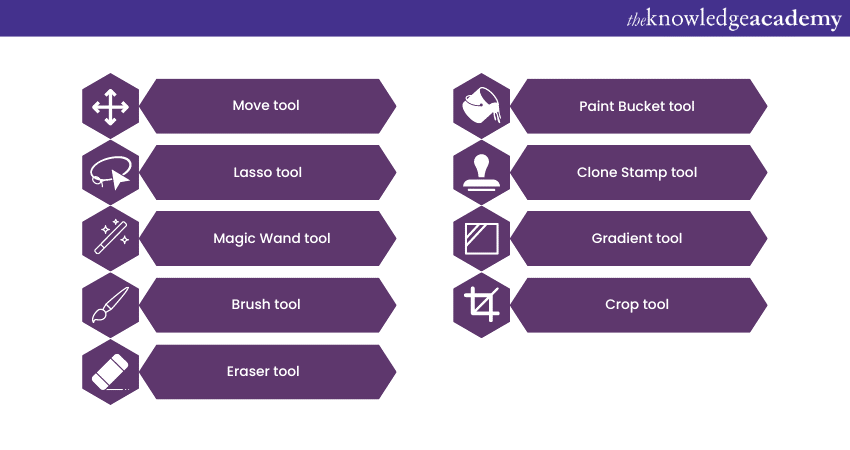
Move tool
The Move tool is the primary tool for shifting elements within the canvas.
1) Functionality: Beyond dragging objects, holding the 'Shift' key ensures you move the selected object in a straight line (either horizontally or vertically).
2) Auto-select: By enabling this feature from the top toolbar, you can easily click and select Layers directly from the canvas without having to do it from the Layers panel.
Lasso tools
Each Lasso tool has a particular strength in selection:
1) Freehand Lasso tool: Ideal for quick, rough selections. Draw around the area, and once you release the mouse, Photoshop will close the selection.
2) Polygonal Lasso tool: Every click establishes a point with straight lines between them. It’s perfect for selecting geometric shapes or areas with straight edges.
3) Magnetic Lasso tool: As you drag the tool, it automatically clings to the edge of contrasting objects. The 'Frequency' option allows you to set how often the tool sets fastening points.
Enhance your portfolio with practical knowledge! Discover our Adobe Training and start creating standout projects.
Magic Wand tool
This tool is excellent for selecting uniformly coloured areas.
1) Contiguous option: If enabled, the tool only selects areas that are physically touching the area you clicked. If disabled, it selects all areas of similar colour throughout the image.
2) Sample all Layers: This option allows the tool to consider all Layers, not just the active one, when determining colour similarity.
Brush tool
More than a simple painting tool, its versatility shines with its plethora of settings:
1) Blend modes: You can change how the painted colour interacts with the background, from overlaying to multiplying and more.
2) Brush presets: There are numerous preset brushes, each offering different textures and densities.
3) Shape dynamics: You can control aspects like size jitter, angle jitter, and roundness jitter to introduce randomness in brush strokes.
Eraser tool
This tool can revert parts of a Layer to transparency or a previous state.
1) Magic Eraser: Acts similarly to the Magic Wand Tool, but instead of making selections, it instantly deletes the selected area.
2) Brush hardness: Just like the Brush Tool, you can adjust the hardness, which controls the sharpness of the edges.
Paint Bucket tool
Perfect for quickly filling in large areas.
1) Blend modes: Like the Brush Tool, you can control how the fill interacts with the underlying colours.
2) Anti-alias: This ensures the edges of the filled area are smooth, not jagged.
Clone Stamp tool
This tool is essential for duplicating parts of an image:
1) Aligned option: If turned on, the source point moves as you paint. If turned off, the source point remains fixed.
2) Sample all Layers: Takes data from all visible Layers rather than just the active one.
Gradient tool
A tool designed for creating smooth transitions:
1) Gradient editor: Allows you to design your gradients, choosing colours and transparency levels.
2) Reverse: This option will invert the order of the colours in your gradient.
3) Dither: Adds noise to the gradient, reducing banding and creating a smoother result.
Crop tool
This is your go-to tool for reframing and trimming:
1) Straighten: If your horizon isn’t level, use this function. Draw a line across the part of the image that should be horizontal, and Photoshop will rotate the image accordingly.
2) Content-aware: When expanding a crop beyond the image's original boundaries, this option tries to fill the extra canvas intelligently.
Unleash your creativity and master the art of image editing with our comprehensive Adobe Photoshop Course. Sign up now!
Understanding layers
The concept of layers is fundamental to the power and flexibility of Adobe Photoshop. At its most basic level, a layer can be likened to a transparent sheet on which imaging effects or images are applied. But in Photoshop, they offer much more. Let’s delve deep into understanding layers:
Layers Panel
The layers panel is the hub of all Layer-related activities. Here, you can:
1) View layers: Each layer you create is listed here.
2) Toggle visibility: Clicking the eye icon next to a layer will hide or reveal it.
3) Rename layers: Double-clicking the layer's name allows you to rename it, helping maintain an organised workflow.
4) Change layer order: Simply click and drag layers to reorder them.
Types of layers
There are different types of layers in Photoshop, all of which we will expand on as follows:
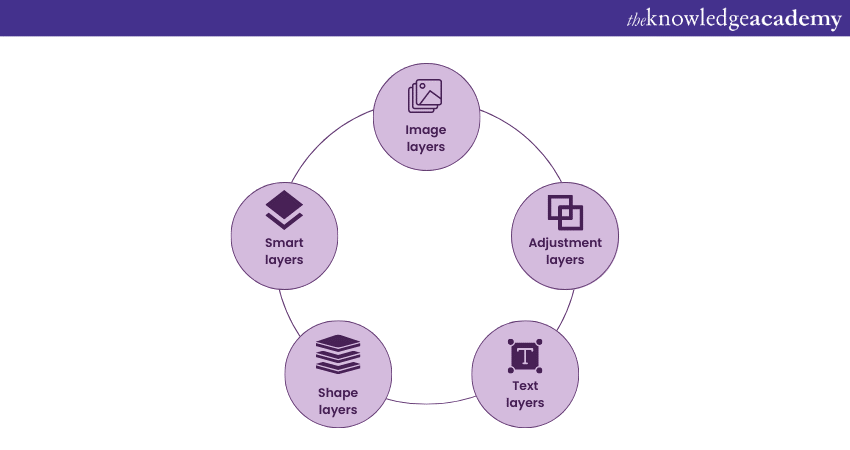
1) Image layers: These are the standard Layers where your images reside.
2) Adjustment layers: These allow you to apply colour and tonal adjustments without permanently altering the original image.
3) Text layers: Created when you use the Text tool. These are editable Layers specifically for text.
4) Shape layers: These contain vector shapes like rectangles, ellipses, or custom shapes you draw with the pen tool.
5) Smart layers: These are special Layers that preserve an image’s source content with all its characteristics.
Layer styles and effects
Layer styles are one-click effects you can add to layers, such as drop shadows, glows, or bevels. Once applied, they can be toggled, edited, or removed without affecting the original layer.
Layer Masks
One of Photoshop’s most powerful features. A layer mask lets you control the visibility of specific parts of a layer. White on a mask reveals areas, black conceals, and the various shades of grey partially reveal.
Layer opacity and fill
Layer opacity controls the transparency of everything on the layer, including any styles or effects. On the other hand, fill affects the transparency of only the layer's content, leaving layer styles or effects untouched.
Blending modes
These are techniques that determine how a layer blends with the Layers below it. Common modes include Multiply, Screen, Overlay, and Soft Light. Each provides a unique interaction of the layer's pixels with those beneath.
Grouping and Linking Layers
Layers can be grouped together by selecting them and pressing Ctrl+G (Cmd+G on Mac). This helps in organising related Layers. You can also link layers so that moving one layer automatically moves any other linked layers.
Flattening and Merging layers
Flattening combines all layers into one, typically done before exporting the final version of an image. On the other hand, Merging combines selected layers. Unlike flattening, it doesn’t compress all layers into one.
Layer locks
Lock options in the layers panel help to prevent accidental edits. You can lock the whole layer, or specific aspects of it, like just the pixels or just the position.
Unlock your creativity with our Adobe InDesign Course – start your design journey today!
Basic image adjustments
Adjusting an image is a fundamental aspect of digital editing in Adobe Photoshop. Basic adjustments can enhance photographs, correct for imperfections, or creatively alter the visual aesthetics. Let’s delve into the primary tools and techniques:
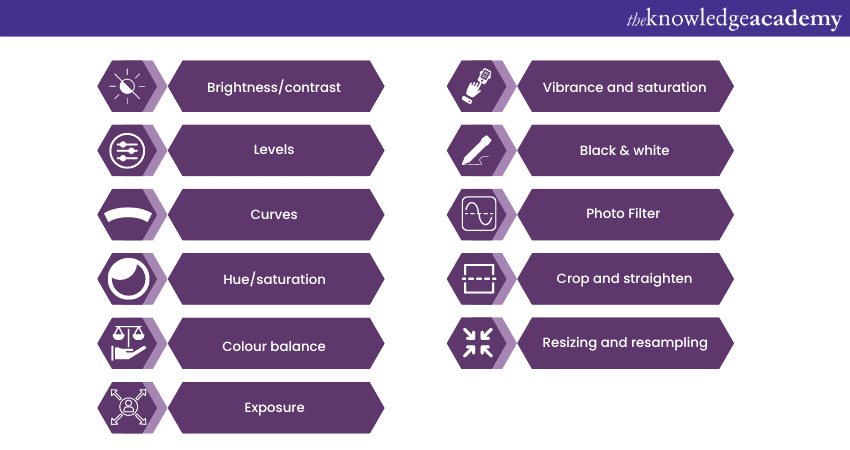
Brightness/contrast
This adjustment allows you to make simple edits to the lightness and difference in light and dark areas of an image. While brightness controls the overall lightness or darkness, contrast increases or decreases the difference between dark and light areas – making them either stand out or blend more.
Levels
Levels help you adjust the brightness, contrast, and tonal range by mentioning the location of complete black, complete white, and midtones in a histogram. There are two types of Levels in Photoshop, namely:
1) Input Levels: Three droppers (black, grey, white) can be used to set the shadows, midtones, and highlights of an image.
2) Output Levels: Controls how the extremes (black and white) are displayed.
Curves
A more advanced tool than Levels, it provides precise control over the brightness and contrast of an image. By plotting points on the curve and dragging them, you adjust specific tonal ranges without affecting others.
Hue/saturation
Hue/saturation is perfect for colour adjustments. Hue alters the overall colour scheme, while saturation intensifies or dulls the colours. At 100%, colours are vibrant; at -100%, the image becomes greyscale. On the other hand, brightness adjusts the overall brightness.
Colour balance
Colour balance is useful for correcting colour casts or for creative effects. Make sure to adjust the balance of reds, greens, and blues in the shadows, midtones, and highlights.
Exposure
The exposure feature adjusts the exposure of an image, just as if you were adjusting it on a camera. The types of exposure settings include:
1) Exposure: Alters the global brightness.
2) Offset: Shifts the histogram to the left or right.
3) Gamma correction: Modifies the midtones while retaining the tonal quality of shadows and highlights.
Vibrance and saturation
While similar to Hue/Saturation, this tool offers another method for adjusting colour intensity. While vibrance increases saturation where it is lacking, typically preserving skin tones, saturation amplifies or decreases the saturation uniformly throughout the image.
Black & white
Black & white converts a colour image to greyscale, but with added control. You can adjust the intensity of how specific colours convert into greyscale, allowing for a richer or varied tonal result.
Photo Filter
A photo Filter mimics the effect of placing a coloured Filter in front of a camera lens. Filters can be used to warm or cool an image, or apply creative colour effects.
Crop and straighten
Cropping and straightening are not exactly colour or tone adjustments, but they are crucial in image composition. While cropping allows you to remove parts of an image to enhance the composition or fit a specific format, straightening corrects tilted images and is useful for ensuring horizons are level.
Resizing and resampling
Resizing and resampling alter the dimensions of an image. While resizing changes the print dimensions without altering pixel count, resampling changes the pixel dimensions – potentially affecting image quality.
Unleash your creative potential today with our Adobe Illustrator Training. Click here to sign up and start your design journey!
Text and typography
Typography, or the art of arranging type, is a vital tool in design. Adobe Photoshop provides a myriad of tools to help you manipulate and utilise text effectively. This guide will provide you with an overview of the key aspects of text and typography within the program.
Text tool basics
In Photoshop, the primary tool for adding text is the Type Tool (T). The types of Type tools are:
1) Horizontal Type tool: For adding horizontal text.
2) Vertical Type tool: For vertically oriented text.
3) Once you've selected the Type tool, simply click on your canvas to begin typing.
Point text vs paragraph text
Point text is created by just clicking and starting to type. It expands as you type and does not wrap to the next line unless you press 'Enter'. On the other hand, paragraph text is created by clicking and dragging to form a bounding box. Text entered will wrap within this box.
Character and Paragraph Panels
Access these panels under Window > Character or Window > Paragraph. They contain essential typography settings.
1) Character Panel:
The character panel consists of the following typography settings.
a) Font family and style: Choose the typeface and its specific style (e.g., Bold or Italic).
b) Font size: Adjust the size of your type.
c) Leading: Controls the vertical space between lines.
d) Kerning and tracking: Adjust the space between characters or groups of characters.
e) Vertical and horizontal scale: Stretch or compress the text.
f) Colour: Change the text colour.
g) Paragraph Panel:
The character panel consists of the following typography settings.
a) Alignment: Align text left, centre, right, or justify.
b) Indentation: Control the left or right indentation.
c) Spacing before/after: Add space before or after a paragraph.
d) Hyphenation: Control how words break at the end of a line.
e) Warping text
Under the Type menu, there's an option called 'Warp Text'. This feature lets you bend, curve, or reshape your text to fit various shapes or styles. It's perfect for creating logos or other design elements.
Converting text to shape
There might be instances when you want to manipulate individual letters as shapes. Right-click on the text Layer and then select 'Convert to Shape'. This turns your text into a vector shape, which can then be manipulated using the Direct Selection Tool or the Pen Tool.
Text Masks
By using text as a mask, you can fill each letter with different images or effects. Simply place your image Layer above your text Layer, right-click on the image Layer, and select 'Create Clipping Mask'. Your image will now fill the text.
Styling text with Layer styles
To add effects like shadows, glows, or strokes, right-click on your text Layer and choose 'Blending Options'. Here you can apply and customise a range of Layer styles.
Text on a path
Using the Pen Tool or any Shape Tool, you can create a path and then add text along it. With the Type Tool selected, hover over the path until you see the cursor change, then click and type. Your text will follow the exact shape of the path.
Anti-aliasing
This option smoothens the edges of your text. It's found in the options bar at the top when you have the Type Tool selected. Choices range from 'None' to 'Smooth', 'Crisp', 'Strong', and 'Sharp', each offering a different level of edge smoothing.
Fonts and licensing
Always ensure you have the right to use a particular font, especially for commercial projects. Some fonts are free for personal use but need a license for commercial projects.
Unleash your creativity with our Adobe After Effects Course – sign up now and elevate your digital animation skills to new heights!
Filters and effects
Filters and effects are integral to the transformative power of Adobe Photoshop, providing a multitude of ways to manipulate and enhance images. They can range from simple adjustments to complex, artistic transformations. Here's a comprehensive overview:
Understanding Filters
Filters are pre-set operations that automatically alter an image in a specific way. You can access them via the 'Filter' menu at the top of the Photoshop interface.
Filter Gallery
The filter gallery (found under 'Filter' > 'Filter Gallery') is a visual collection of many of Photoshop's filters, grouped into folders like Artistic, Brush Strokes, and Texture. You can preview how each filter affects your image before committing.
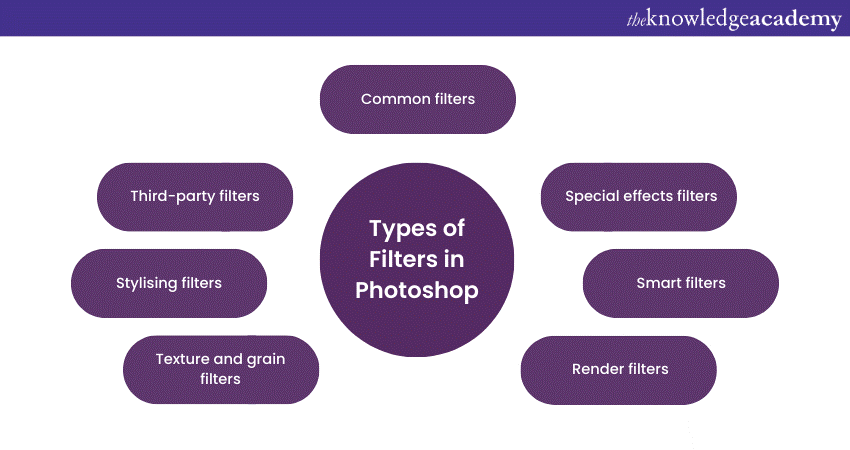
Common Filters
The following are some of the commonly used Filters in Photoshop.
1) Blur: This group contains various blurring methods like Gaussian Blur, Motion Blur, and Lens Blur. Each offers a different type of blurring effect.
2) Sharpen: Enhance the clarity and details of an image. Common options include Unsharp Mask and Smart Sharpen.
3) Distort: Change the shape of parts of your image. This includes effects like Pinch, Ripple, and Twirl.
4) Noise: Add or remove grain and noise. 'Add Noise' is perfect for adding texture, while 'Dust & Scratches' can be used to clean up old photos.
Special Effects Filters
The following are some of the Special Effects Filters used in Photoshop.
1) Liquify: A powerful tool that allows for intricate distortions and reshaping of elements within an image. It's particularly popular for portrait retouching.
2) Vanishing point: Allows for the accurate cloning, painting, and transformation of objects in an image, in line with the image's perspective.
3) Lens correction: Corrects camera lens distortions, including barrel and pincushion distortion, vignetting, and chromatic aberration.
Smart Filters
When you change a Layer to a Smart Object (by right-clicking on it and then choosing 'Convert to Smart Object'), any Filter applied becomes a Smart Filter. This means it remains editable and non-destructive, allowing you to go back and adjust or remove it later.
Render Filters
The following are some of the Render Filters used in Photoshop.
1) Clouds: Produces a cloud-like pattern, often used for backgrounds.
2) Lens Flare: Adds a synthetic lens flare to your image, emulating the effect of shining a bright light into a camera lens.
3) Lighting effects: Allows you to create various lighting sources, manipulating their type, direction, and intensity.
Texture and grain
Filters like texture and grain can be used to add depth and texture to flat images, emulating surfaces like canvas or sandstone, or adding film grain.
Stylising Filters
These Filters give your image a particular style or look:
1) Oil Paint: Turns your image into an oil painting.
2) Solarise: Creates a surreal look by inverting some of the colours in your image.
3) Wind: Emulates the effect of a wind-blown streak.
Third-party Filters and plugins
Beyond the built-in Photoshop Filters, numerous third-party companies offer plugins and Filters. These can provide additional functionality or more specialised effects.
Combining Filters
Often, the real power comes from combining multiple Filters. For instance, applying a texture Filter followed by a blur can create a dreamy background. Remember always to use Layers and smart Filters to keep your work non-destructive.
Saving and exporting your work
In Adobe Photoshop, it's vital to correctly save and export your work to preserve quality and ensure compatibility. 'Save As' lets you retain your project with Layers in the PSD format, perfect for future edits. However, for sharing or publishing, 'Export' offers formats like JPEG, PNG, and GIF, optimised for various platforms.
Consider factors such as file size, quality, and transparency needs when choosing. Additionally, 'Save for Web' provides an older but still useful option for web-specific exports. Regularly saving your work and understanding these formats guarantees your creations are safely stored and readily shareable.
Conclusion
To sum it up, while Adobe Photoshop might appear overwhelming, taking it one step at a time and utilising resources can lead to swift and significant progress. Whether you're looking to retouch photographs or create stunning digital artwork, Photoshop offers the tools and flexibility to bring your vision to life. Hope we could provide you with all the information you needed to know about How to Use Adobe Photoshop!
Ready to tell your story through video? Join our Adobe Premiere Pro Course and learn how to create stunning edits like a pro!
Frequently Asked Questions
Upcoming Office Applications Resources Batches & Dates
Date
 Photoshop Course
Photoshop Course
Fri 17th Jan 2025
Photoshop Course
Fri 7th Mar 2025
Photoshop Course
Fri 23rd May 2025
Photoshop Course
Fri 18th Jul 2025
Photoshop Course
Fri 12th Sep 2025
Photoshop Course
Fri 14th Nov 2025
Photoshop Course
Fri 12th Dec 2025
 If you wish to make any changes to your course, please


