We may not have the course you’re looking for. If you enquire or give us a call on +1 7204454674 and speak to our training experts, we may still be able to help with your training requirements.
We ensure quality, budget-alignment, and timely delivery by our expert instructors.

Setting up a Microsoft Exchange Server is an essential process for organisations aiming for seamless communication and collaboration. Microsoft Exchange Server is a robust platform that integrates emails, calendars, and contacts, providing a unified system.
Moreover, the program allows the composition, modification and transmission of messages among individuals on the server without an internet connection. Read this step-by-step guide on How to Set up Microsoft Exchange Server. Know more about a local server that helps to compose and doesn't require an internet connection.
Table of Contents
1) A quick look at Microsoft Exchange Server
2) Steps to How to Set up Microsoft Exchange Server manually
3) Steps to choose your settings
4) Conclusion
A quick look at Microsoft Exchange Server
Microsoft Exchange Server is a collaboration and messaging server developed by Microsoft. It's a central hub that facilitates email communication within an organisation, but it doesn't stop there. The server also manages calendars, contacts, and tasks, providing a unified communication system.
Additionally, it integrates with Microsoft Outlook and can be accessed through various devices, promoting flexibility and efficiency. Many large enterprises rely on Microsoft Exchange Server for its robust features and security measures, including data loss prevention and anti-spam filters.
More importantly, this server not only enhances internal communication but also provides administrators with tools to manage and monitor the entire system, thus offering a comprehensive solution for modern business communication needs.

Looking at the steps on How to Set Up Microsoft Exchange Server
Here are the various steps that you can follow to set up Microsoft Exchange Server on your system:

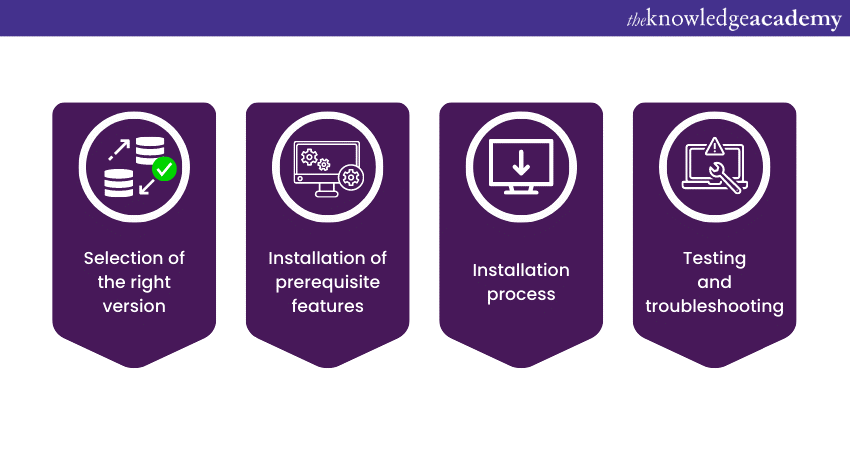
Step 1 – Selection of the right version
Before you start the installation process, you must select the right version of Microsoft Exchange Server that aligns with your organisation's needs and budget. Think about the size of your organisation, the features you require, and the scalability needed in the future. Each version might differ in functionalities and pricing, so a careful analysis of your needs is essential.
Step 2 – Installation of prerequisite features
Think of this step as laying the groundwork. Before installing the Exchange Server, certain prerequisites need to be met.
a) Windows features: Install the necessary Windows features and roles. These may include the .NET Framework, Windows Server roles, and other essential components.
b) Other necessary components: This includes other required software like Unified Communications Managed API (UCMA), and adjustments to the configuration settings. Ensure you're following the specific guidelines for your chosen version of Exchange Server, as they might vary.
Deploy Microsoft Exchange Server in Linux – Explore Compatibility and Installation!
Step 3 – Installation process
Now you're ready to install Microsoft Exchange Server.
a) Download and extract: Start by downloading the version you've chosen and extract the files to a directory.
b) Configuration: Launch the setup and proceed through the installation wizard. Here you'll define your organisation's name, choose the server roles you want to install, and set up other configurations like virtual directories and databases. It's like setting up the rooms in a house, each with a specific purpose.
c) Installation: Once configured, the installation process will begin. It may take some time, so patience is key.
d) Final checks: Before concluding, ensure that everything is installed correctly. Check the services and Exchange admin centre to confirm everything is running as it should.
Step 4 – Testing and troubleshooting
The final step is testing and troubleshooting to make sure everything is functioning as intended.
a) Testing: Utilise built-in tools to test the mail flow, connectivity, and other essential functions. Think of this as a trial run, ensuring that every part of the system is in harmony.
b) Troubleshooting: If you encounter any issues during the testing phase, it's time to troubleshoot. Refer to logs, error messages, and online forums or support if needed. Remember, a snag here and there isn't uncommon; it's part of the process.
Install, configure and manage recipients and operations by signing up for the Administering Microsoft Exchange Server 2016/2019 M20345-1 course now!
Steps to choose your settings
Choosing the right settings on Microsoft Exchange Server is crucial for personalising the experience to match individual or organisational preferences. Here are the various steps you can follow to set your account on the software tool below:
a) Accessing the Exchange Admin Center (EAC): The Exchange Admin Center is your gateway to customising settings. Users with administrative privileges can log into the EAC by entering their credentials and navigating to the 'Settings' or 'Options' section.
b) User mailbox settings: These settings comprise of general settings, email connectivity and automated replies. Users can basically alter their personal and professional details, control how the connectivity between the email clients and the server and set up POP3 or IMAP protocols.
c) General settings: This includes basic information like display name, email address, and contact information. Users can modify these to reflect their personal or professional details.
d) Email connectivity: Users can control how email clients connect to the server. This may involve setting up protocols like POP3 or IMAP, ensuring the preferred method of email retrieval.
e) Automated replies: For those going on holiday or away from the office, automated replies can be set up, delivering a message to anyone who emails during that period.
f) Permissions and roles: Administrators can assign roles and permissions, defining what users can and cannot do within the server. Whether it's a basic user who only needs email access or a team lead with managerial roles, these can be customised.
g) Security settings: Security preferences can be tailored to fit the organisation's requirements. This includes setting up firewalls, spam filters, and encryption methods, providing robust protection.
h) Mobile device policies: Administrators can set policies regarding mobile access, including security measures and synchronisation settings, owing to the rise in mobile usage.
i) Customising appearance and functionality: Depending on the version of Exchange Server, users might have control over the appearance and functionality of their email client. This could involve changing themes, layout, or adding specific add-ins that enhance productivity.
j) Group and distribution lists: Users can manage and create distribution lists or groups. This is particularly helpful for sending mass emails to specific departments or teams within the organisation.
Boost Your Career with Microsoft Exchange Server Interview Questions – Get Started Now!
Conclusion
You have now understood How to Set up Microsoft Exchange Server and how it is important for businesses seeking a robust communication platform. The process involves careful selection of the version, installation of prerequisites, system configuration, and personalisation of user settings, culminating in a tailored and efficient hub for organisational collaboration and connectivity.
Learn to monitor, maintain and troubleshoot your email server by signing up for the Microsoft Exchange Server Training now!
Frequently Asked Questions
Upcoming Microsoft Technical Resources Batches & Dates
Date
 Retired : Administering Microsoft Exchange Server 2016/2019 M20345-1
Mon 10th Mar 2025
Mon 19th May 2025
Mon 21st Jul 2025
Mon 15th Sep 2025
Mon 17th Nov 2025
Mon 15th Dec 2025


 Top Rated Course


 If you wish to make any changes to your course, please


